



Why build ConvertKit forms in ConvertFlow
ConvertKit is now called Kit. The integration is the same — this page uses the ConvertKit name because that's still how most people search for it.
ConvertKit's built-in forms do one job well: capture an email and add the subscriber to a sequence. That works until you want the form to ask something before the email, or send different answers down different sequences.
ConvertFlow forms create the same ConvertKit subscriber and trigger the same sequences, but add multi-step funnels, conditional paths, custom field values written on every answer, real-time email verification, and A/B testing with funnel-level reporting.
The subscribers still live in ConvertKit. ConvertFlow is the capture layer in front of it.
1. Connect ConvertKit to ConvertFlow
Head to your ConvertFlow website's Integrations area and click to connect with ConvertKit.
In ConvertKit, go to Account → Account Info to find your API Secret.
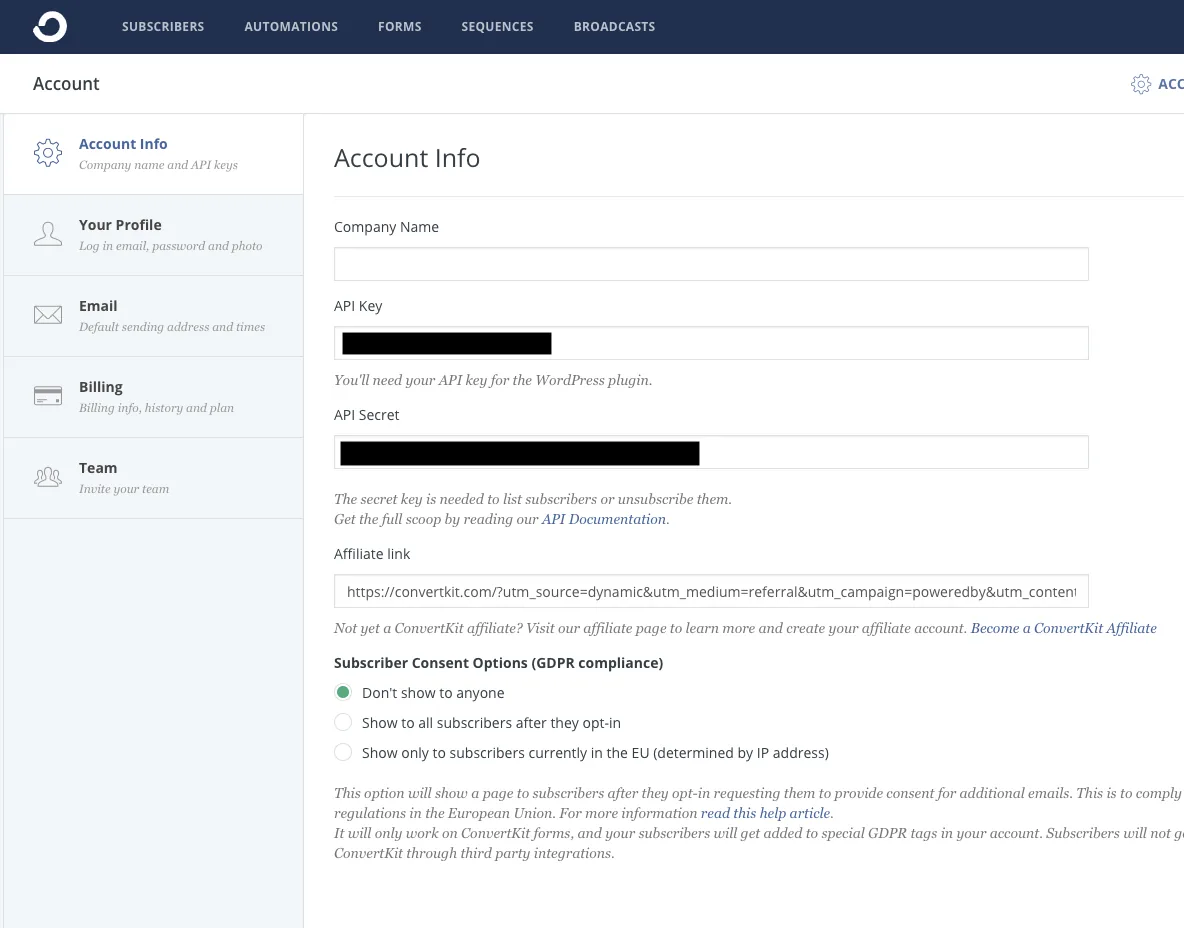
Read that again before you copy anything: it's the API Secret, not the API Key. ConvertKit issues both and displays them on the same screen, one above the other. Pasting the Key is the most common reason this step fails, and the resulting error rarely points at the real cause.
Copy the API Secret and paste it into ConvertFlow's integration field.
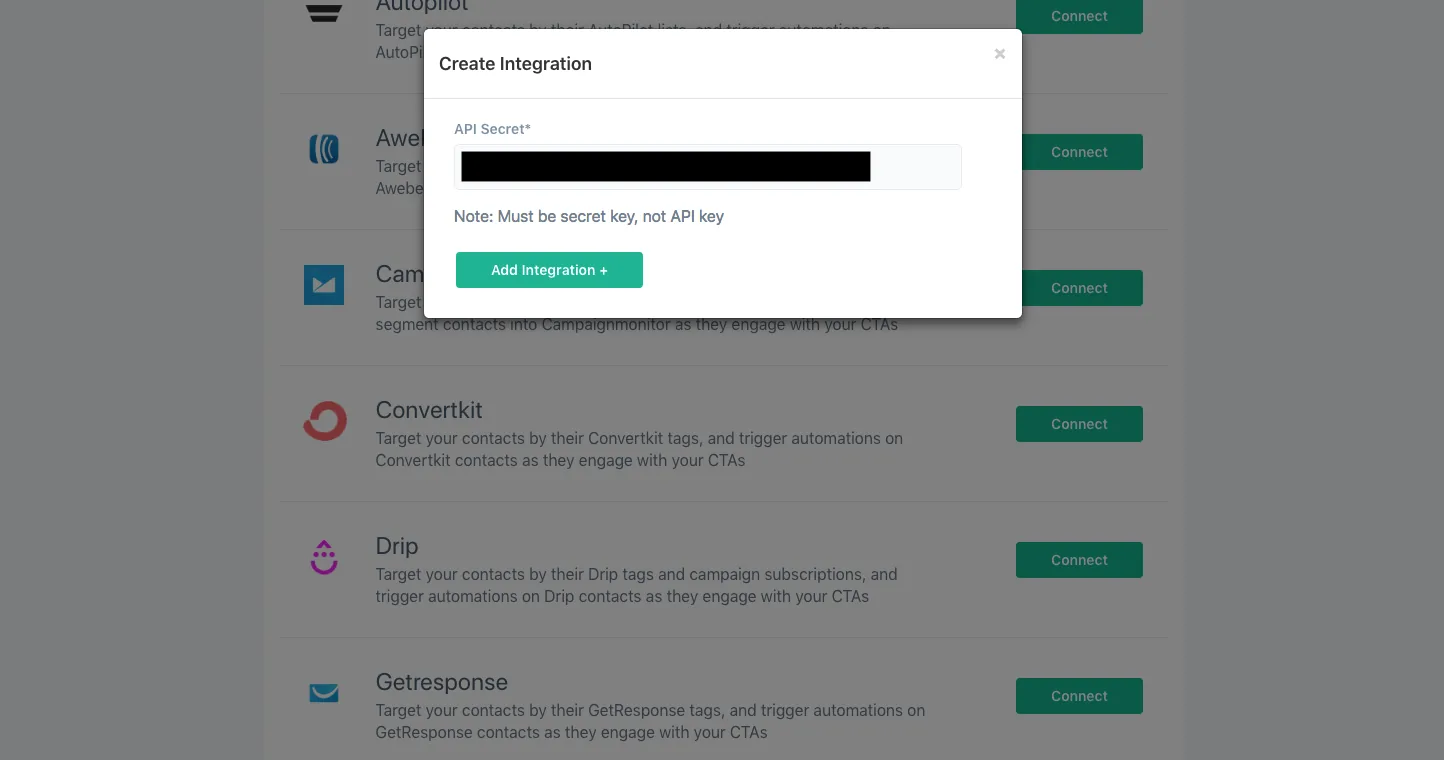
ConvertKit and ConvertFlow are now connected. ConvertFlow starts pulling in your sequences and tags, so you can trigger automations and segment subscribers as visitors submit your forms, landing pages and quizzes.
2. Add a form to your campaign
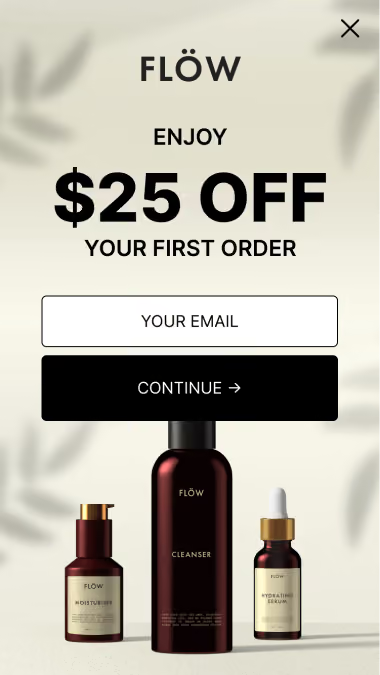
Add your ConvertKit form to a ConvertFlow landing page, popup or embed. Click to add an element and choose the "form" element type — start from a form template or build from scratch.
.avif)
3. Toggle the contact fields you want
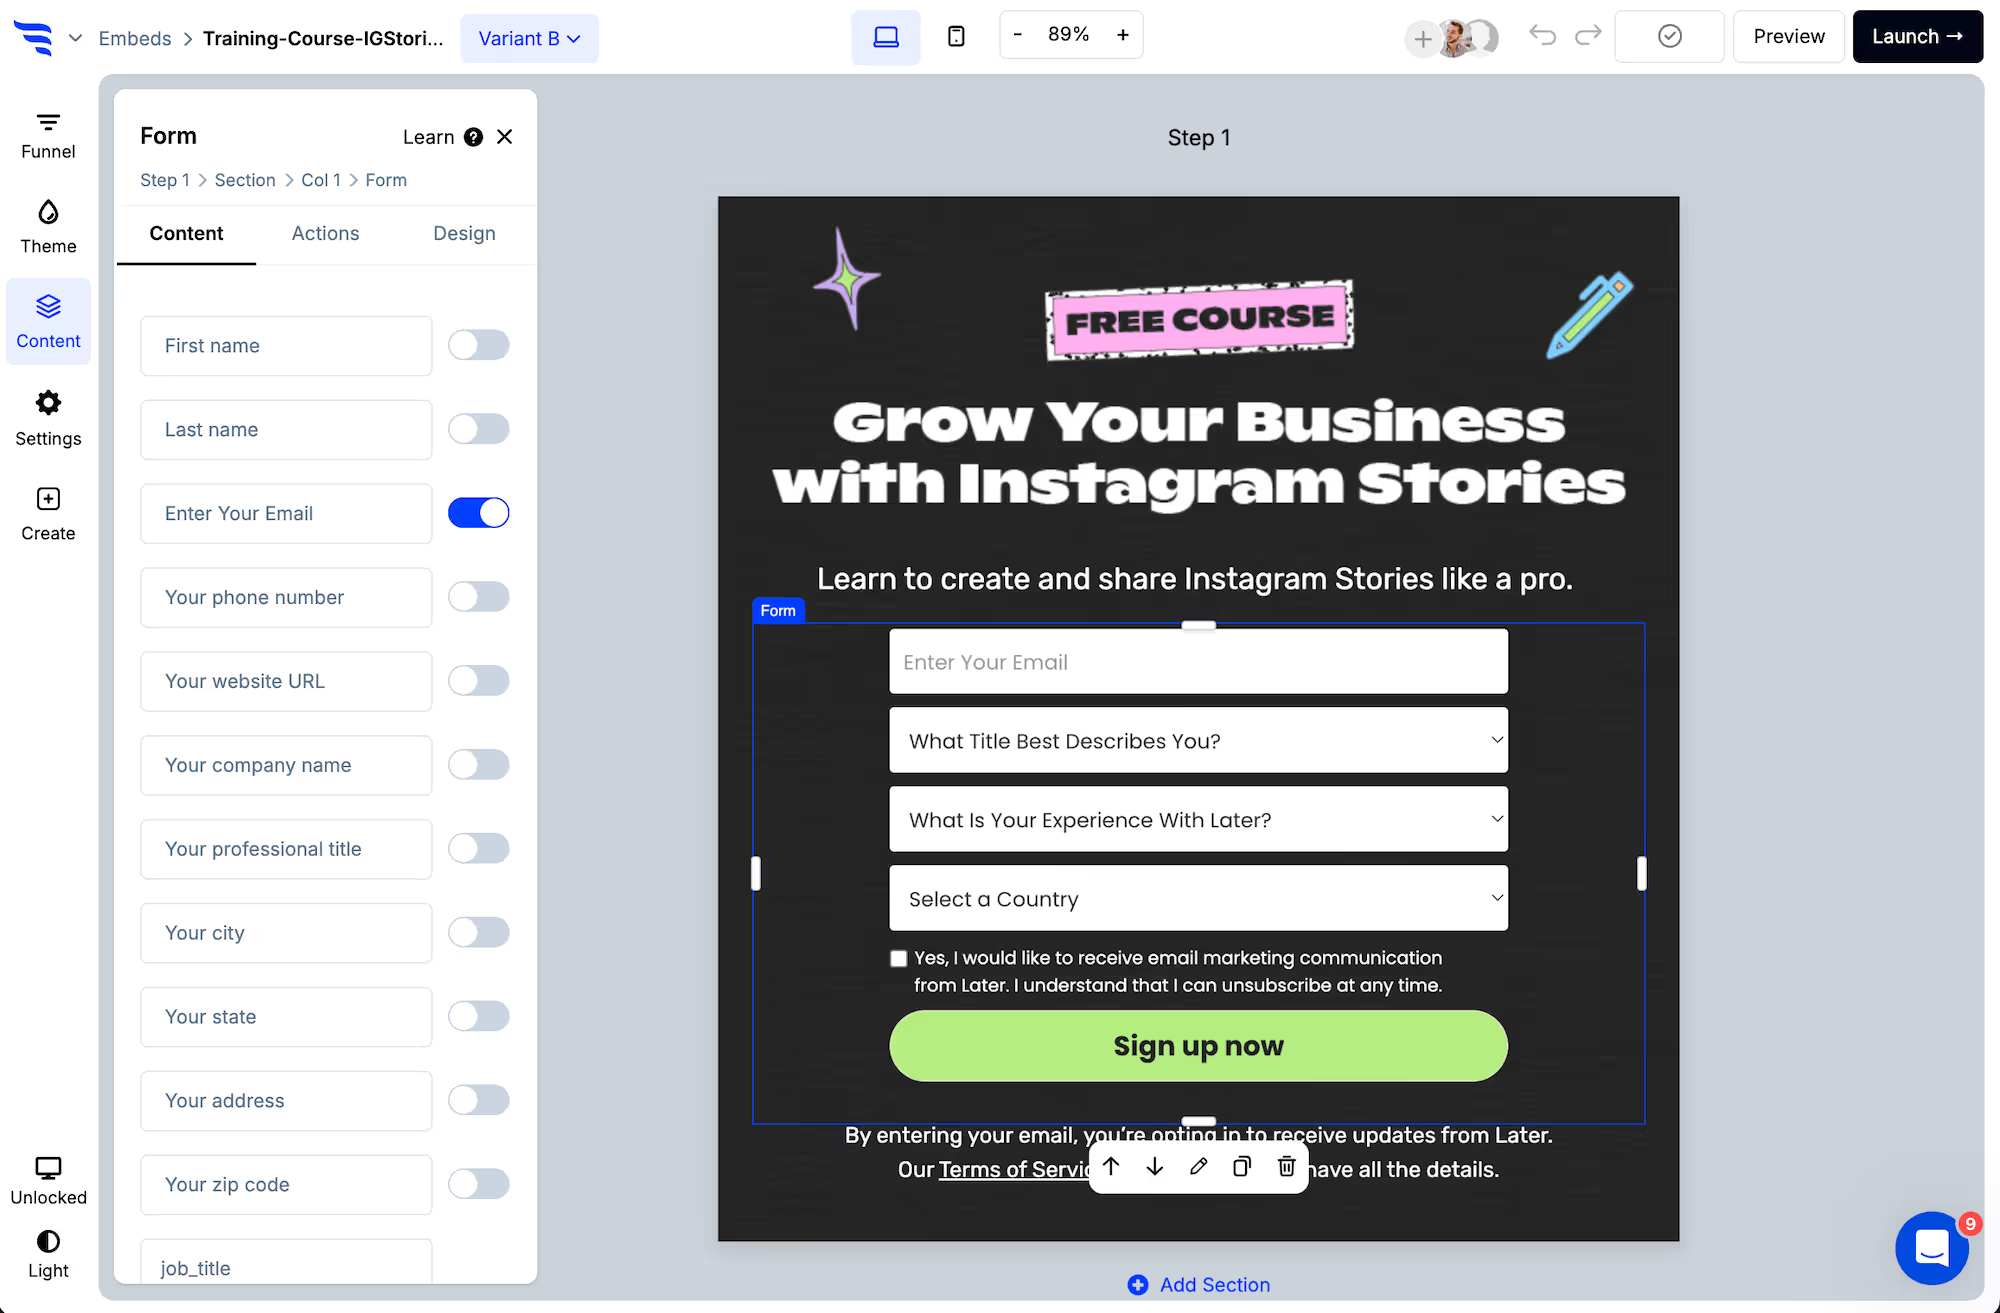
Select the form element and switch on the contact fields to request. Email address and first name map to ConvertKit automatically — which covers most creator signup forms without any further configuration.
.png)
Each field can be edited from the builder panel — placeholder text, label, required state and more.
.avif)
4. Verify emails before the sequence starts
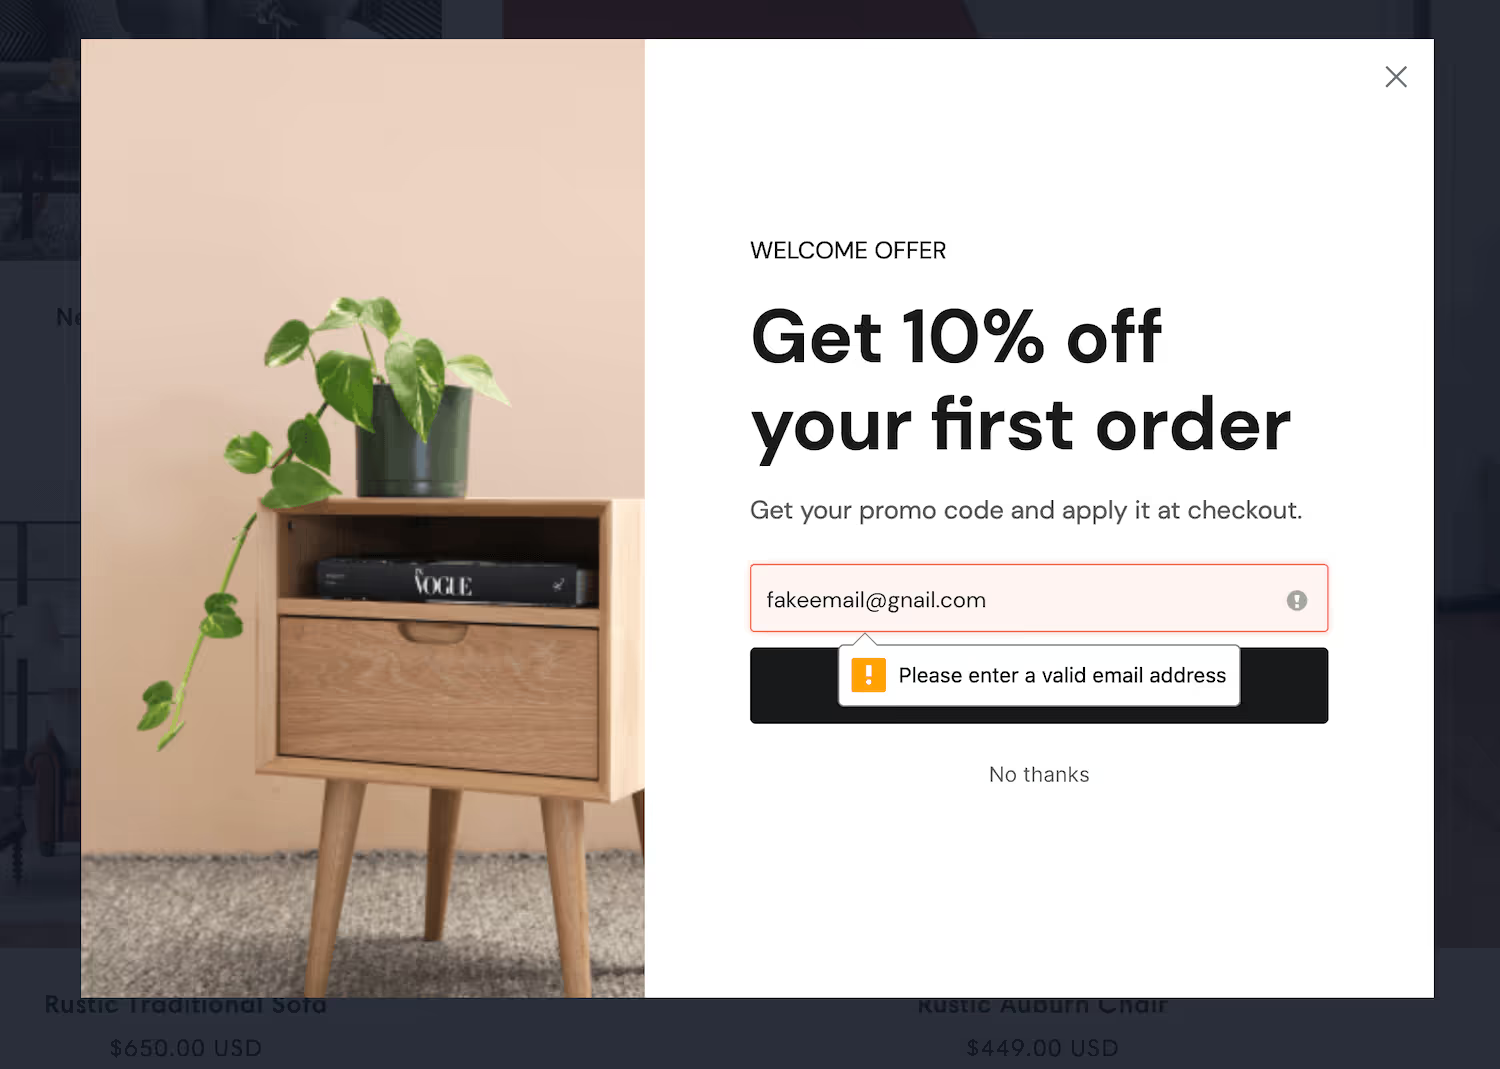
ConvertFlow can check that an entered address exists with its provider before the subscriber reaches ConvertKit. For a creator on a per-subscriber plan this is worth switching on: a fake address costs you a billable subscriber slot and runs a whole sequence against nobody.
5. Add consent checkboxes
Scroll below the preset contact fields to find compliance checkboxes:
- Privacy consent: link to your privacy policy and terms of service alongside a required checkbox.
- Marketing consent: if your form gates a lead magnet but also opts the subscriber into your regular newsletter, collect consent for it.
- SMS consent: require consent to SMS marketing with the required disclosures.
6. Add custom fields and map them to ConvertKit
By clicking to add a field at the end of the fields list, you can add as many custom fields as you'd like.
.avif)
When naming the field, select from "ConvertKit fields" — a dropdown of the subscriber custom fields that already exist in your account. ConvertFlow sends the value collected by this form into that field.
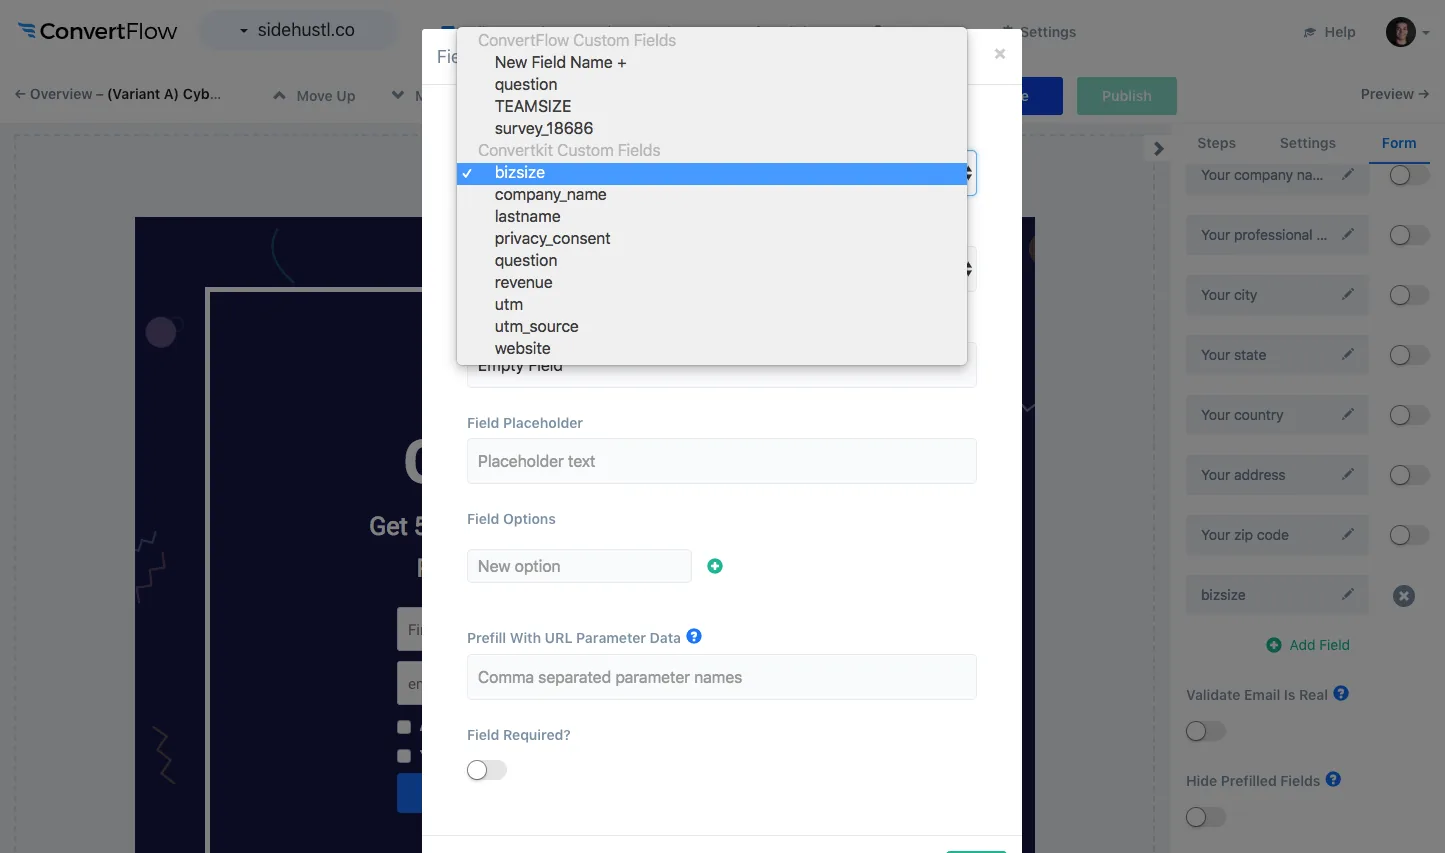
The field needs to exist in ConvertKit first. If you're building a form around a new attribute, create it there before you start and it'll be waiting in the dropdown.
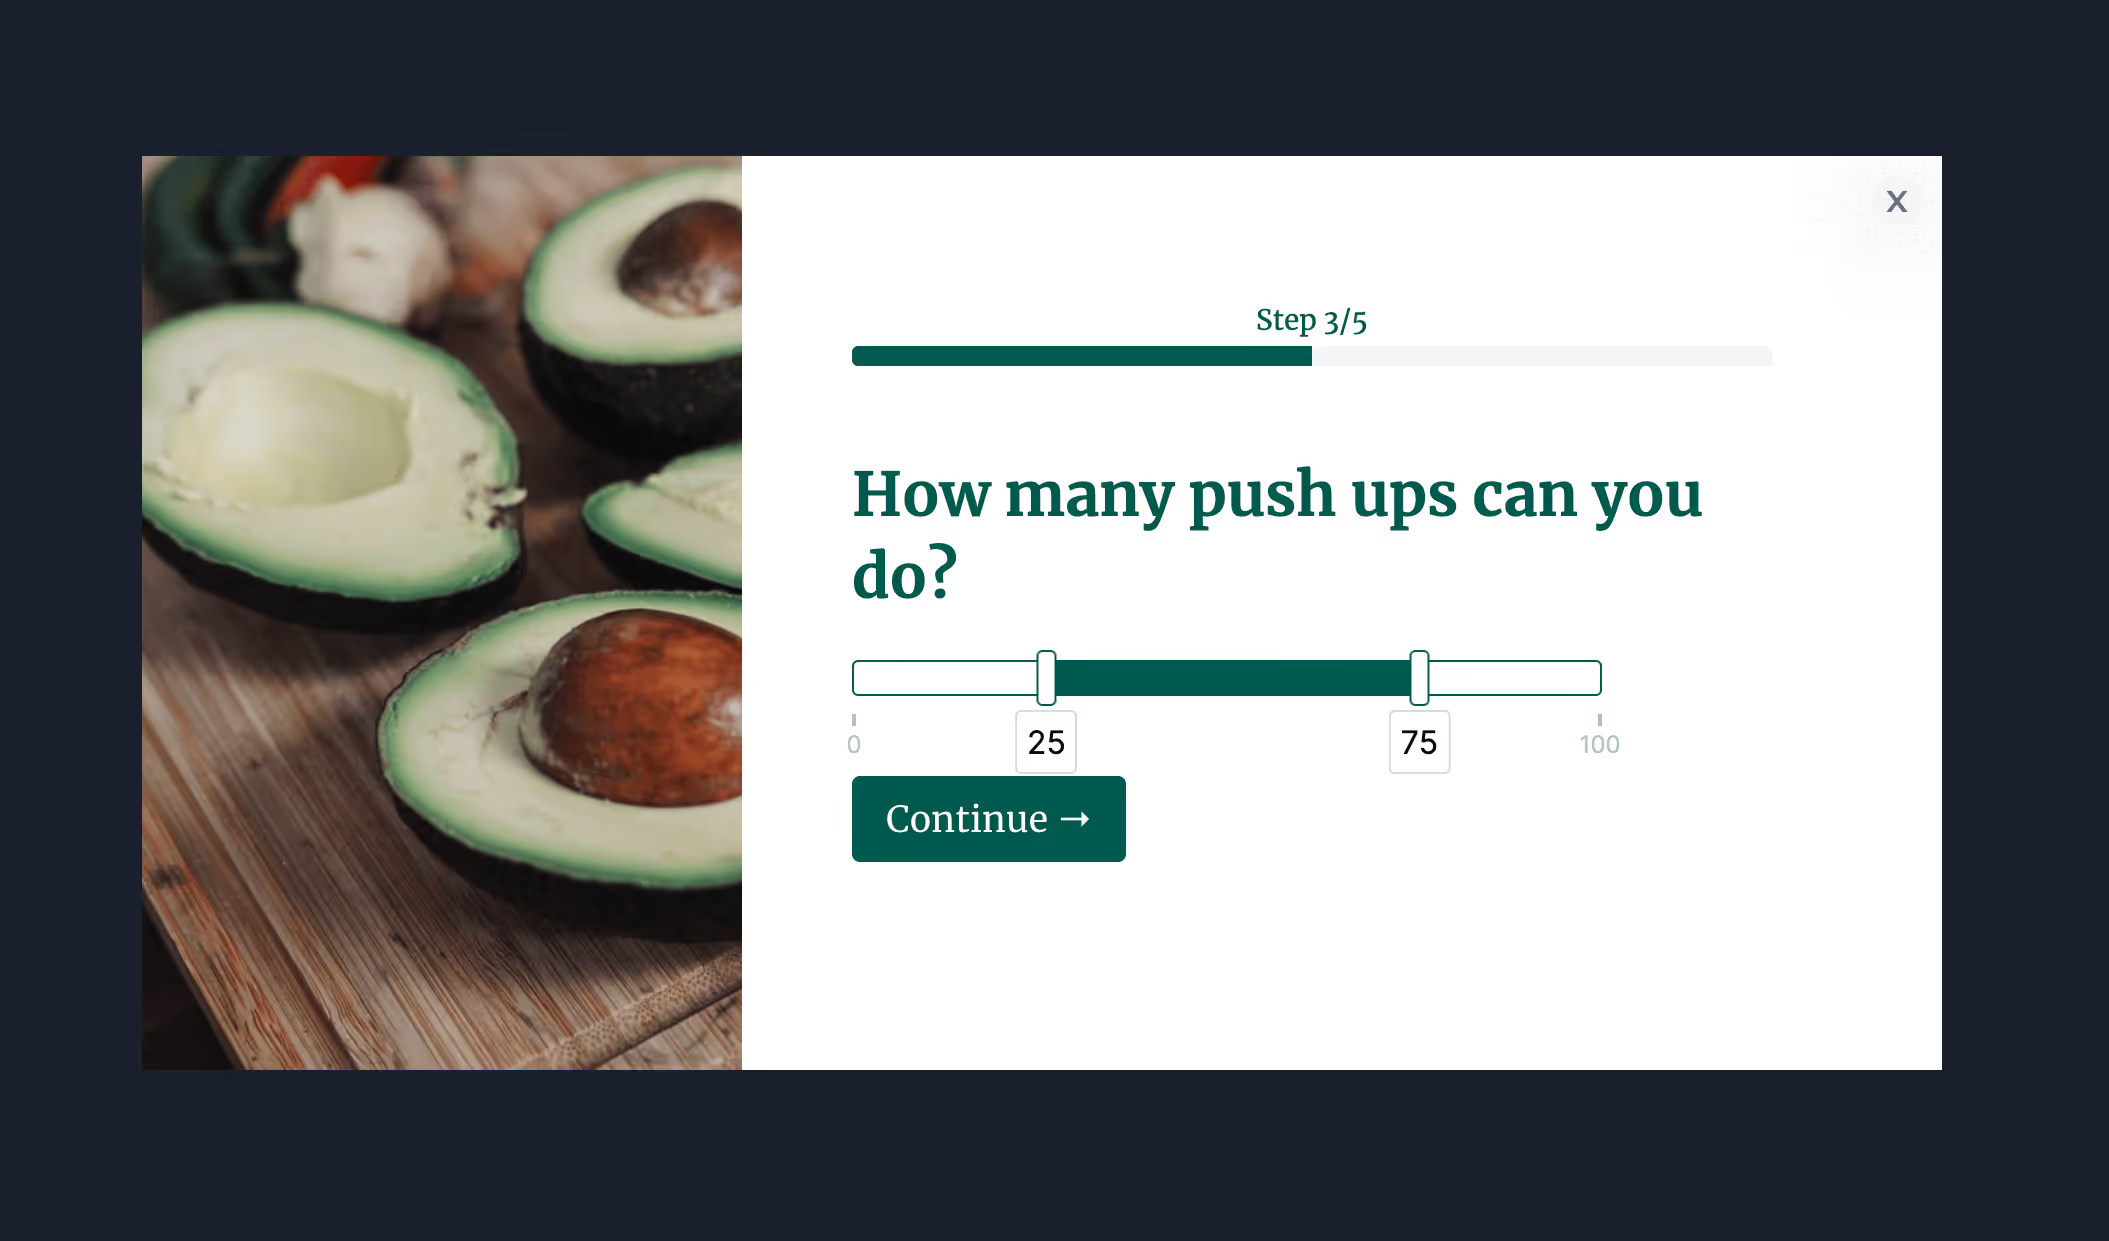
Choose the field type — text, dropdown, radio selection, paragraph or hidden. Dropdown and radio options can carry score values for funnel logic.
7. Map survey and quiz answers to ConvertKit
Survey and quiz elements have a "Map to custom field" dropdown, where you select from your ConvertKit custom fields. Each answer is written to the subscriber record — which is what makes answer-based segmentation possible.
8. Map ConvertFlow's preset fields to ConvertKit
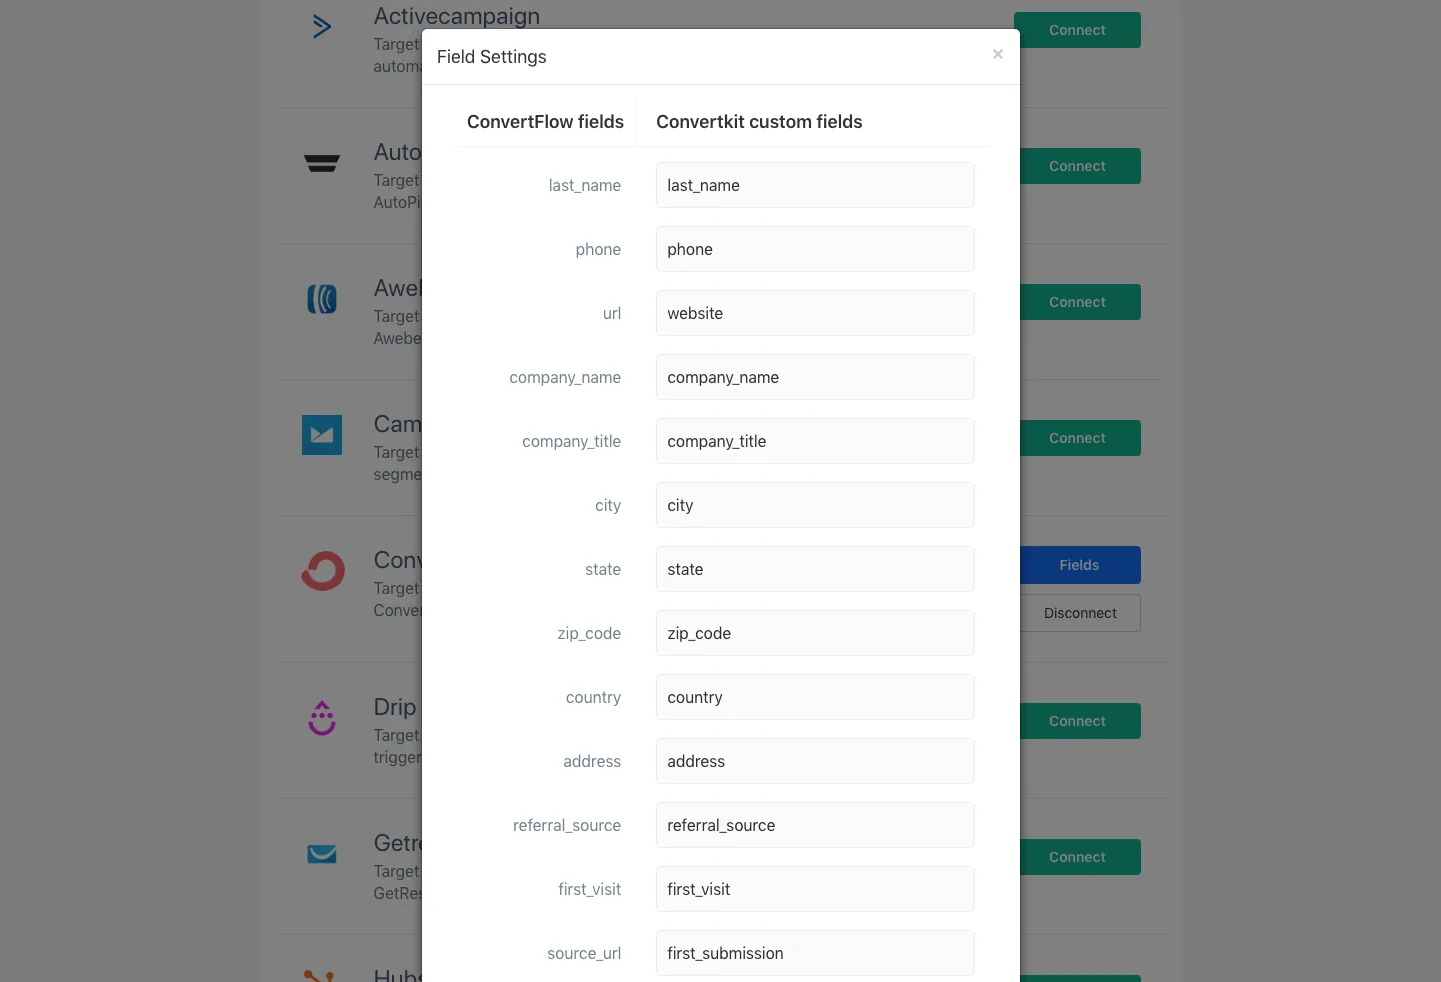
With ConvertKit connected, your Integrations page shows a Fields button. Use it to map ConvertFlow's preset contact fields to ConvertKit custom fields by entering the field's data name. Email address and first name are already mapped.
9. Style the form to match your brand
In the Design tab, set spacing, field layout, width, fonts, button colour and roundness, field colour and shadows — so the form looks like part of your site rather than an embedded ConvertKit form.
.avif)
10. Configure what happens on submit — tags and sequences
In the Actions tab, choose what follows submission — redirect to a URL, jump to another funnel step, display a thank-you message, or open a popup.
.avif)
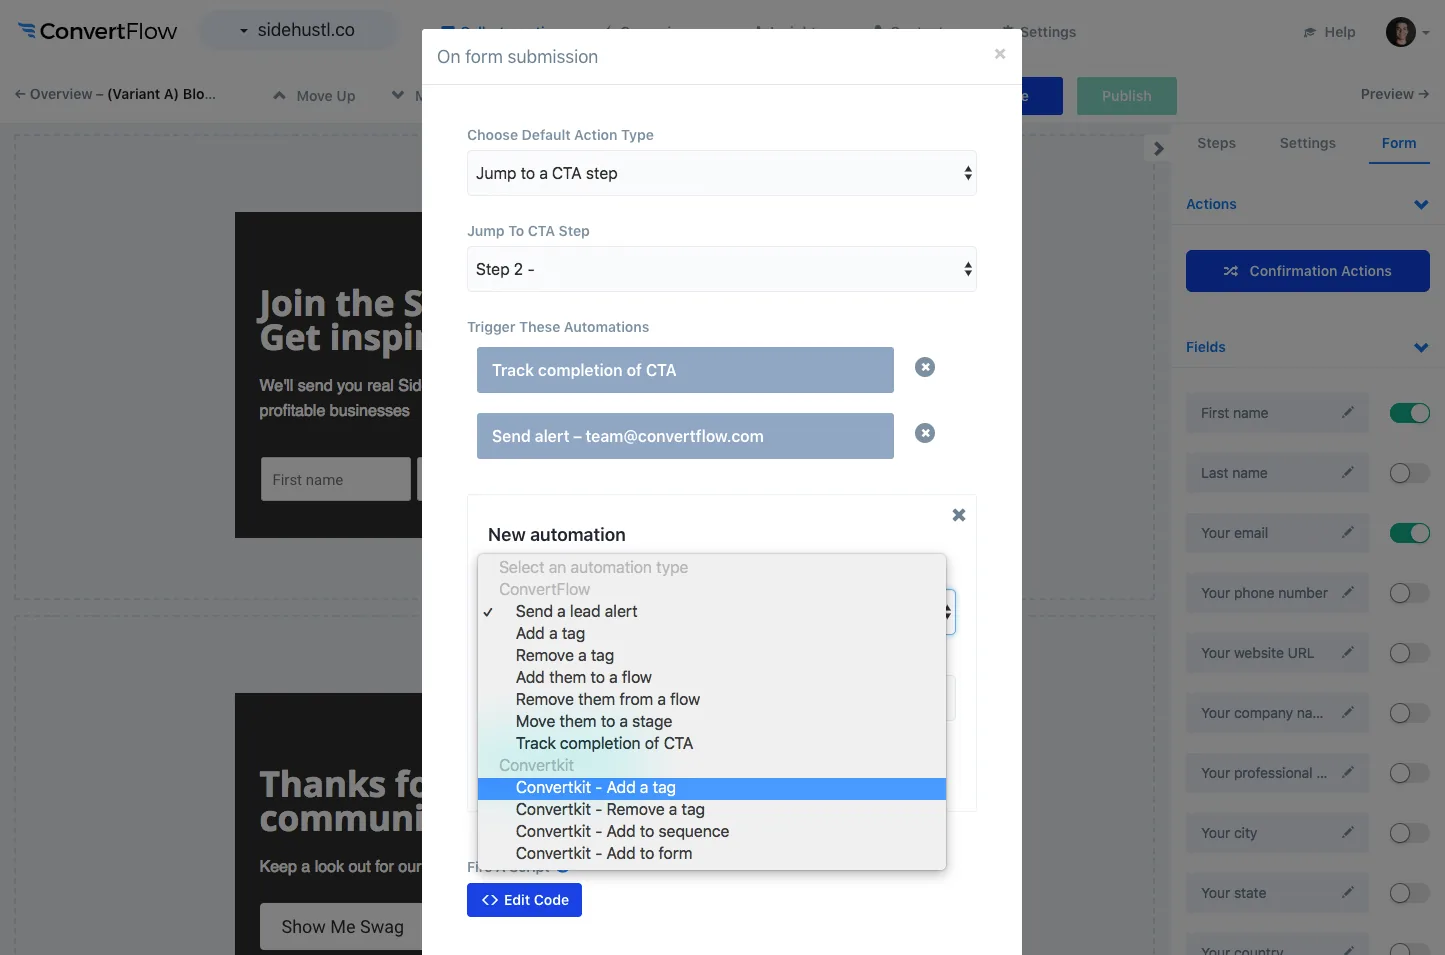
Alongside the default action, add automations that fire on submit — applying a ConvertKit tag, or adding the subscriber to a ConvertKit sequence. Both are in the dropdown because ConvertFlow pulled them in when you connected.
In ConvertKit the tag is usually what drives everything downstream, since visual automations are triggered by tags rather than by form. Tagging at the moment of capture means the right automation starts immediately, with the answer already on the record.
Conditional actions let you route by field value, so someone who says they're a beginner gets a different tag — and a different sequence — than someone who says they're advanced.
.avif)
11. Report on submissions
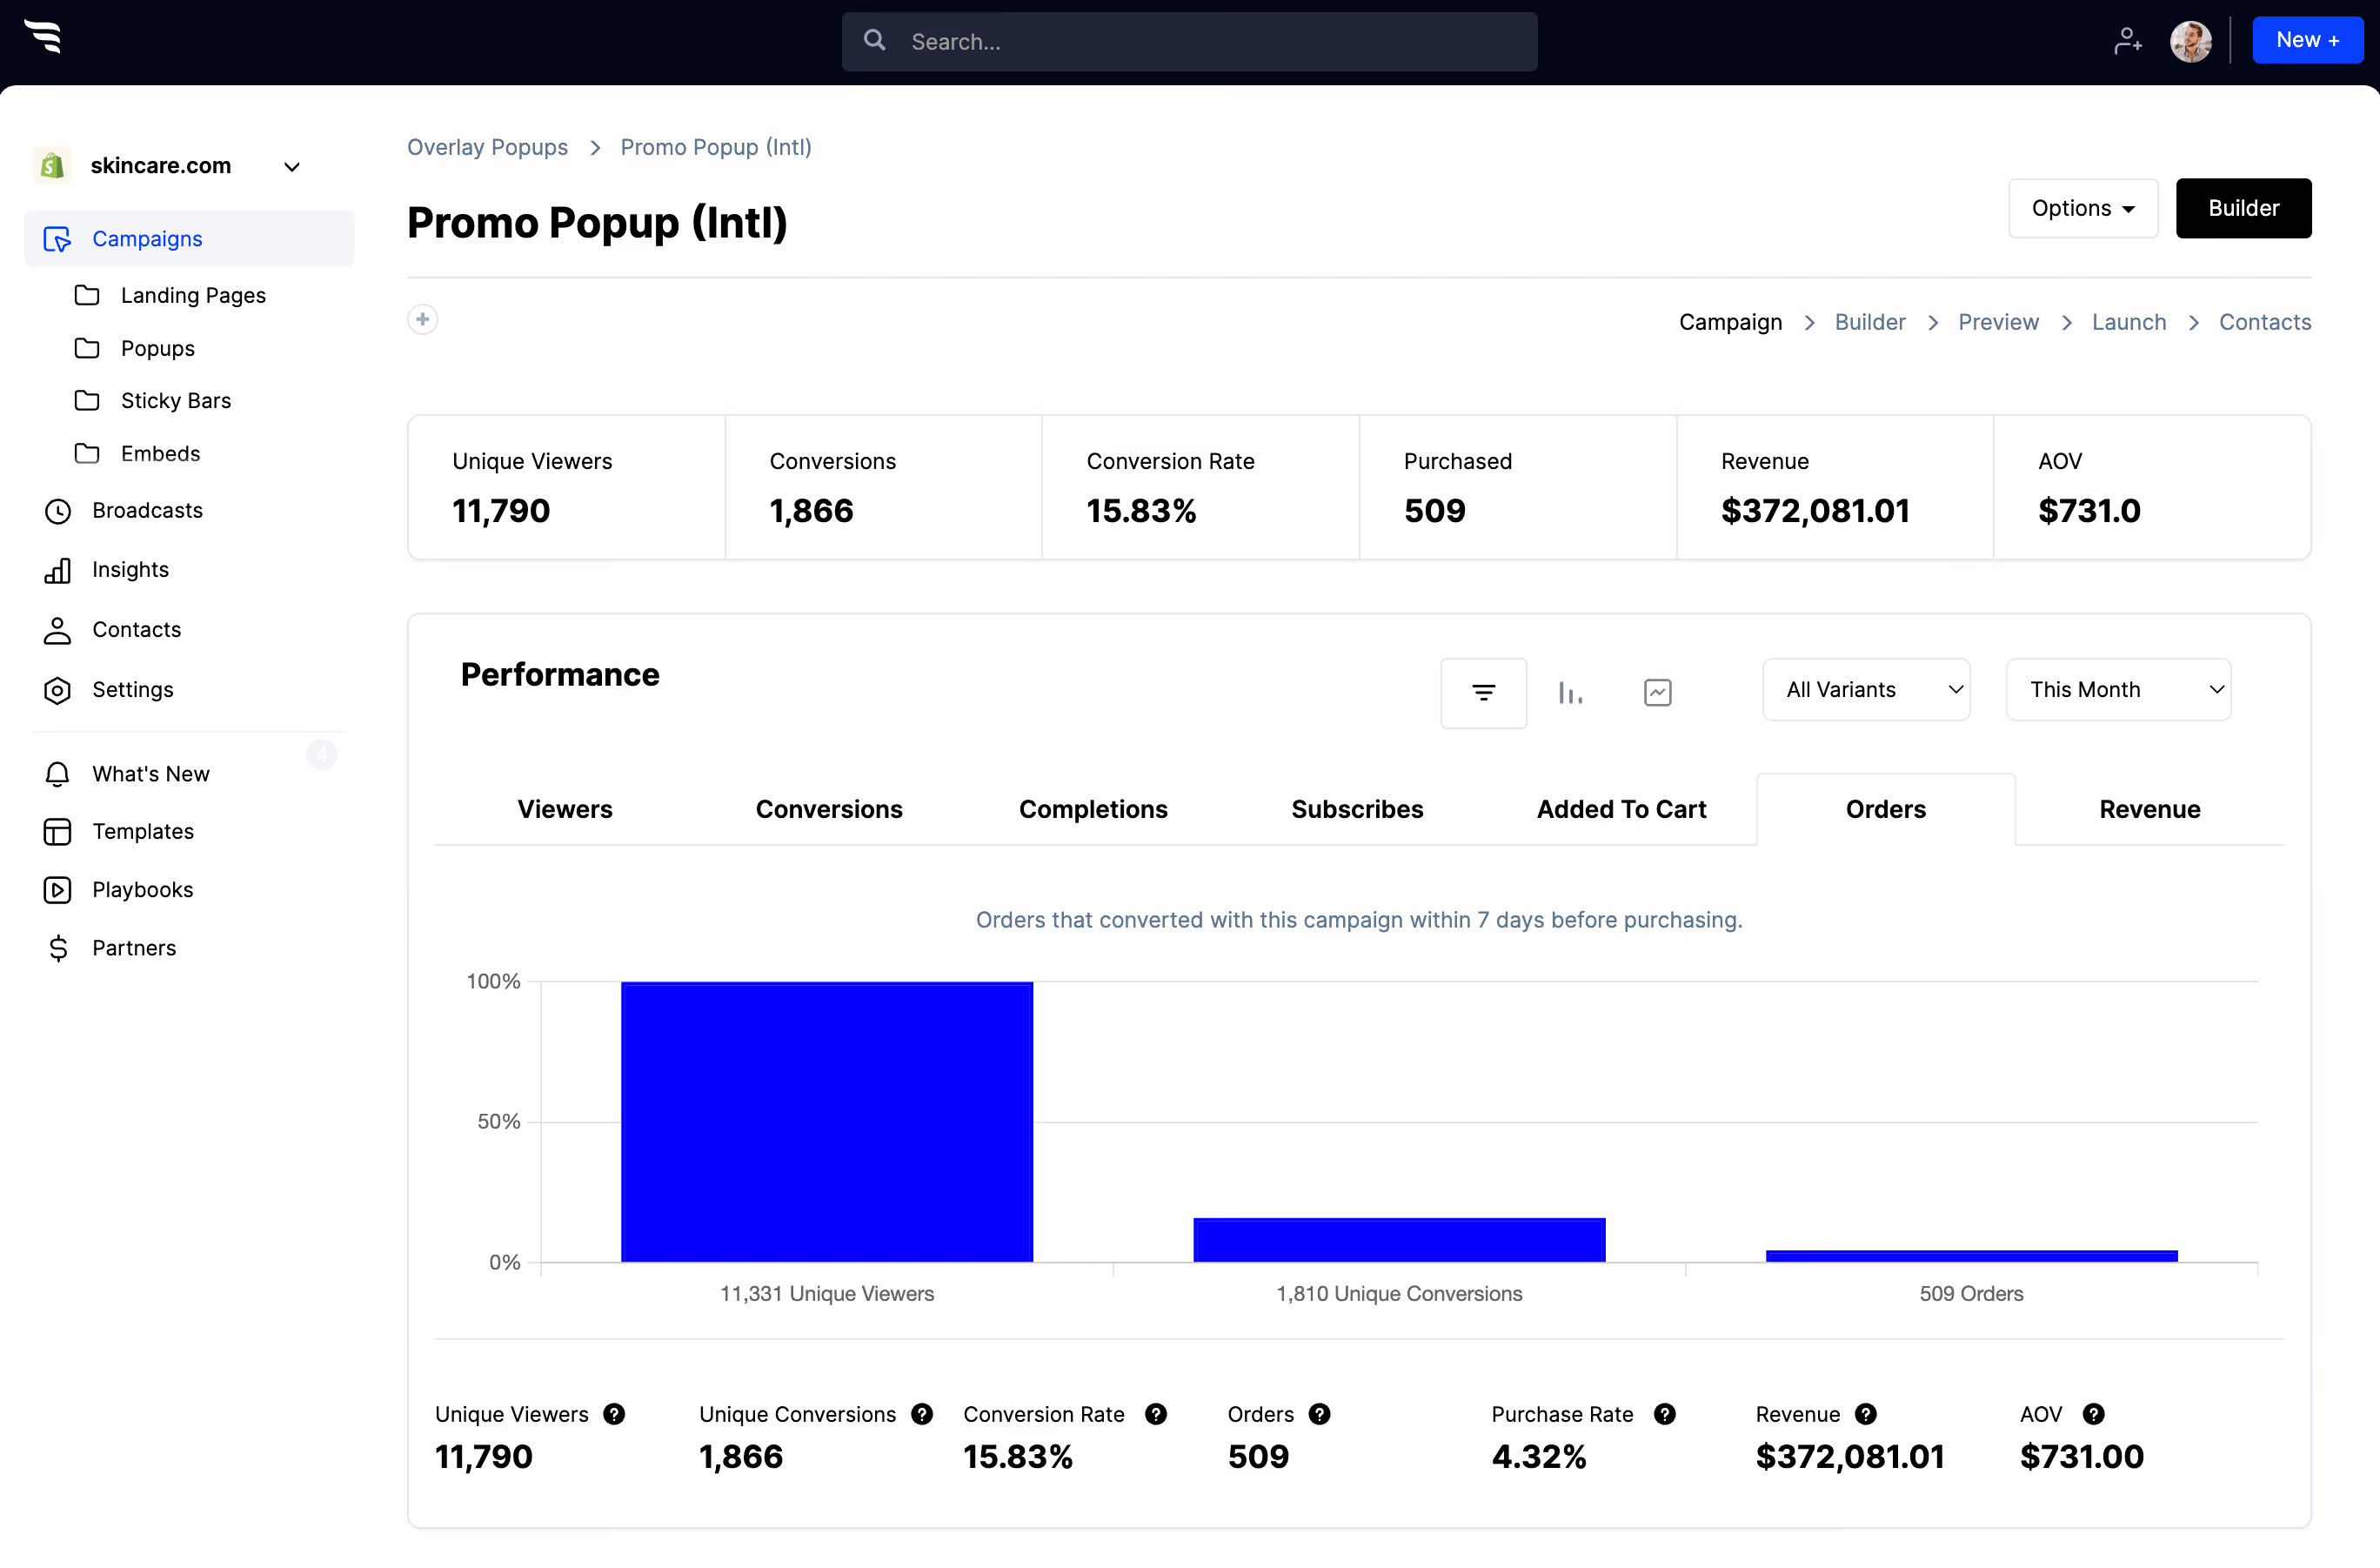
The funnel breakdown report shows how many people saw, converted and completed the form, where they dropped off, and which answers they selected — so you can see which question is costing you subscribers.
.avif)
12. Segment and personalize for ConvertKit subscribers
Once answers are landing on ConvertKit subscriber records, build segments from those field values and tags, and target your sequences and broadcasts against them.
ConvertFlow can also read your ConvertKit subscriber segments and personalize your site for them — so an existing subscriber sees your next offer rather than the same opt-in form.
13. Publish
- On WordPress: add ConvertFlow's snippet once, then target the form to specific posts, pages or categories.
- On Shopify: publish to a Shopify page in one click.
- Anywhere else: Webflow, Squarespace, Wix or any CMS take the same single embed snippet.



%20(1).avif)






.svg)
