How to build the best ConvertKit surveys.
By adding a ConvertKit survey to your ConvertFlow landing page, popup, or embed, you can ask your visitors a question and present them with fixed answers for them to select.
To add a survey to your campaign, click to add an element and choose the "survey" element type.
ConvertKit survey options
Once you've selected a survey element, you'll be able to manage its survey options in the builder panel.
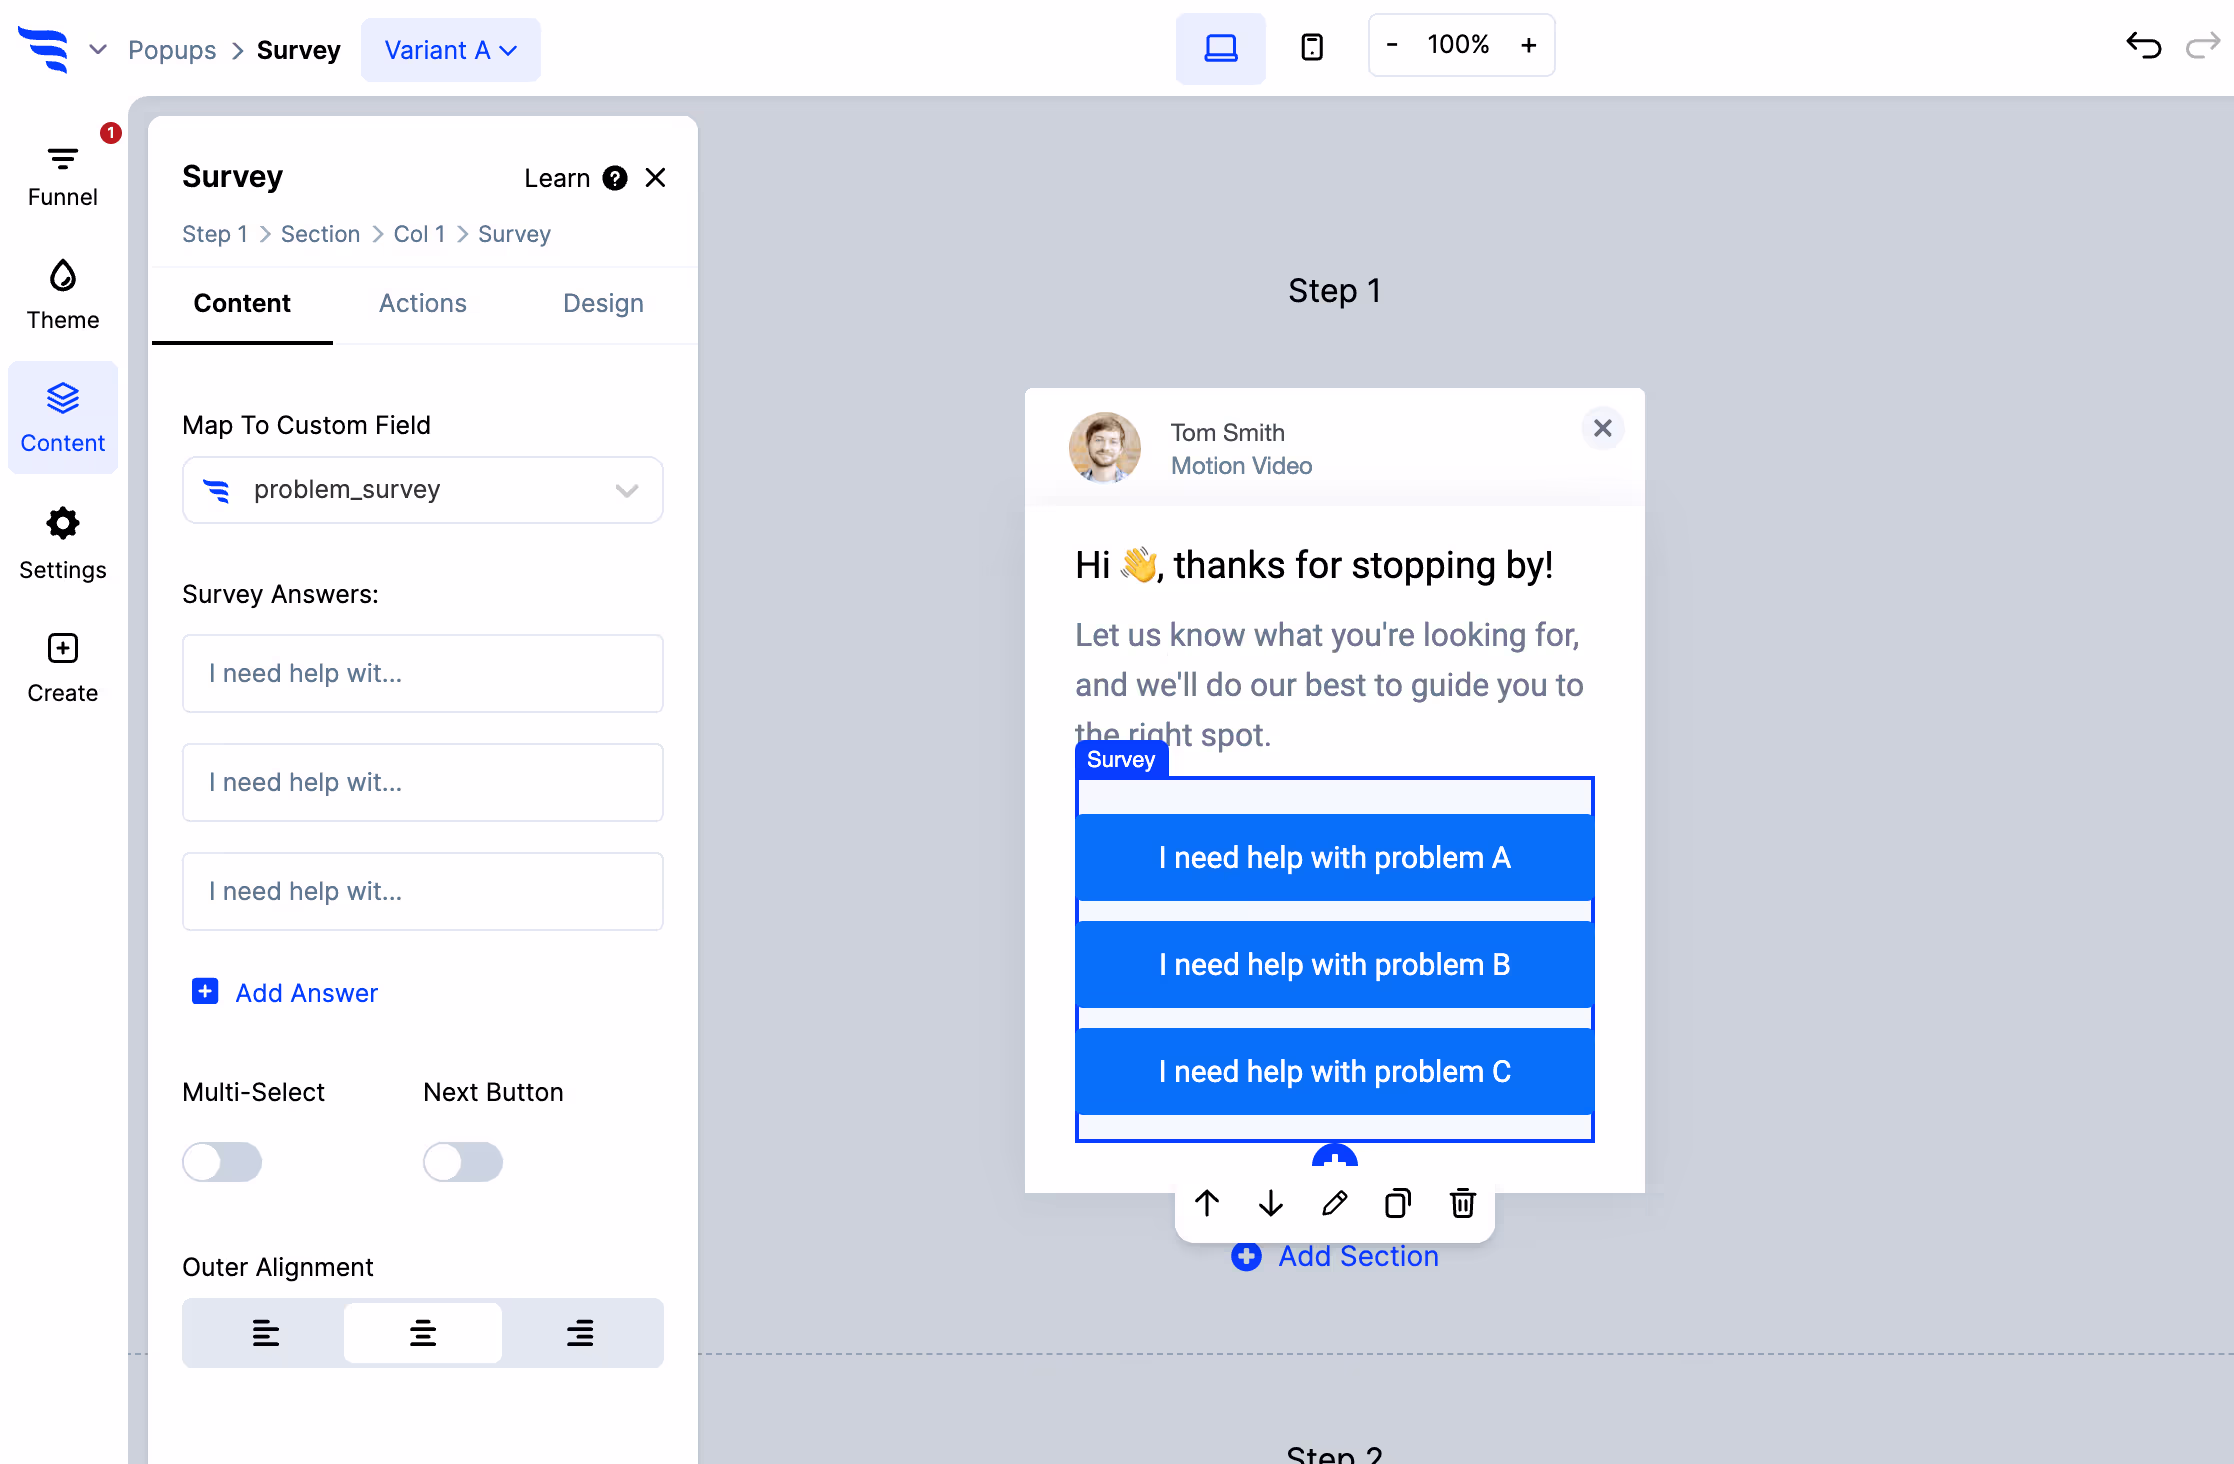
Here you can add ConvertKit survey options, arrange their position, edit their text and you can also map your ConvertKit survey to a custom field in your email provider / CRM.
If you want your visitors to be able to select multiple options, toggle the "multi-select" option. Multiple selected ConvertKit survey option values will be mapped to your custom field separated by commas.
Each survey option can also have images if you want your ConvertKit survey to have clickable images for your visitors to select from.
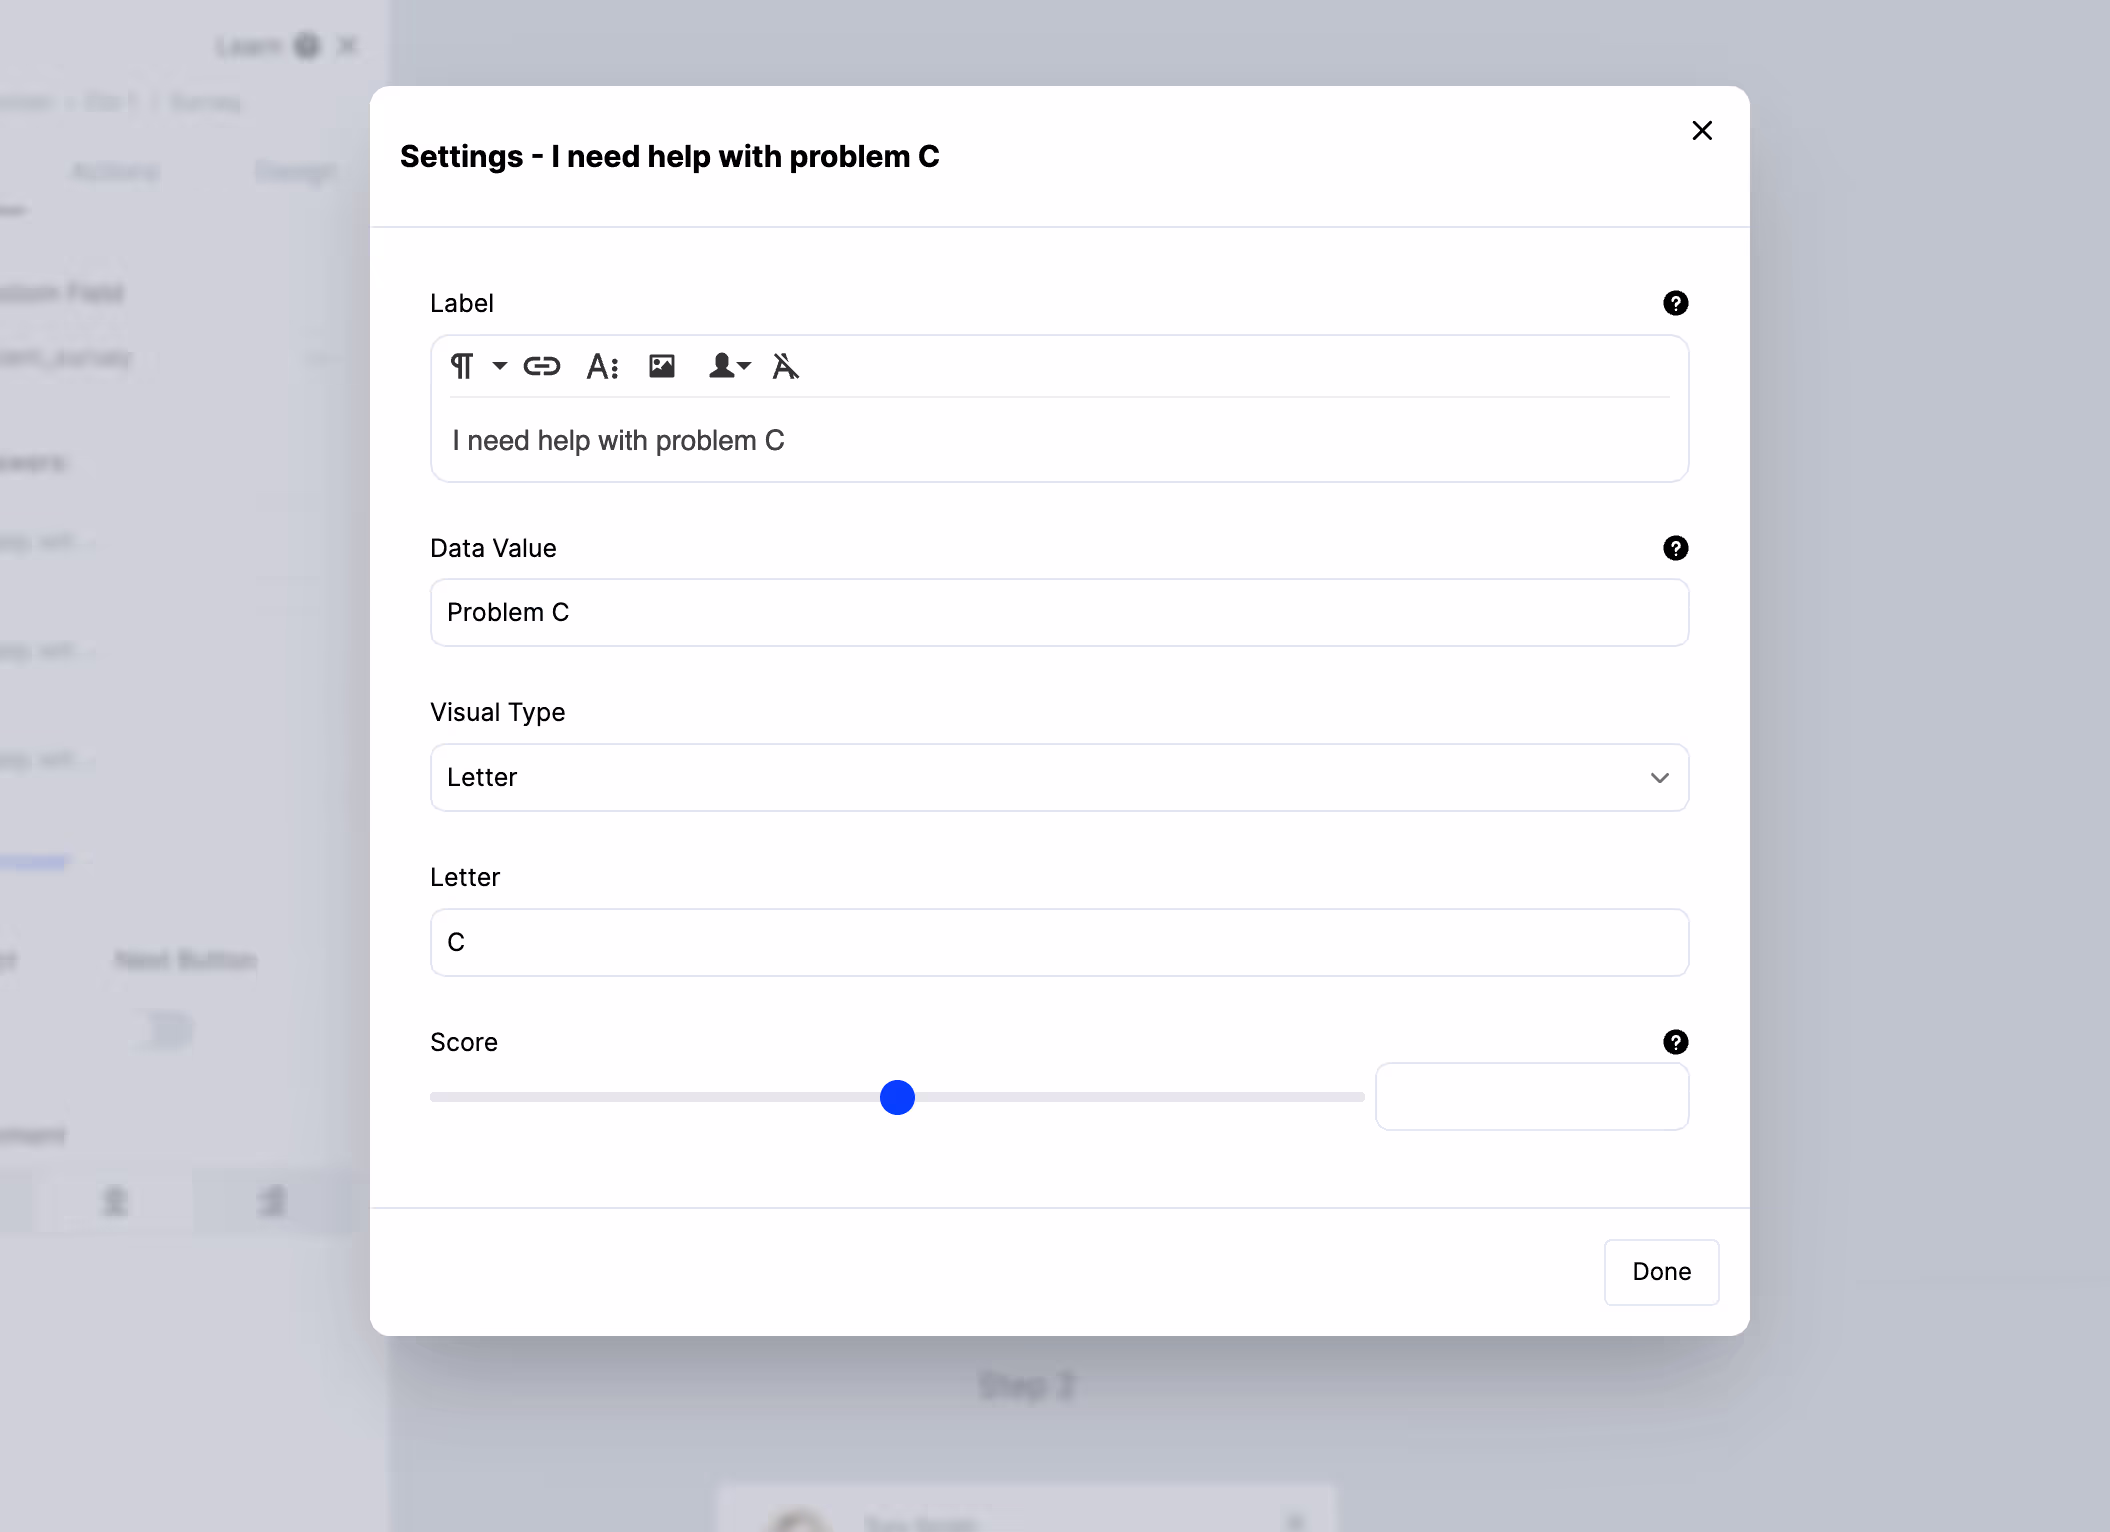
To control additional settings for your survey options, such as:
- Separating the data value from the displayed label
- The image used in the survey option
- The score increase/decrease applied by the survey option
Then, click on the survey option to open up a settings modal where you can control each of these options.
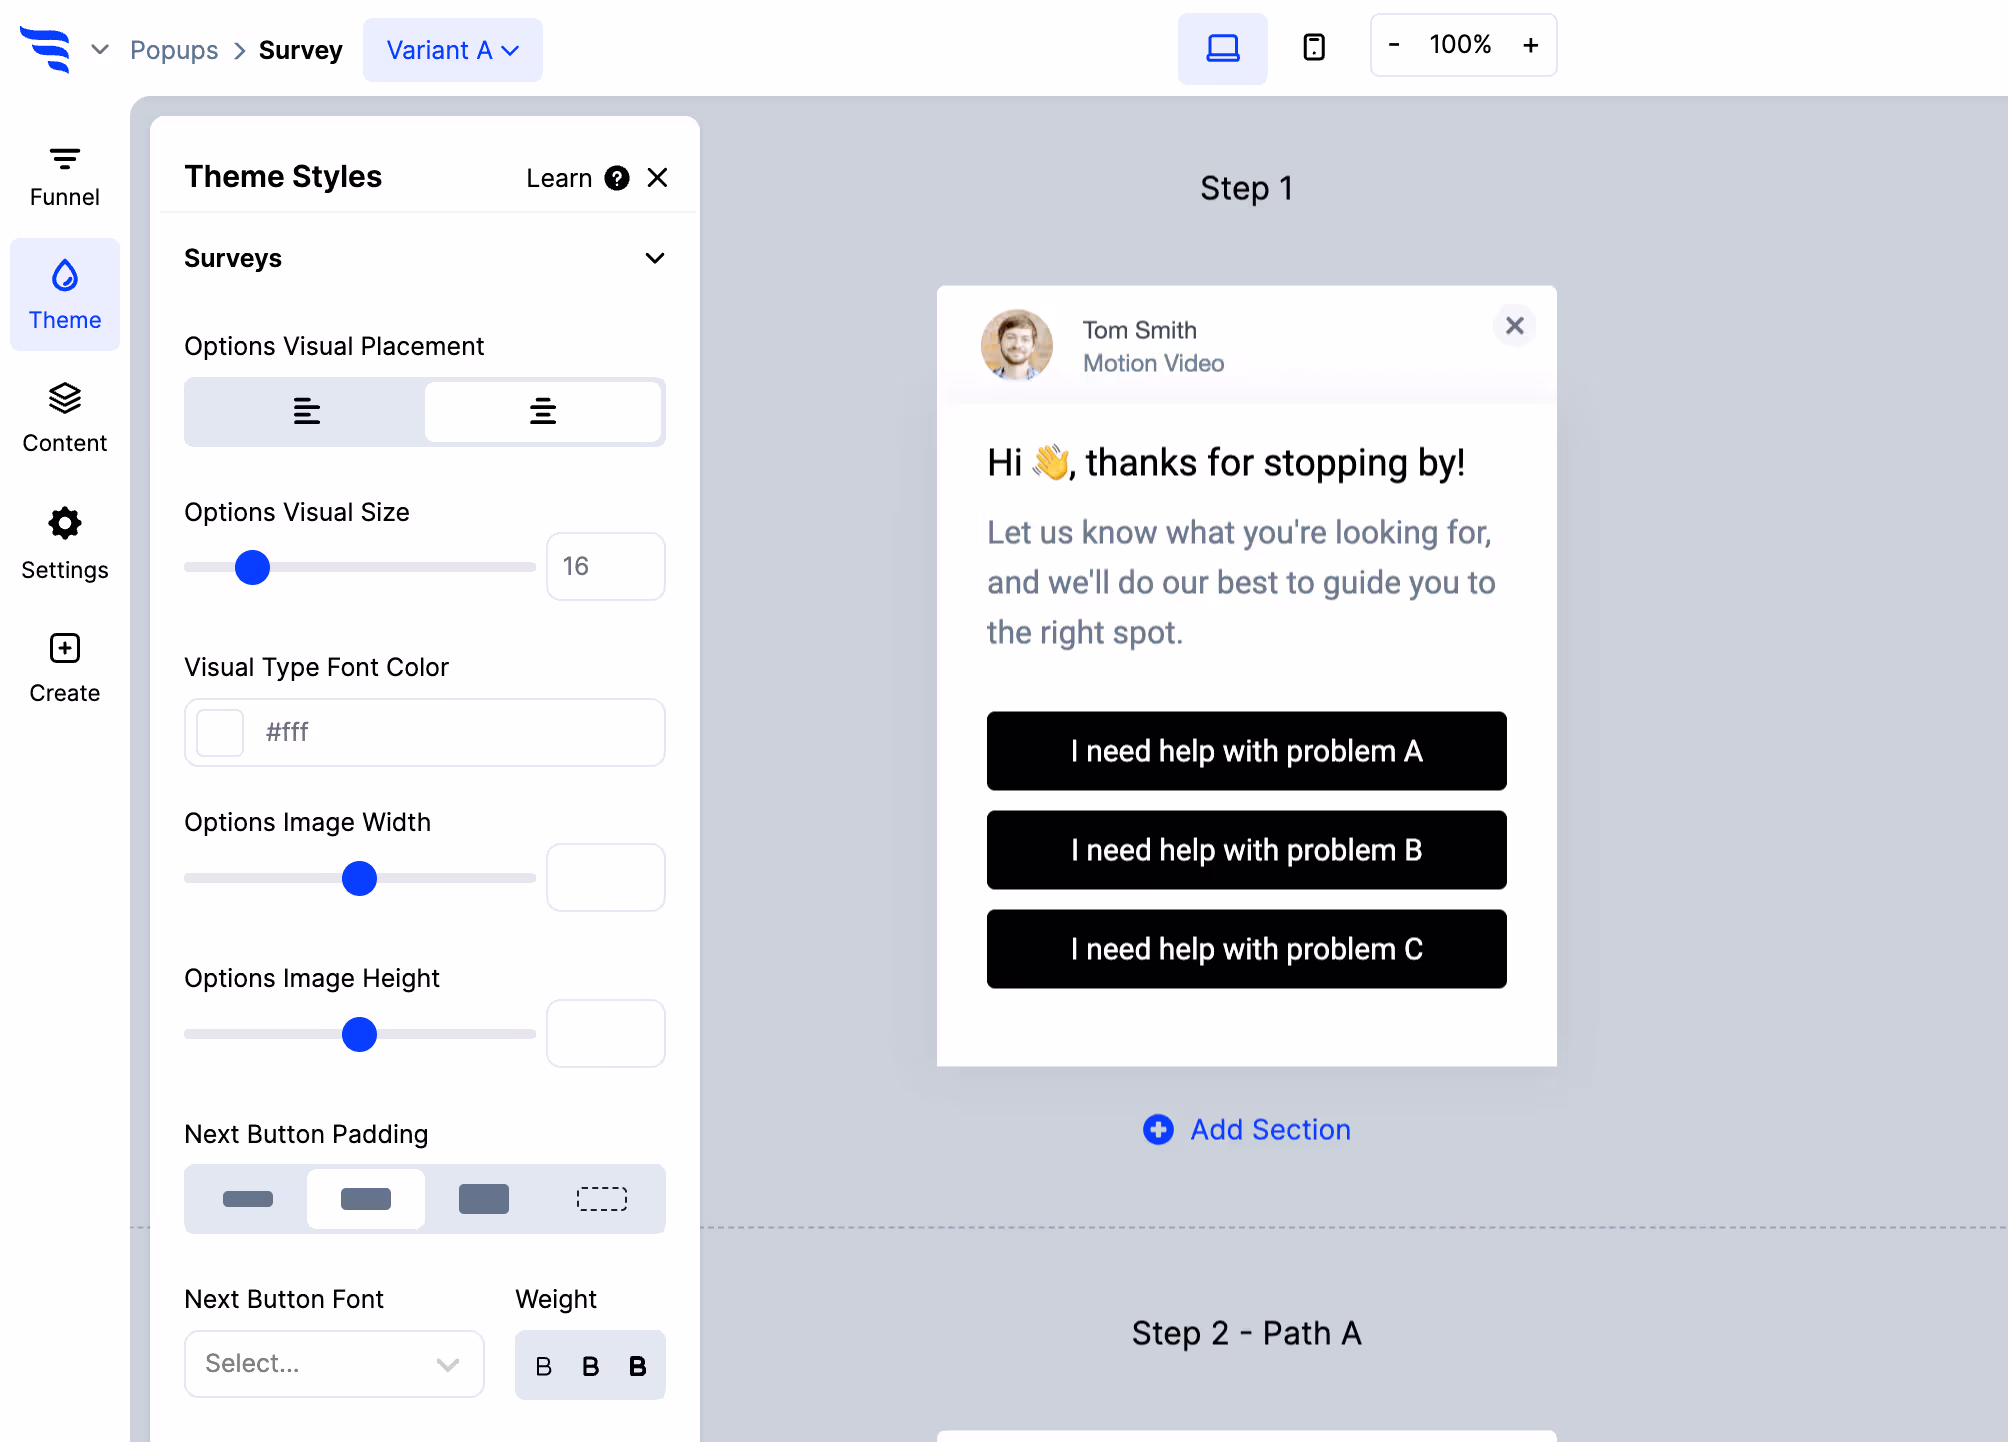
Styling your ConvertKit survey
Below the survey option settings and in the "Themes" tab, you'll find the style controls for your ConvertKit survey.
You can adjust the width of your ConvertKit survey, the alignment of the text, fonts, colors, sizing, whether options are stacked or responsive, drop shadows, and more.
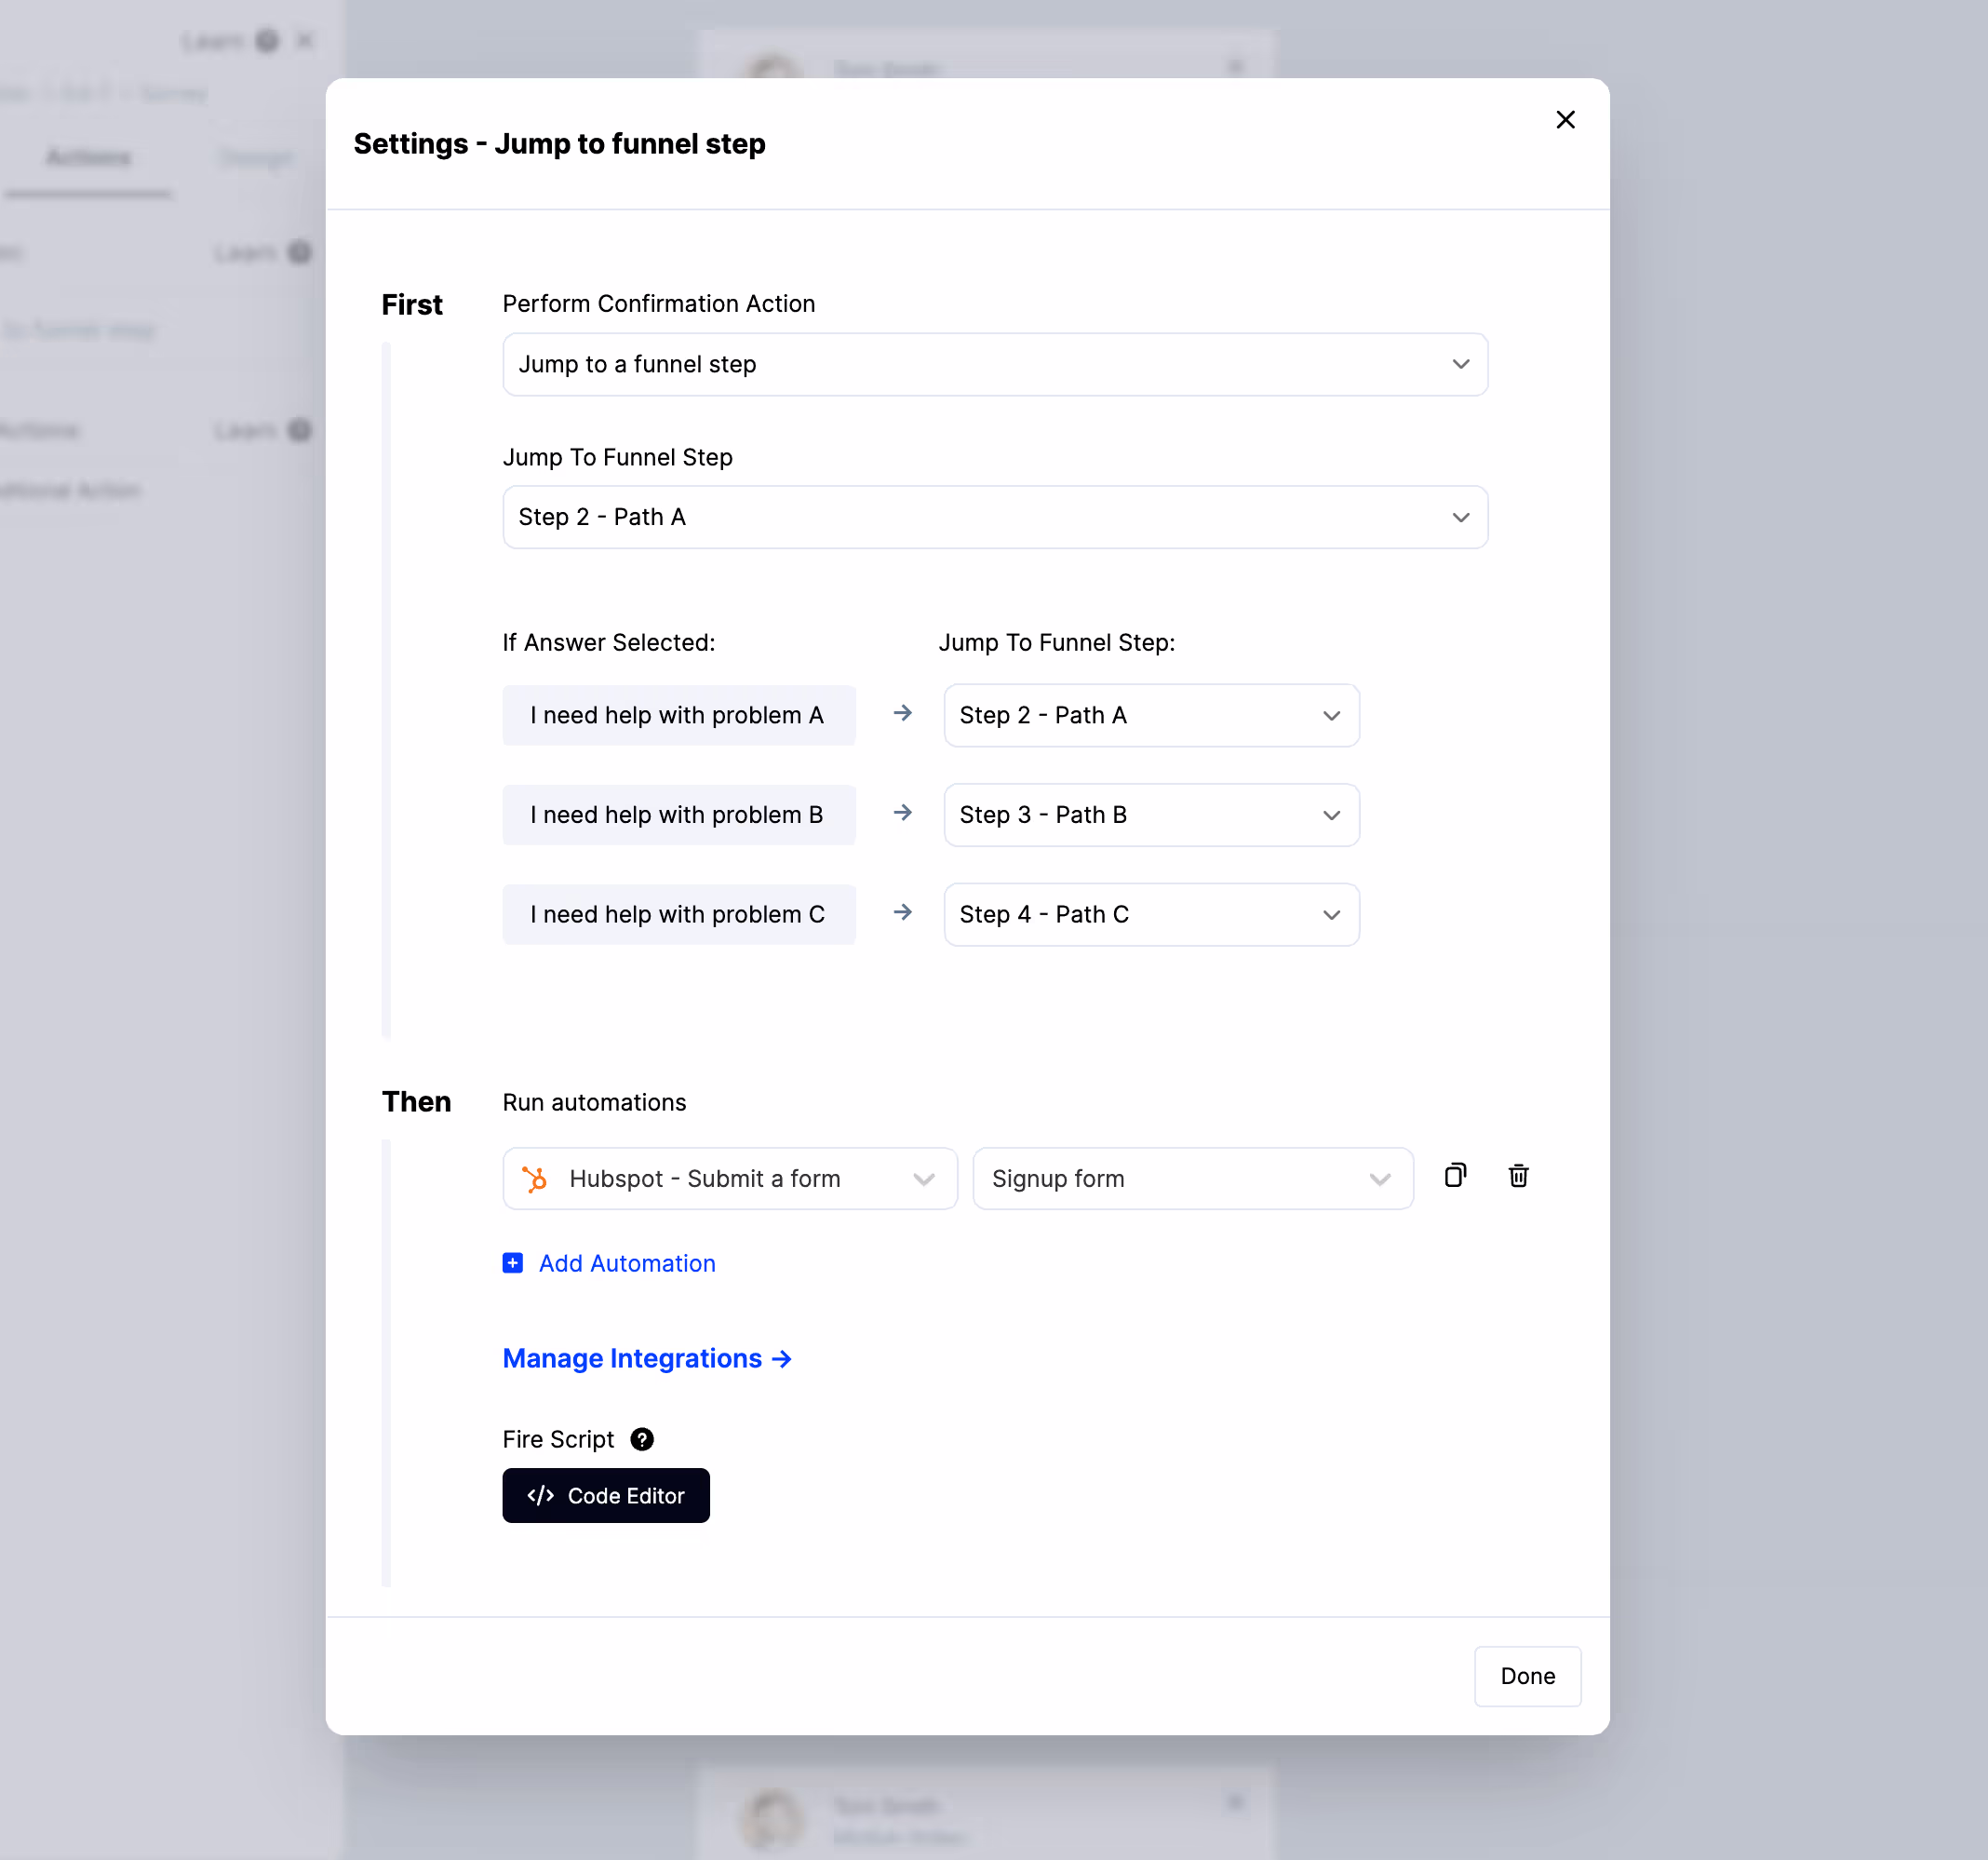
ConvertKit survey confirmation actions
While a survey element is selected, in the builder panel you'll be able to click to the "Actions" tab of your ConvertKit survey.
When editing the actions, you can choose what you want to happen when someone selects a survey option.
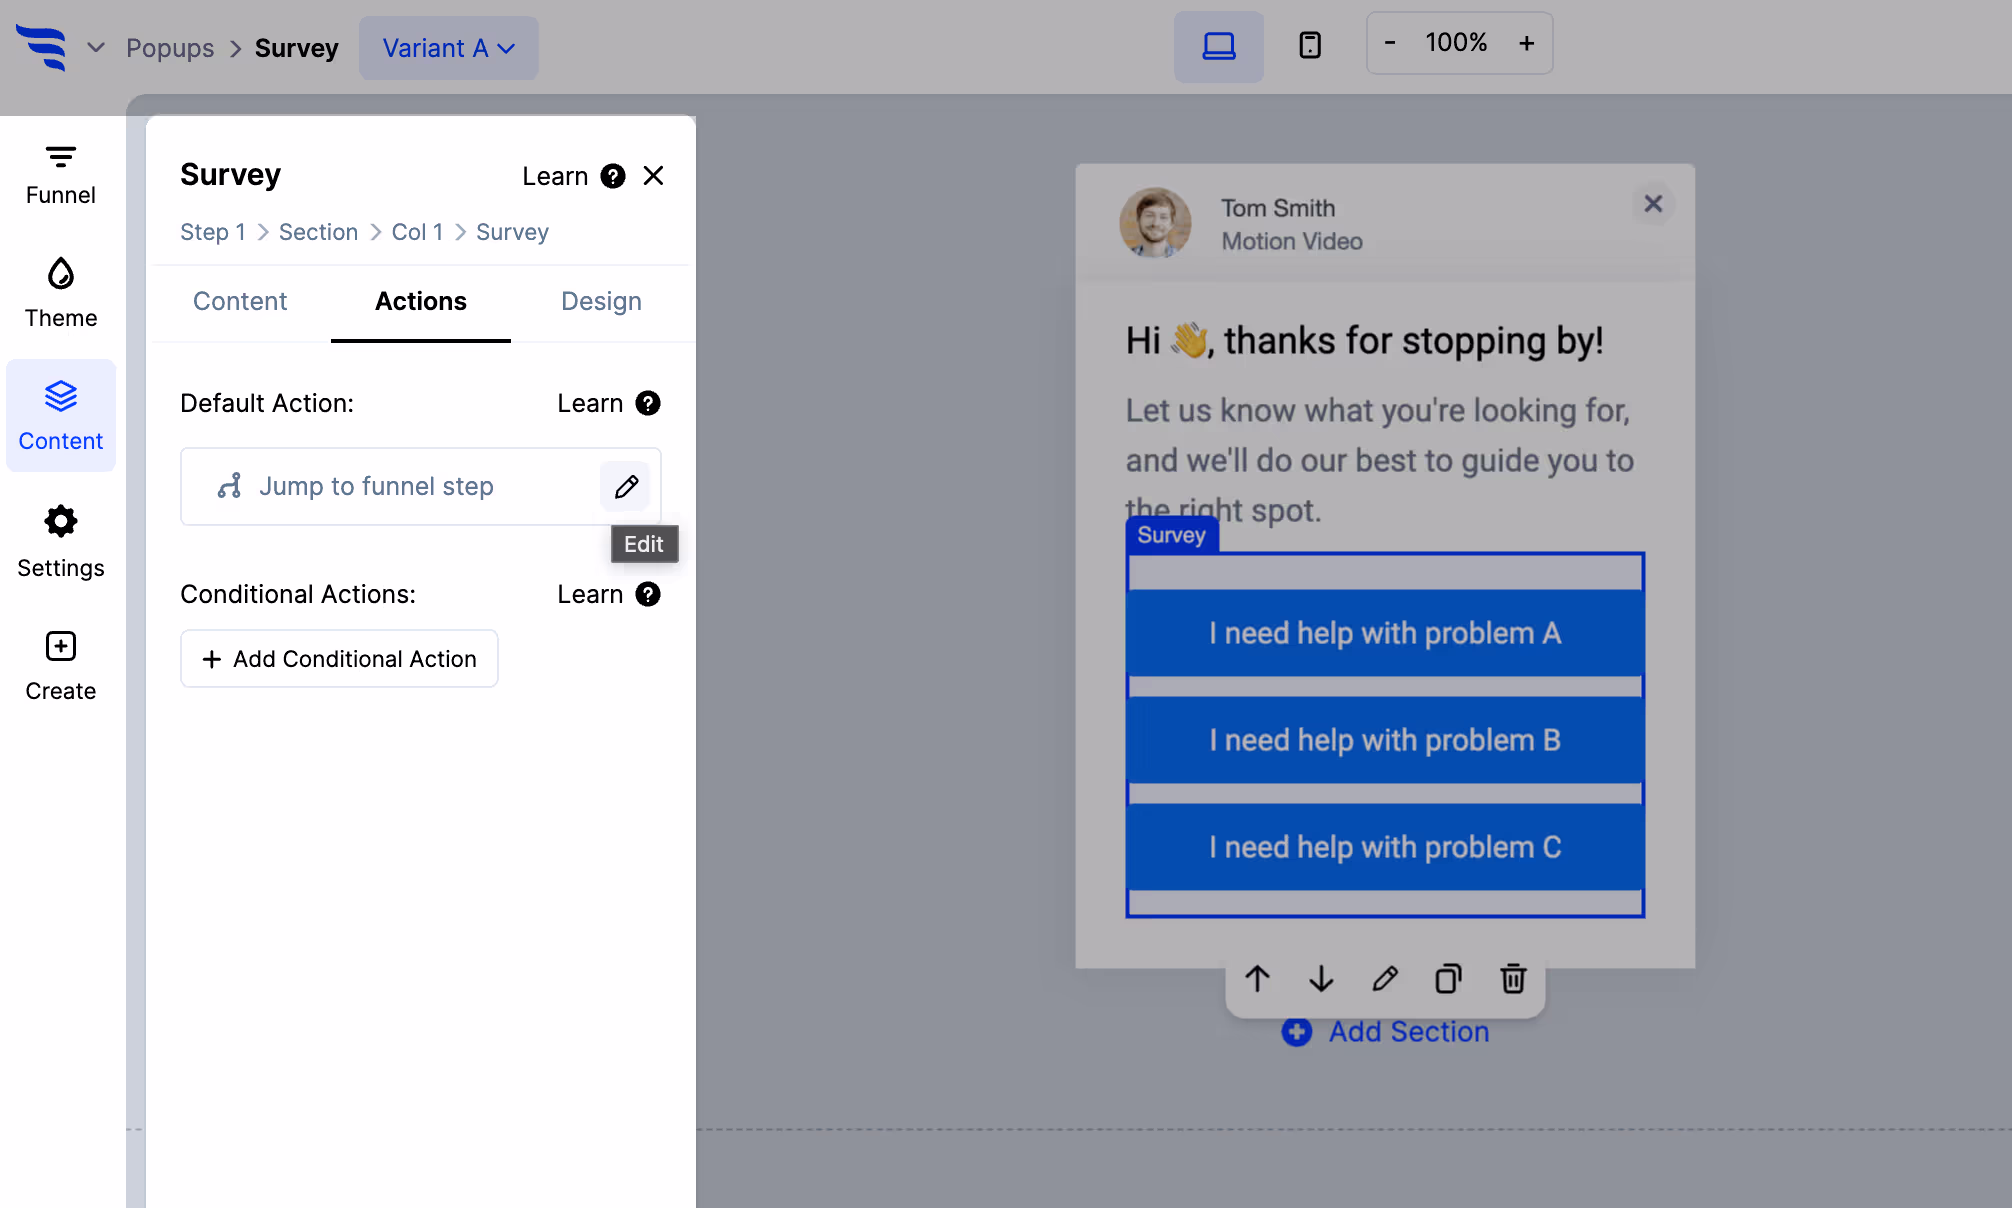
Here are some of the actions you can perform upon survey selection:
- You can choose to redirect your visitors to a URL
- Show another step in the campaign (or specific steps based on survey selection)
- Display a thank you message
- Display another campaign you've created in ConvertFlow
- Open an SMS message to a phone number
Select the survey confirmation action you want to configure the confirmation actions, as well as configure survey jumps based on answers.
Adding automations to your ConvertKit survey
Here you can also add "Automations" to your ConvertKit survey. These can be automations in ConvertFlow such as sending a lead alert to a team member, adding a ConvertFlow tag to segment the ConvertKit survey taker for future targeting, etc.
You can also add automations to your integrated email service provider. For example, for MailChimp you can choose which list you want to add the contact to after completing your ConvertKit survey.
Add as many automations as you need to your ConvertKit survey to properly segment your contacts into the right audiences in your connected tools.
Running scripts & pixels when completing your ConvertKit survey
By adding scripts to your ConvertKit survey's confirmation actions, you can fire conversion pixels in your advertising platforms and perform other custom javascript. ConvertFlow will run scripts added here only after a survey option has been selected.
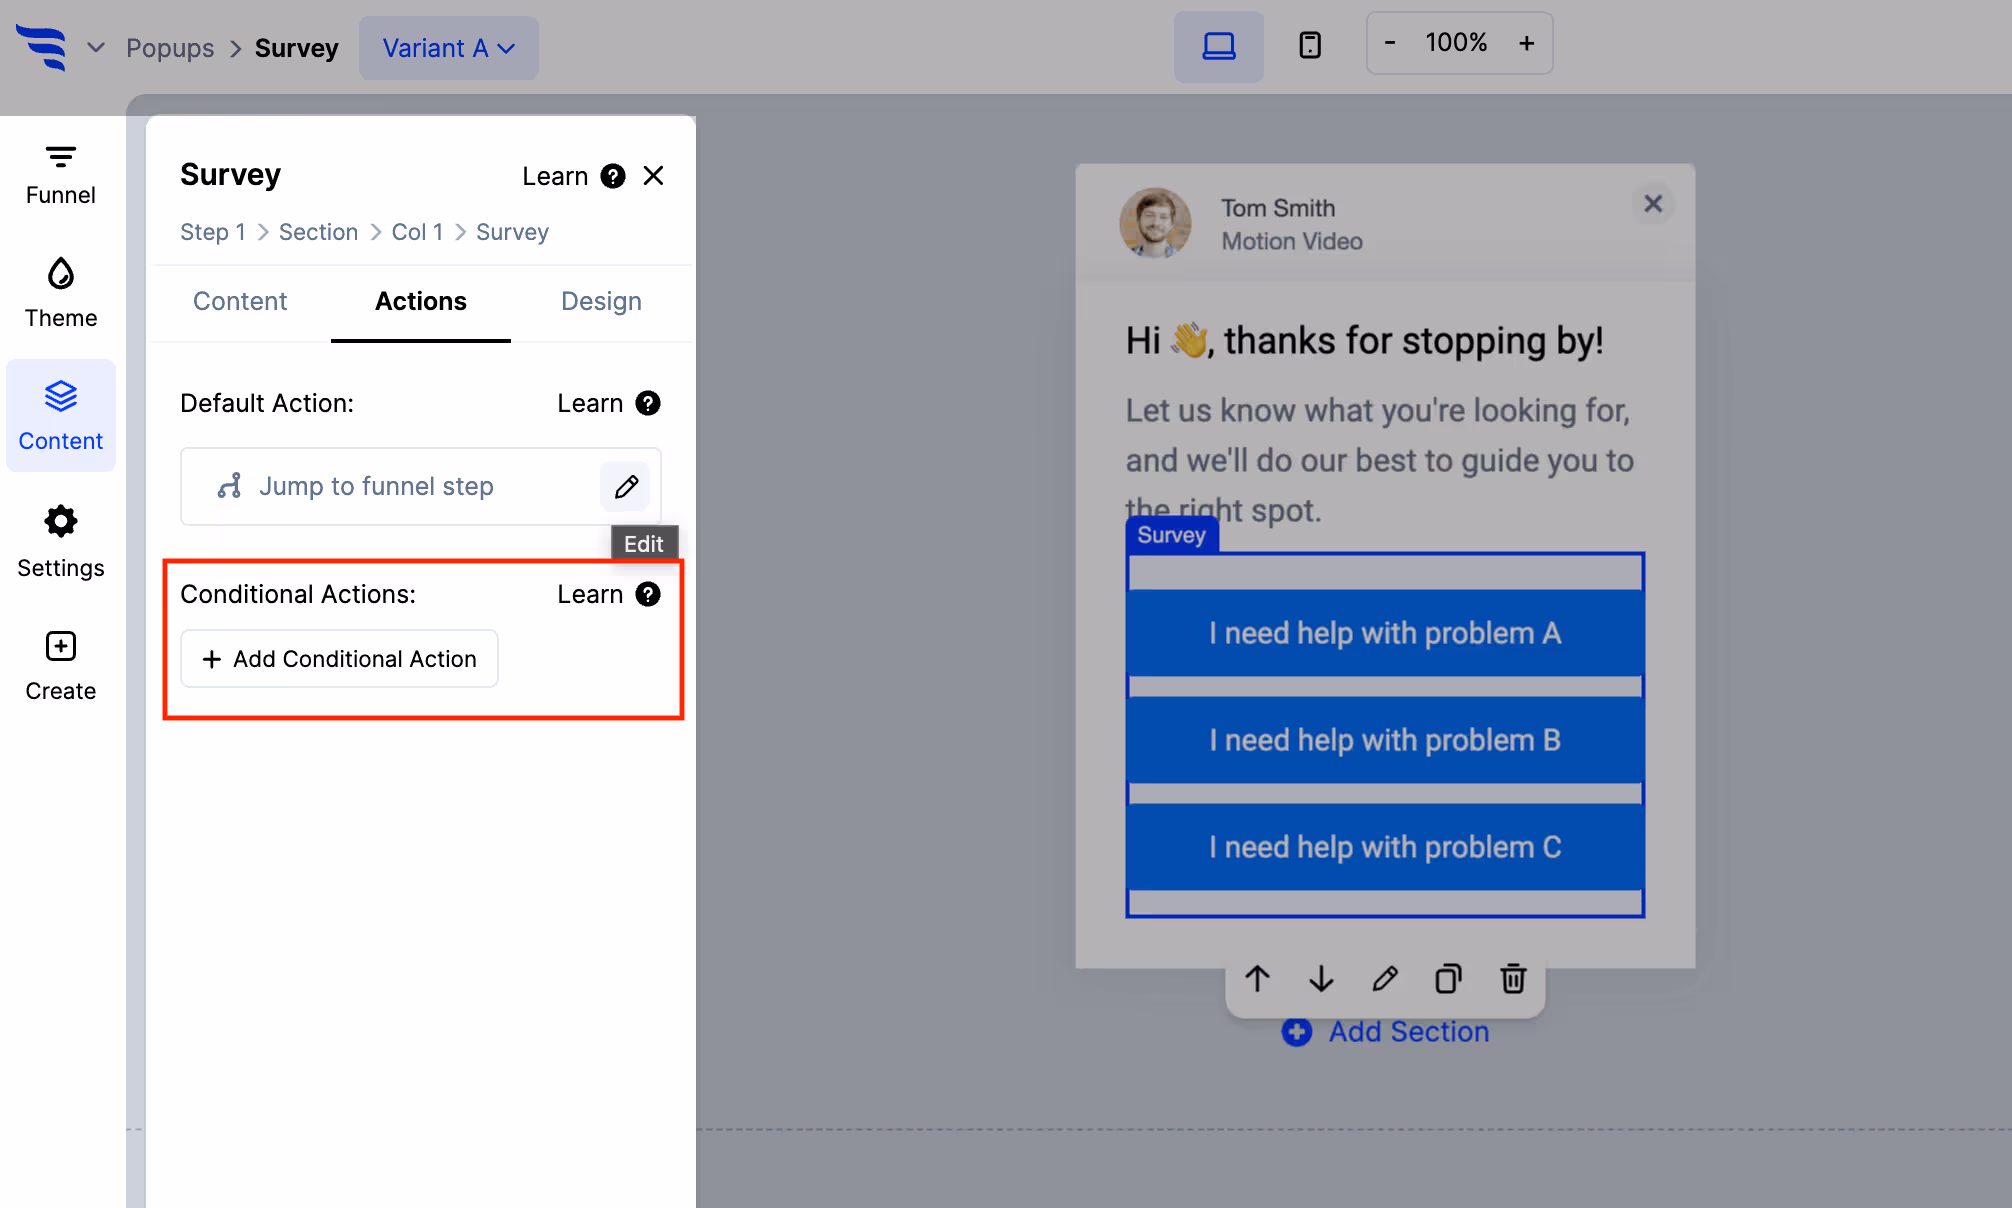
Adding conditional logic to your ConvertKit survey
By default, your ConvertKit survey will perform the confirmation action you've set. However, there may be scenarios where you want to perform actions only for certain people, such as directing ConvertKit survey takers to a certain outcome based on the sum of their selections.
By clicking "+ Add Conditional Action", you can perform actions only for the visitors that meet the conditions you've defined. Learn more about conditional actions →


%20(1).png)


.svg)
