Salesforce is where your pipeline lives, but getting leads into it from your website is the part nobody enjoys. The native option is Web-to-Lead: a block of generated HTML you paste onto a page. It works, but it can't be styled without a developer, it can't ask questions conditionally, it can't run across multiple steps, and it writes to the Lead object whether or not that's what you wanted.
This guide walks through building a Salesforce form in ConvertFlow instead — designed visually, mapped to your Salesforce fields, and live on your site without a developer or a sandbox deploy.
Start in your ConvertFlow website's Integrations area and click to connect with Salesforce.
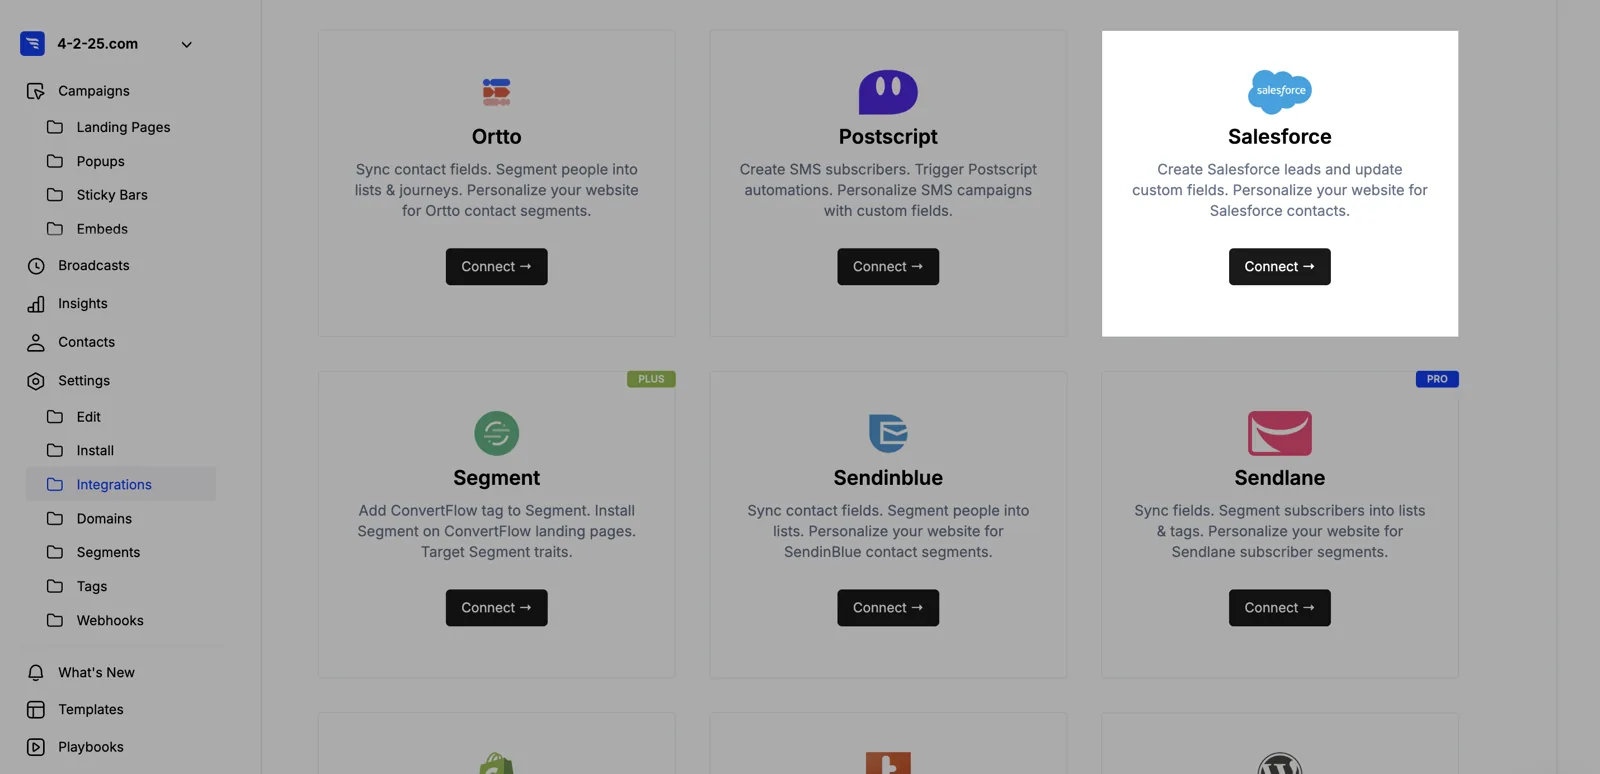
You'll be sent to Salesforce to authorize the connection. There's no API key to generate and no consumer secret to paste — approve the access request and you're back in ConvertFlow.
Once connected, ConvertFlow pulls in your Salesforce fields so you can map form inputs to them in the steps below.
Do this before you build anything, because it determines where every submission lands.
Most Salesforce orgs write inbound web submissions to the Lead object. But if your org runs on Person Accounts — common for B2C, healthcare, education and financial services — you'll want submissions going there instead.
ConvertFlow has a toggle for it. Switch on Use Person Accounts in the Salesforce integration settings.
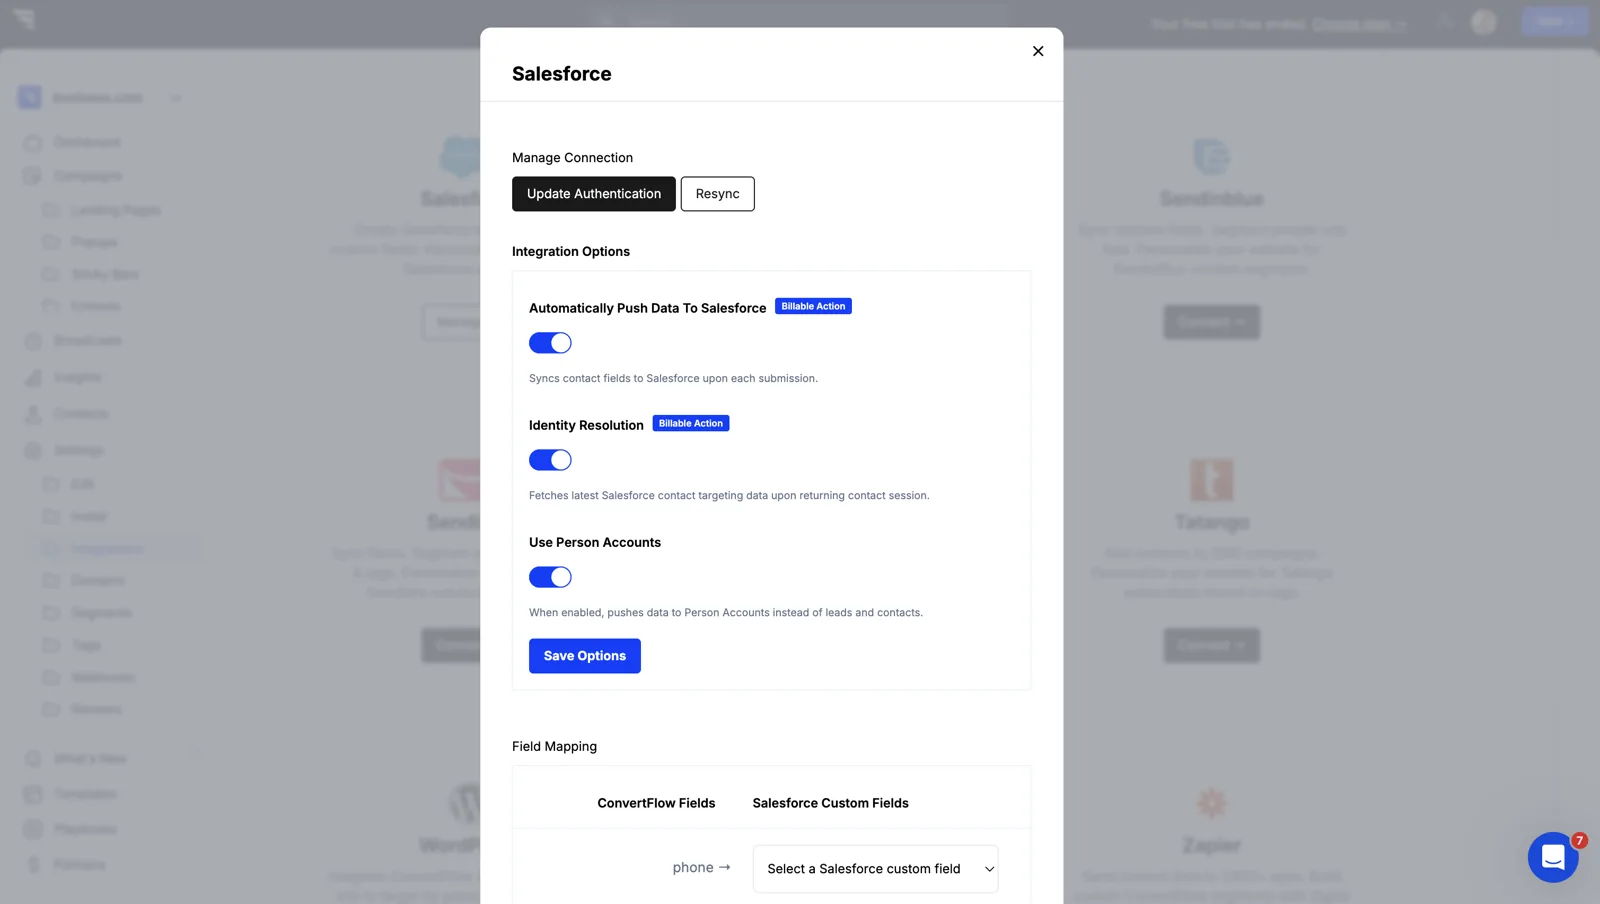
After flipping it, click Resync so ConvertFlow fetches the Person Account fields. Skip the resync and the field dropdown in Step 5 will still show your old object's fields, which is a confusing way to lose twenty minutes.

The resync button is also what you use any time someone adds a custom field in Salesforce and it doesn't appear in ConvertFlow yet. The integration refreshes on its own periodically; resync just does it now.
Create a new campaign in ConvertFlow and pick the format you need — a landing page, a popup, or an embed that sits inside an existing page on your site.
Then click to add an element and choose the form element type. You can start from a form template or build from scratch.
.avif)
Select the form element and switch on the contact fields you want to collect.
.png)
Each field can be edited from the builder panel — placeholder text, label, whether it's required, and more.
.avif)
Turn on email verification while you're here. It checks that an address actually exists with its provider before the record is created.

This matters more in a CRM than in an email tool. A junk address in an email platform costs you deliverability. A junk Lead in Salesforce gets assigned to a rep, worked, chased, and counted in pipeline reporting until somebody gives up on it.
This is the step Web-to-Lead makes you do in HTML. Here it's a dropdown.
Add a custom field to your form by clicking to add a field at the end of the field list.
.avif)
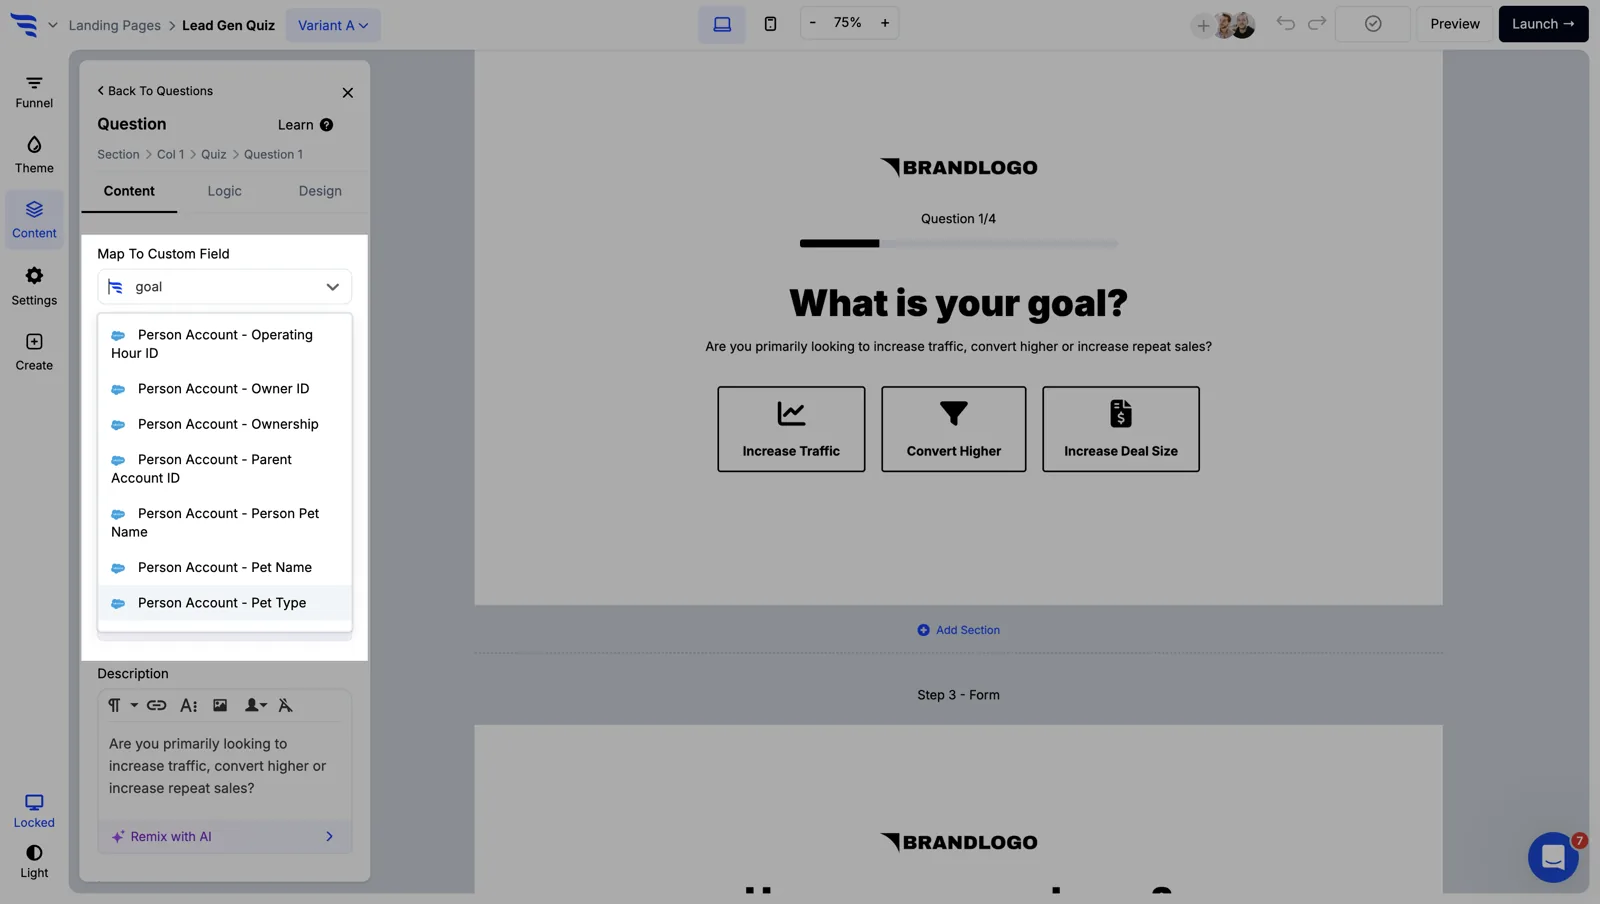
When naming it, select from the Salesforce fields dropdown — a list of the fields that already exist on your object.
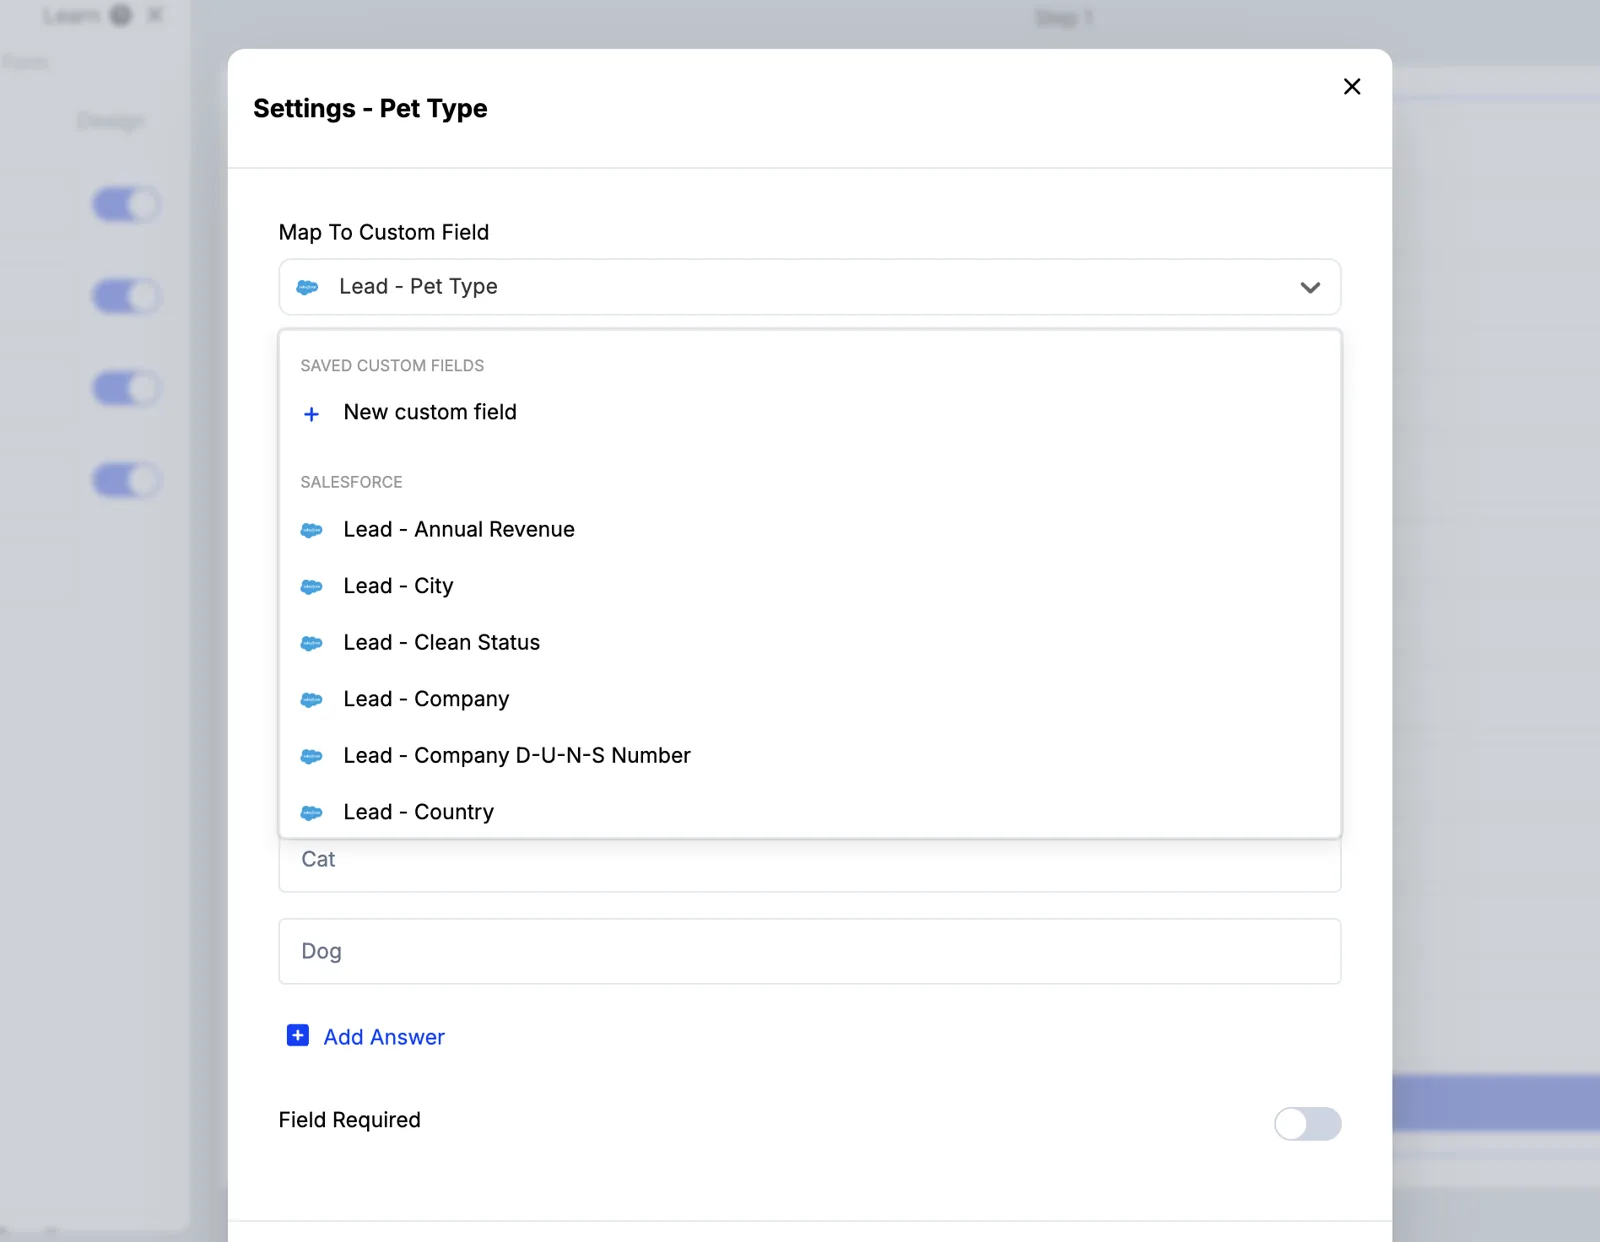
Because you're selecting rather than typing, you can't silently create a field that doesn't exist — which is the usual failure mode when hand-editing Web-to-Lead markup.
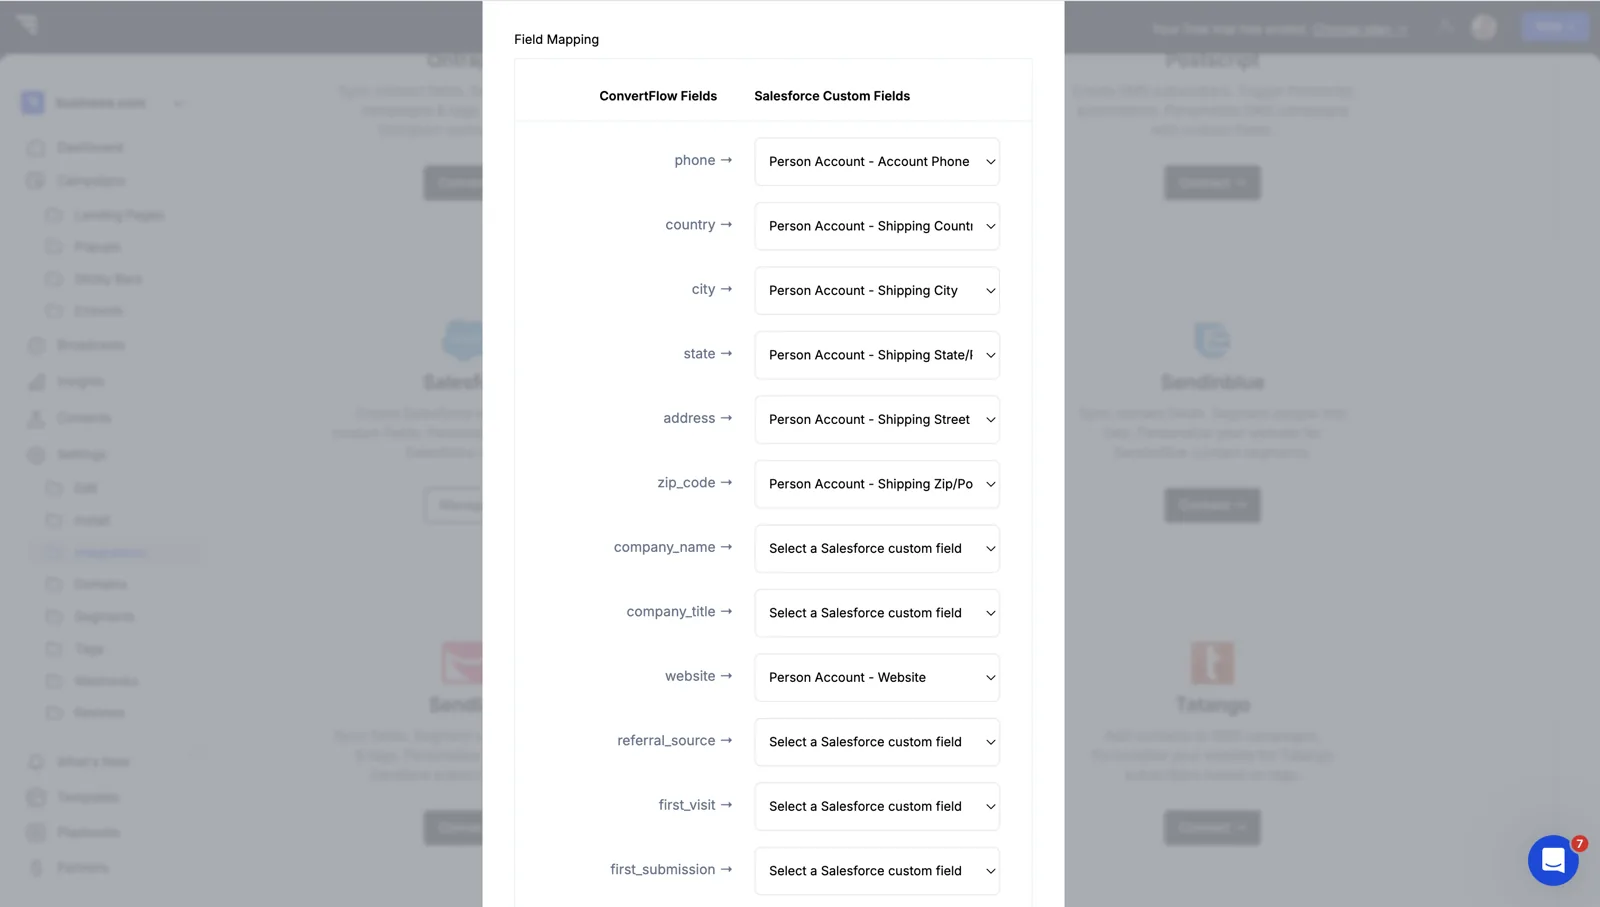
For ConvertFlow's preset contact fields, use the Fields button on your Integrations page to map each one to its Salesforce counterpart.
Here's where a ConvertFlow form stops resembling Web-to-Lead altogether.
Rather than a flat name-and-email box, you can ask the questions a rep would ask in the first two minutes of a discovery call — company size, use case, timeline, current tooling — and write each answer straight to a Salesforce field.
Field types include text, dropdown, radio, paragraph, hidden, and range sliders for things like headcount or budget.
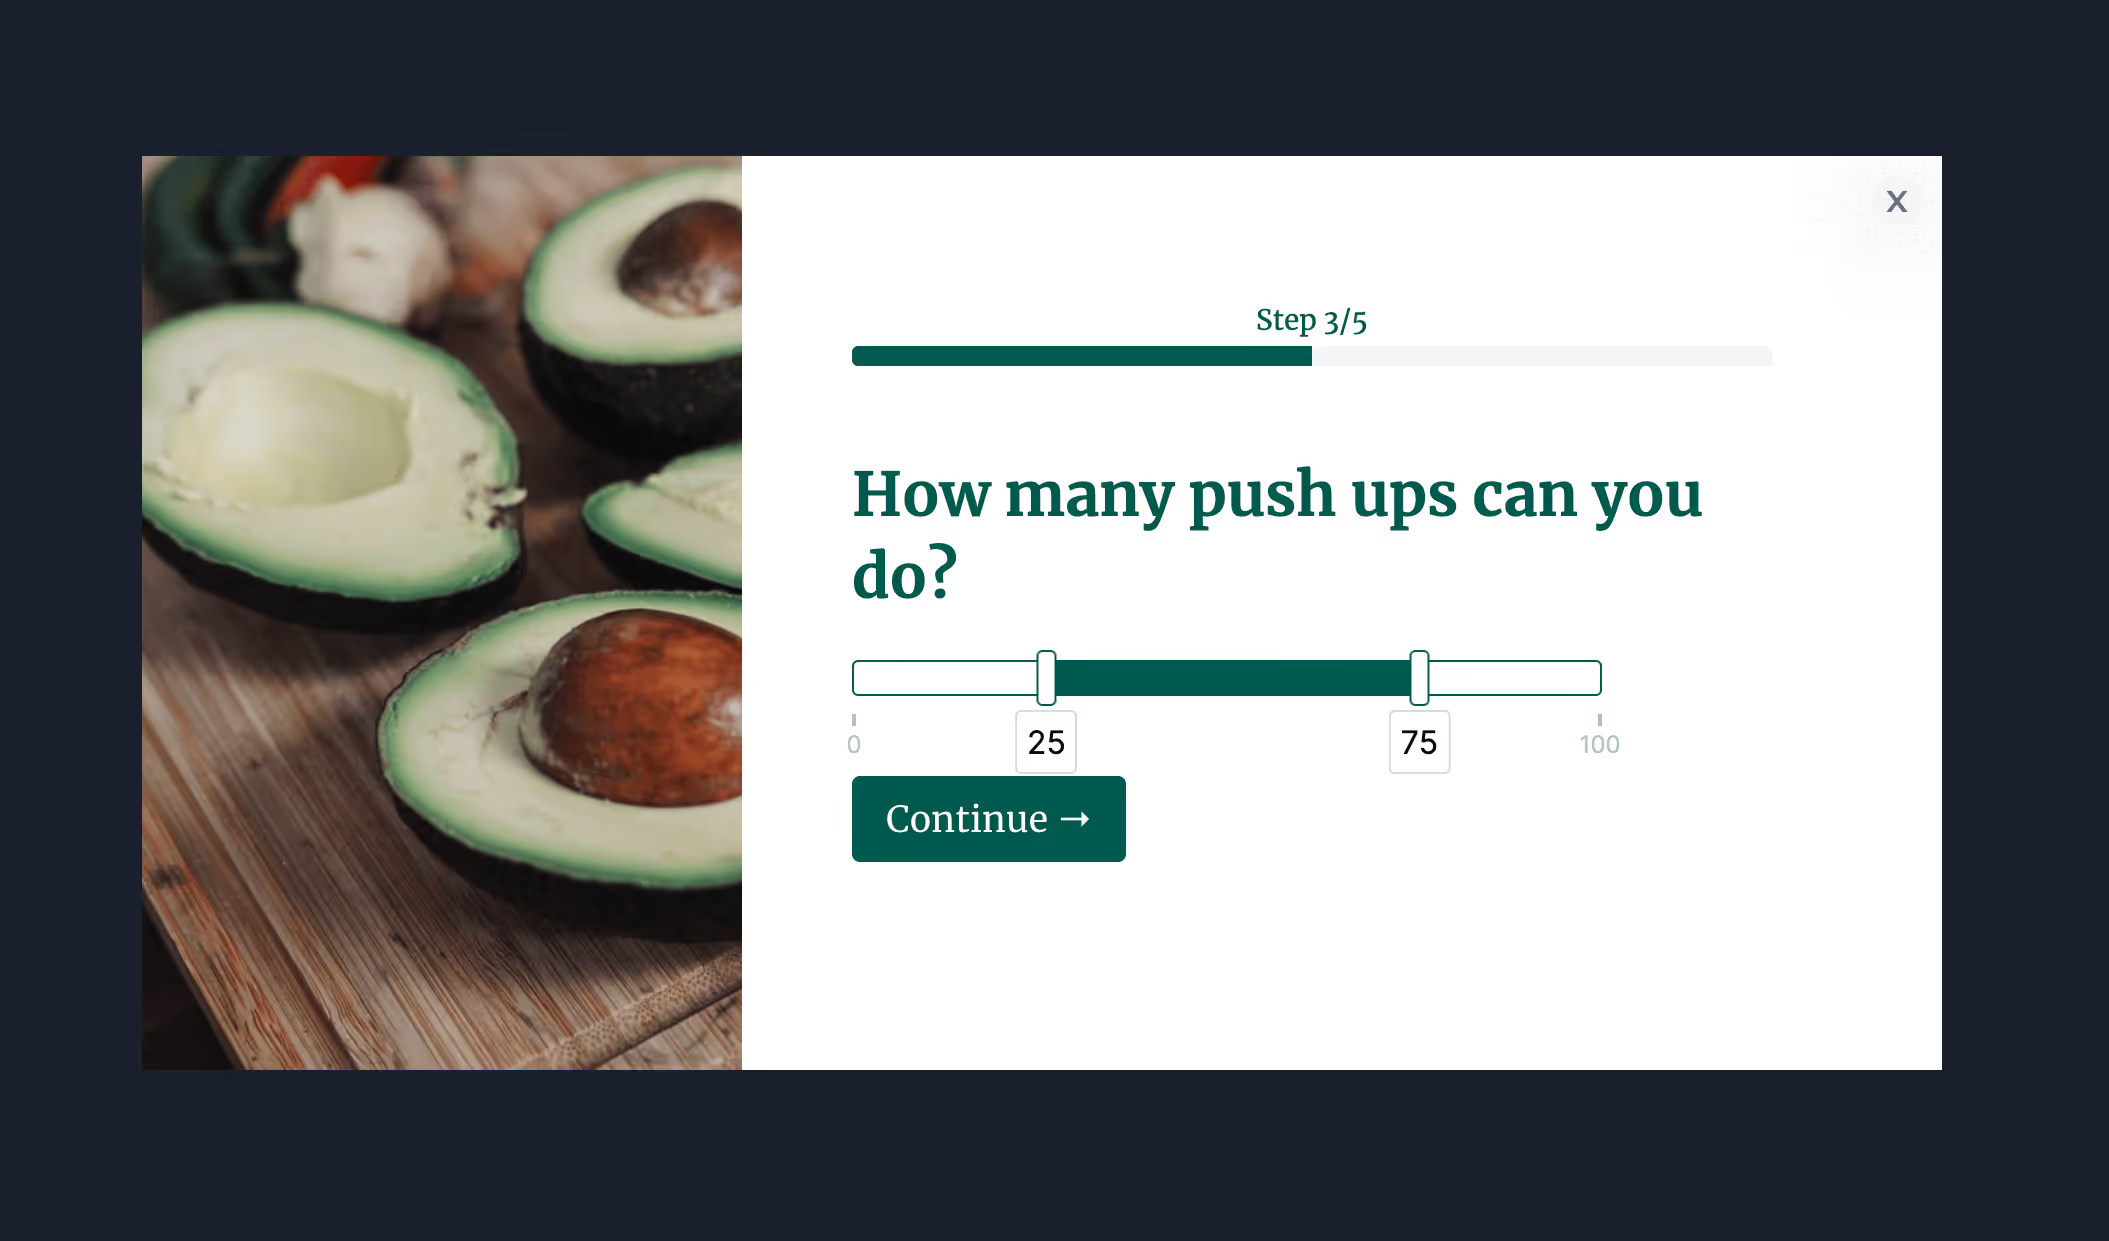
Quiz questions map the same way — use the Map to custom field setting to choose the Salesforce field each answer populates.
Two things worth doing while you're here:
In the Design tab, set spacing, field layout, width, fonts, button colour and roundness, field colour and shadows.
.avif)
This is the whole reason most teams stop using Web-to-Lead. The generated markup inherits almost nothing from your site, so making it look like it belongs there means a developer, a stylesheet and a deploy every time marketing wants a change.
In the Actions tab, choose what happens after someone submits — redirect to a URL, jump to another funnel step, show a thank-you message, or open a popup.
.avif)
Then add conditional actions, which is where the qualifying questions from Step 6 start paying for themselves.
.avif)
The pattern most teams land on is two branches:
Same form, two outcomes, decided by the answers rather than by a rep reading the record three days later.
Preview and test the form first. Test submissions don't count towards campaign stats and don't fire automations, so you won't create junk Leads while checking your logic.
Then publish — one click on Shopify, a single snippet on WordPress, Webflow, Squarespace, Wix or any other CMS.
Once it's live, the funnel breakdown report shows how many people saw, started and completed the form, where they dropped off, and which answers they chose.
.avif)
Read the per-question drop-off closely. Every qualifying question costs you some completions, and this report tells you which ones are worth that cost. A question your team never actually references when working the lead is pure loss — cut it.
Web-to-Lead isn't bad at what it does. If you need one plain form writing to the Lead object and you have a developer to style it, it's fine.
The case for building elsewhere is everything around it: multi-step flows, conditional questions, scoring, routing, styling without a deploy, A/B testing, and mapping to Person Accounts as easily as to Leads. Those are the things that turn a web form from a name-collector into something your sales team can actually work from.
If you'd like to see templates, examples and the full feature set, head to the Salesforce form builder.
Create a free ConvertFlow account and integrate
Salesforce
in minutes.
Build & A/B test lead capture funnels for Salesforce.
Connect For Free










.svg)