Integrate ConvertFlow with your WordPress site to target by posts, pages, categories and more.
Connect For FreeThere are three ways to get a landing page onto a WordPress site, and they suit different situations.
You can build one from your theme's page editor, install a landing page plugin, or use a hosted builder that publishes to your domain. This guide covers when each makes sense, then walks through the third — which is usually the fastest if the page needs to convert rather than just exist.
Free, and you already have it. The catch is that theme templates are built for content pages — headers, sidebars, navigation, footers. A landing page usually wants none of those, and stripping them out means either a blank page template or CSS work.
Fine for a simple page. Awkward when you want A/B testing or conditional content.
Plugins like SeedProd and similar give you drag-and-drop building inside WordPress. Good if you want everything to live in one place and you're comfortable maintaining another plugin.
The trade-offs are the usual WordPress ones: plugin conflicts, update cycles, and page speed — landing page builders tend to load their own CSS and JS on top of your theme's.
The page is built and hosted outside WordPress but published on your own domain. Nothing to maintain in WordPress, no theme conflicts, and the builder handles A/B testing and targeting natively.
This is the approach below. It also means the same page can be reused as a popup or embed elsewhere on the site.
When creating a new campaign in ConvertFlow, choose the "landing pages" format.
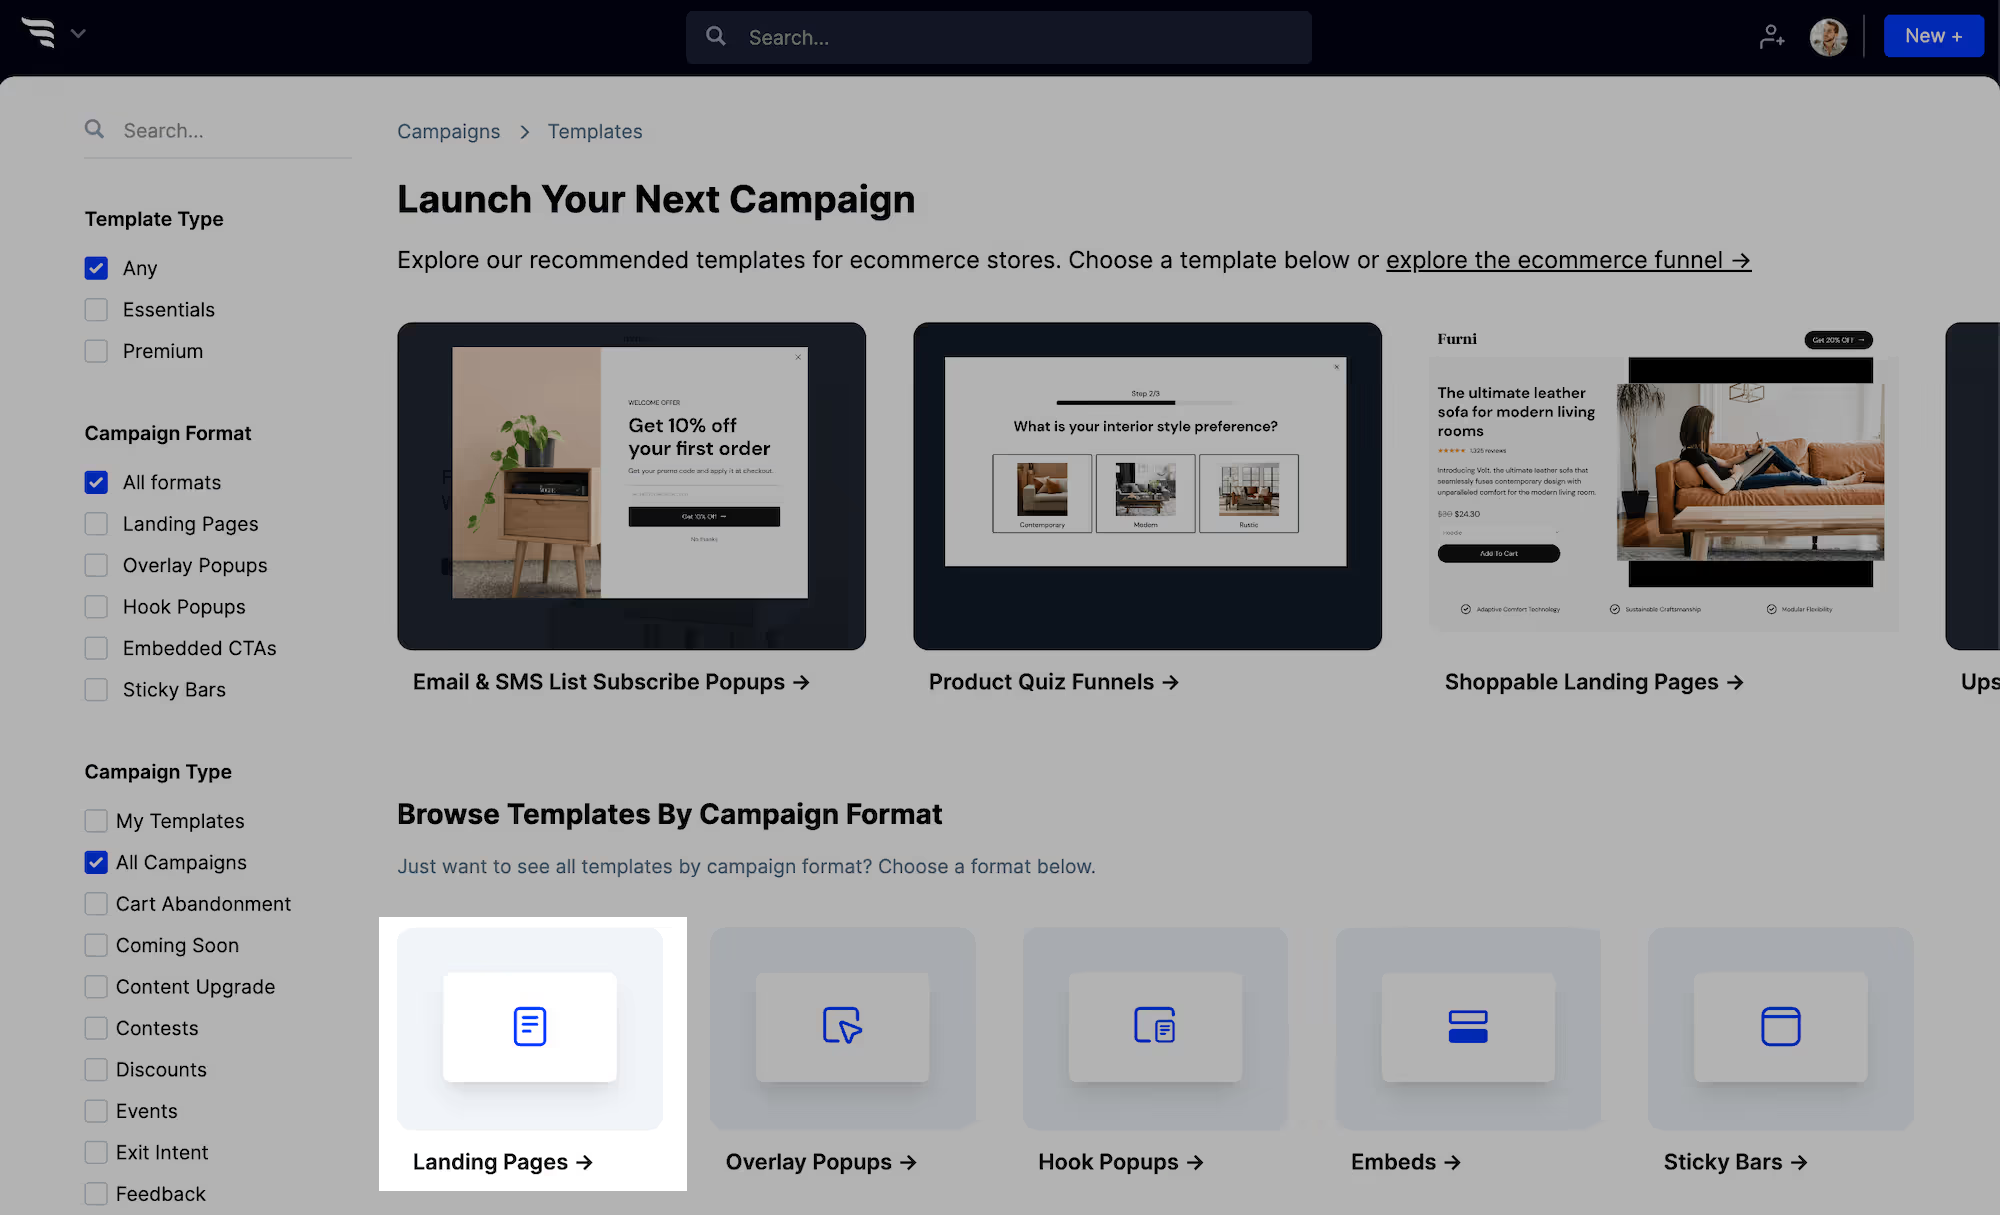
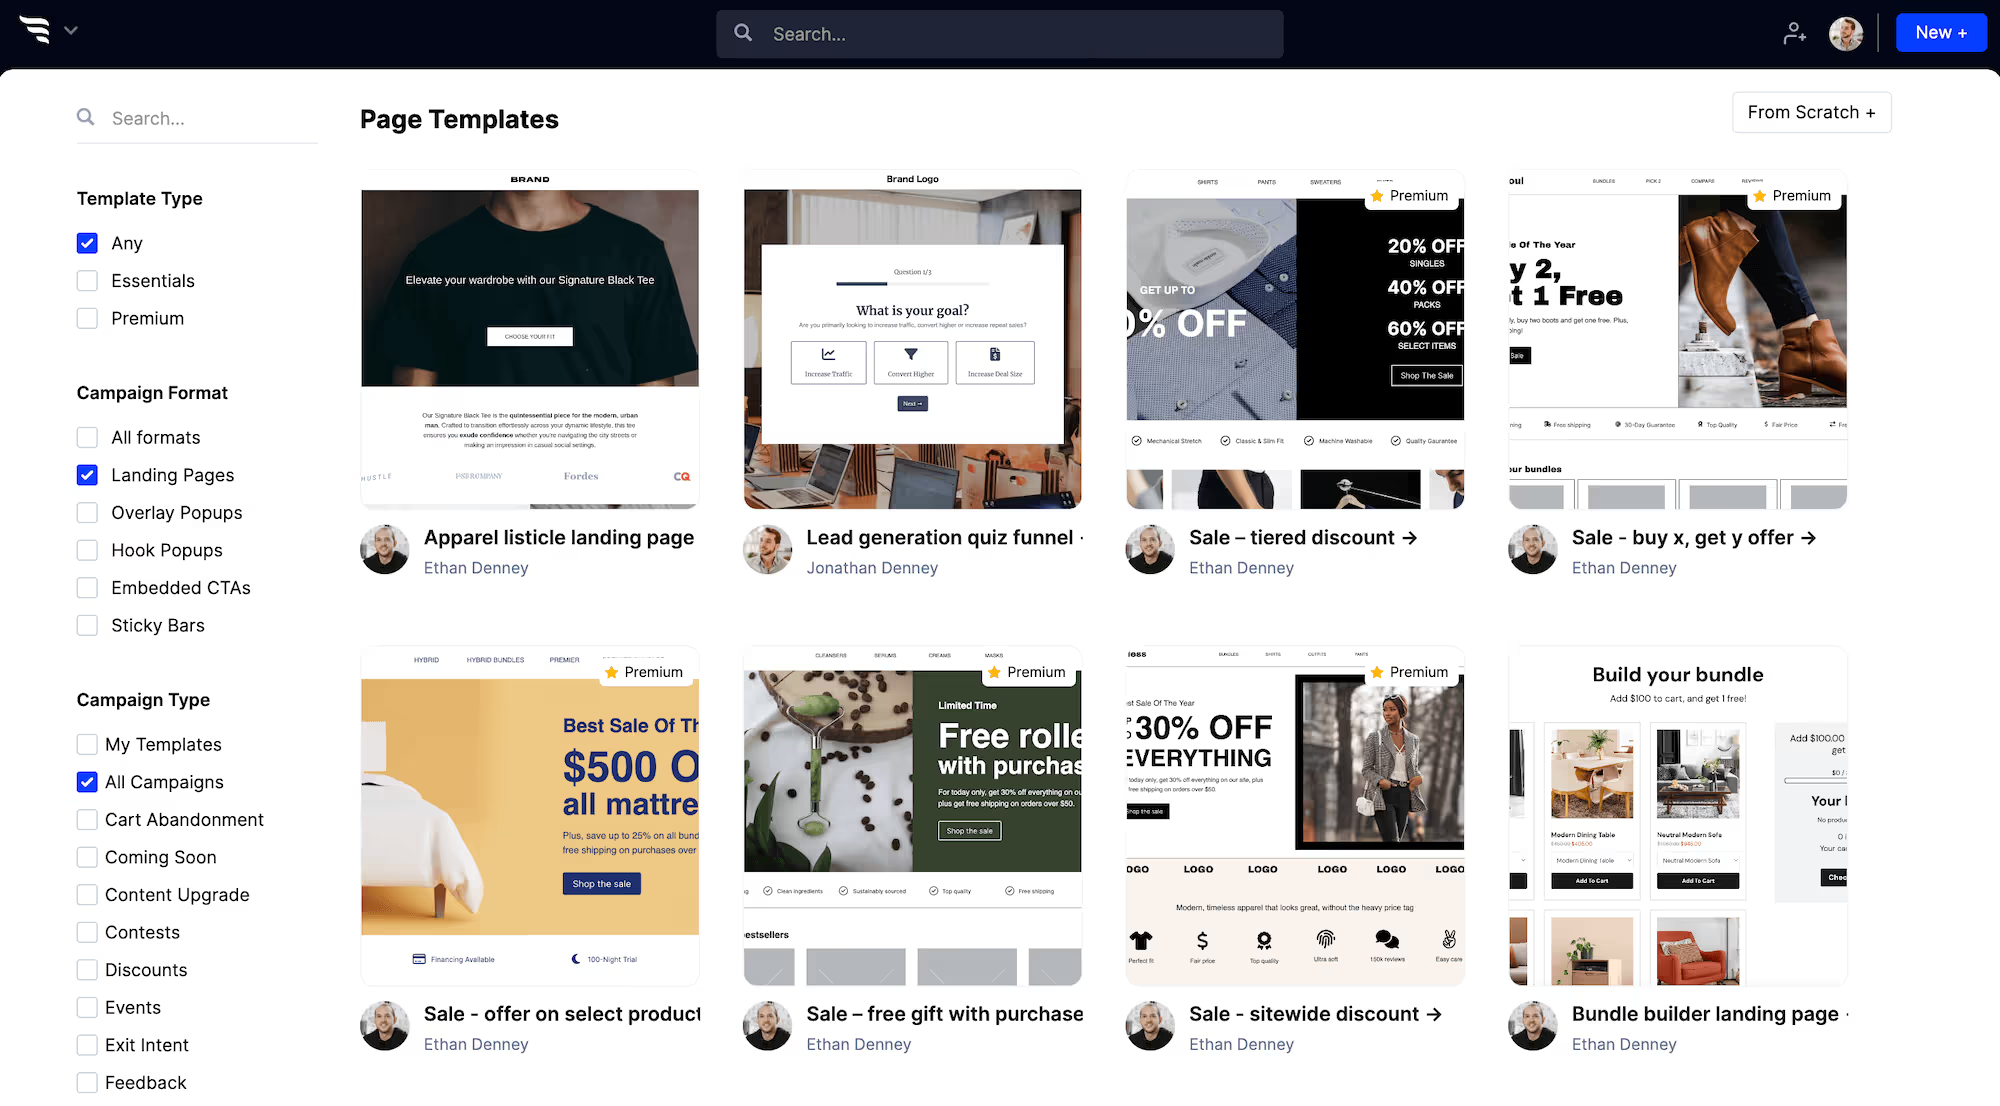
Then pick the template closest to your campaign, or start from scratch.
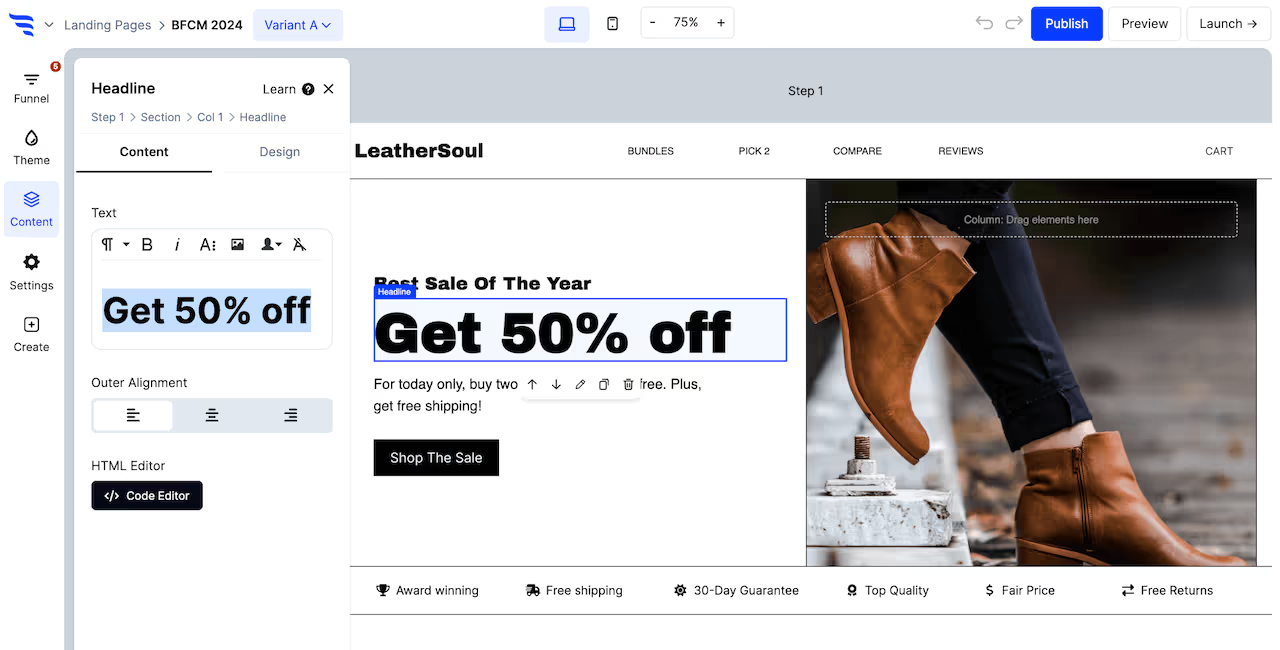
Use the theme settings to set headline, button and container styles before you touch the content. Everything then inherits it, including elements you add later.

Match your WordPress theme's fonts and brand colours here and the page will read as part of the same site, even though it isn't rendered by your theme.
Click any element, or use the layer manager, to edit it. Text elements have an editor in the builder panel, or you can double-click text on the canvas.
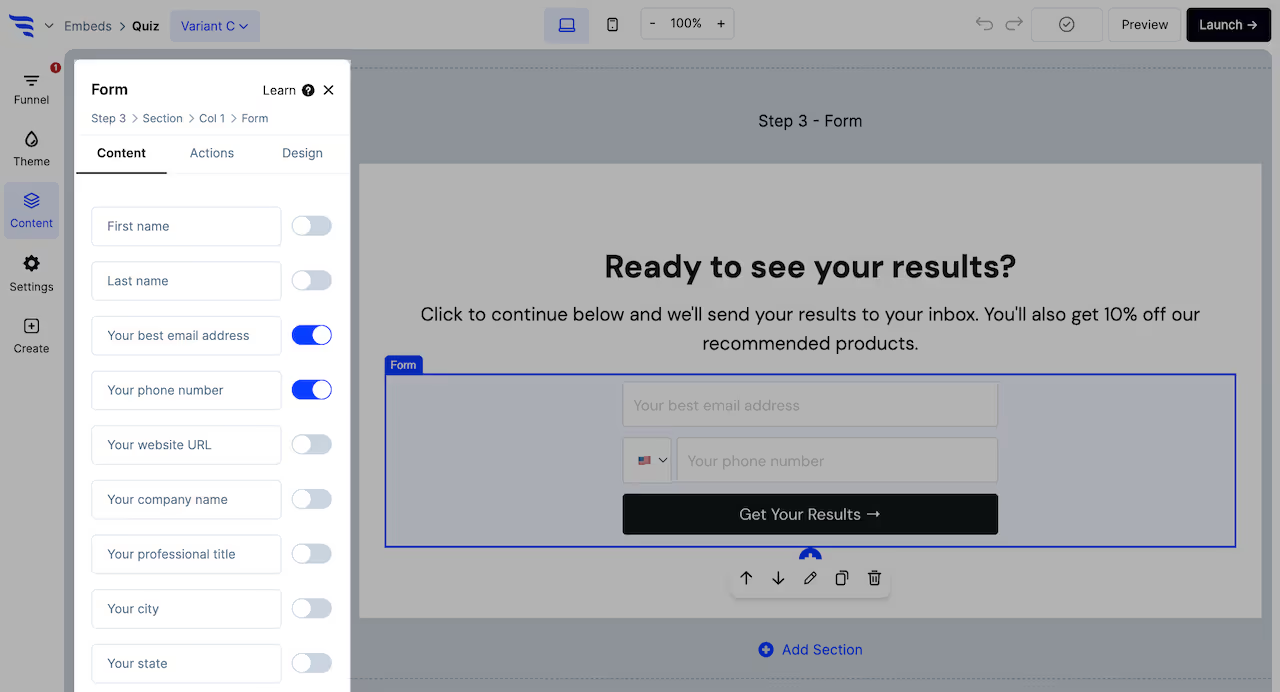
Add a form or quiz element and toggle on the fields you want to collect.
Turn on email verification so invalid addresses don't reach your email platform.

Capture UTM parameters into hidden fields too. On a campaign page this is the cheapest attribution you'll ever set up — the source travels with the contact into whatever platform you sync to.
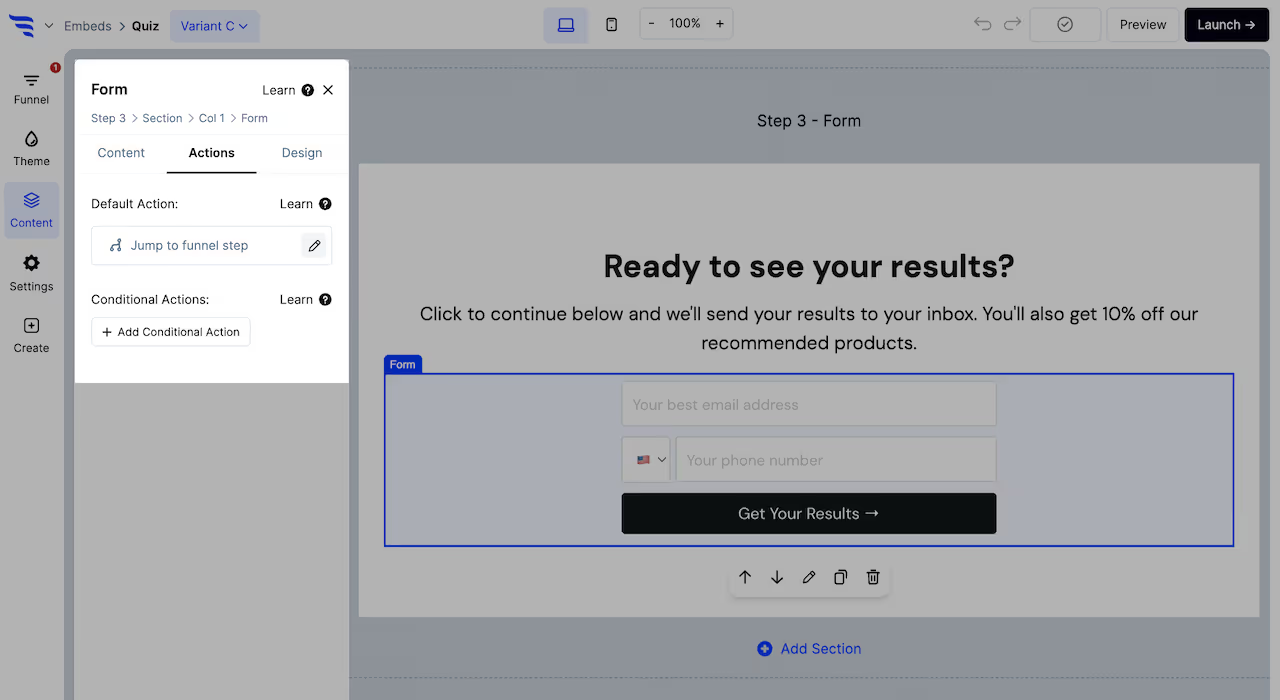
Each conversion element has a default action — jump to another step, redirect to a URL, or display a popup — plus automations that sync the contact to your email platform or CRM.
Add ConvertFlow's snippet to your WordPress site once. After that you can target campaigns to specific posts, pages and categories — which is the part that makes this worth doing on a content-heavy WordPress site.
A landing page doesn't strictly need the snippet if you're publishing to a ConvertFlow-hosted URL. But installing it lets you reuse the same account for popups and embeds across your existing posts, and target them by category.
Preview and test the page. Test submissions don't count towards stats and don't trigger automations.

Then click "Launch" and choose the domain and URL — your reserved convertflowpages.com subdomain, or a custom domain you've added.
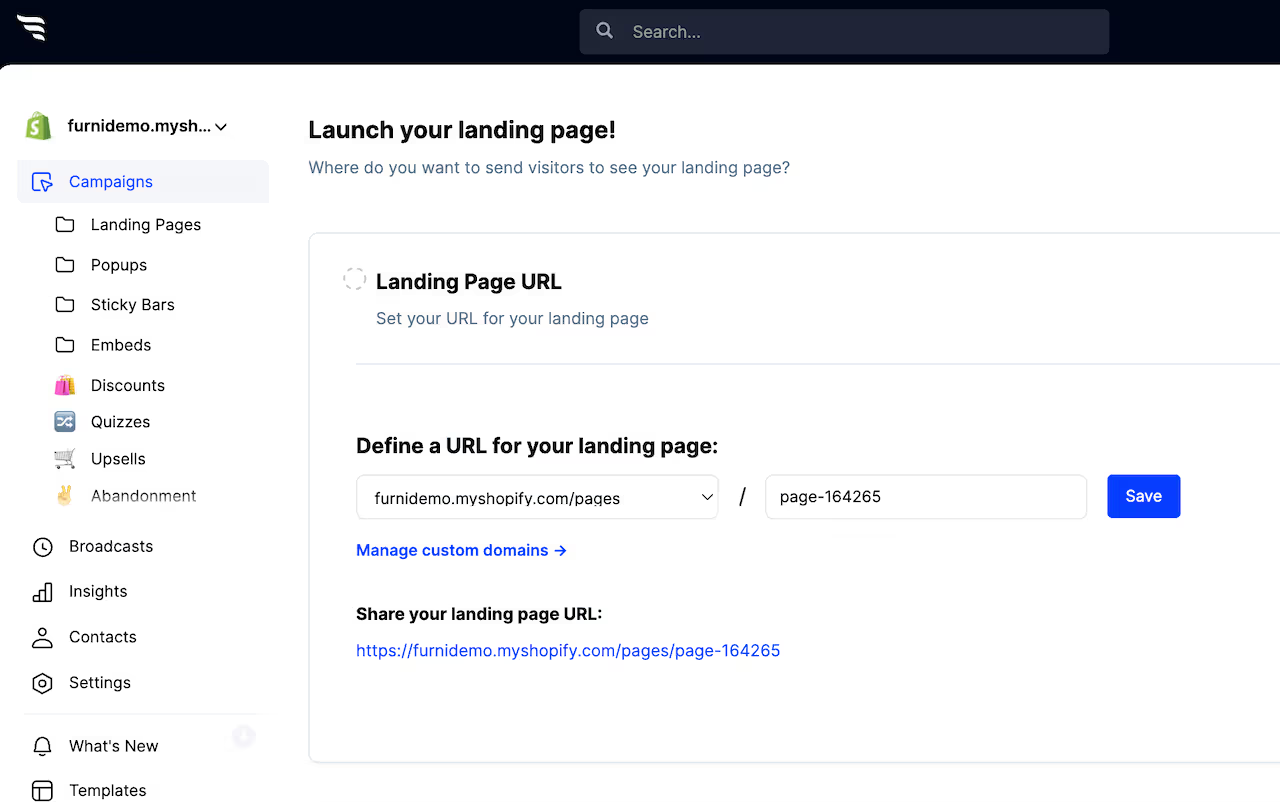
Using a subdomain of your main domain keeps the page recognisably yours in ads and email, without touching your WordPress install.
Split traffic between variants and read views, submissions and attributed revenue per variant in the funnel report.
.avif)
This is the practical argument against building landing pages in your theme. Running a genuine A/B test in WordPress means either a plugin or a developer; here it's a toggle.
To see templates and the full feature set, visit the WordPress landing page builder.
Create a free ConvertFlow account and integrate
WordPress
in minutes.
Integrate ConvertFlow with your WordPress site to target by posts, pages, categories and more.
Connect For Free










.svg)