
Playbook summary
Discover The ConvertFlow Funnel Builder And How To Launch Your First Campaign
- Industry:Any
- Metrics affected:Conversion Rate
- Campaign type:General
Tools you'll need
- A ConvertFlow account [Login / Create Account]
Quick setup
Welcome to ConvertFlow, the all-in-one funnel builder.
With ConvertFlow, you can create, test and personalize conversion funnels using popups, landing pages, forms, quizzes, surveys, product recommendations, cart upsells, cross-sells, sticky bars, embedded CTAs, and so much more, all from one dashboard.
And the best part is you can do all of this without waiting on developers.
Before ConvertFlow
If you’re like most marketers, before ConvertFlow, managing your conversion funnel is a chaotic mess of apps, plugins, scripts and zaps. Your reporting is all over the place and trying to get your tools to communicate and share data is a nightmare. You may also find yourself relying on developers to make technical things work properly.
And as soon as you invite another team member to help work on your funnel, you realize how much of a mess everything really is.
With ConvertFlow
Enter ConvertFlow, and now all your website’s conversion campaigns are beautifully organized into one platform.

Getting conversion reports is crystal clear. Making changes and running funnel experiments takes just minutes.
Launching new campaigns is effortless with templates to improve just about any funnel metric you can think of.
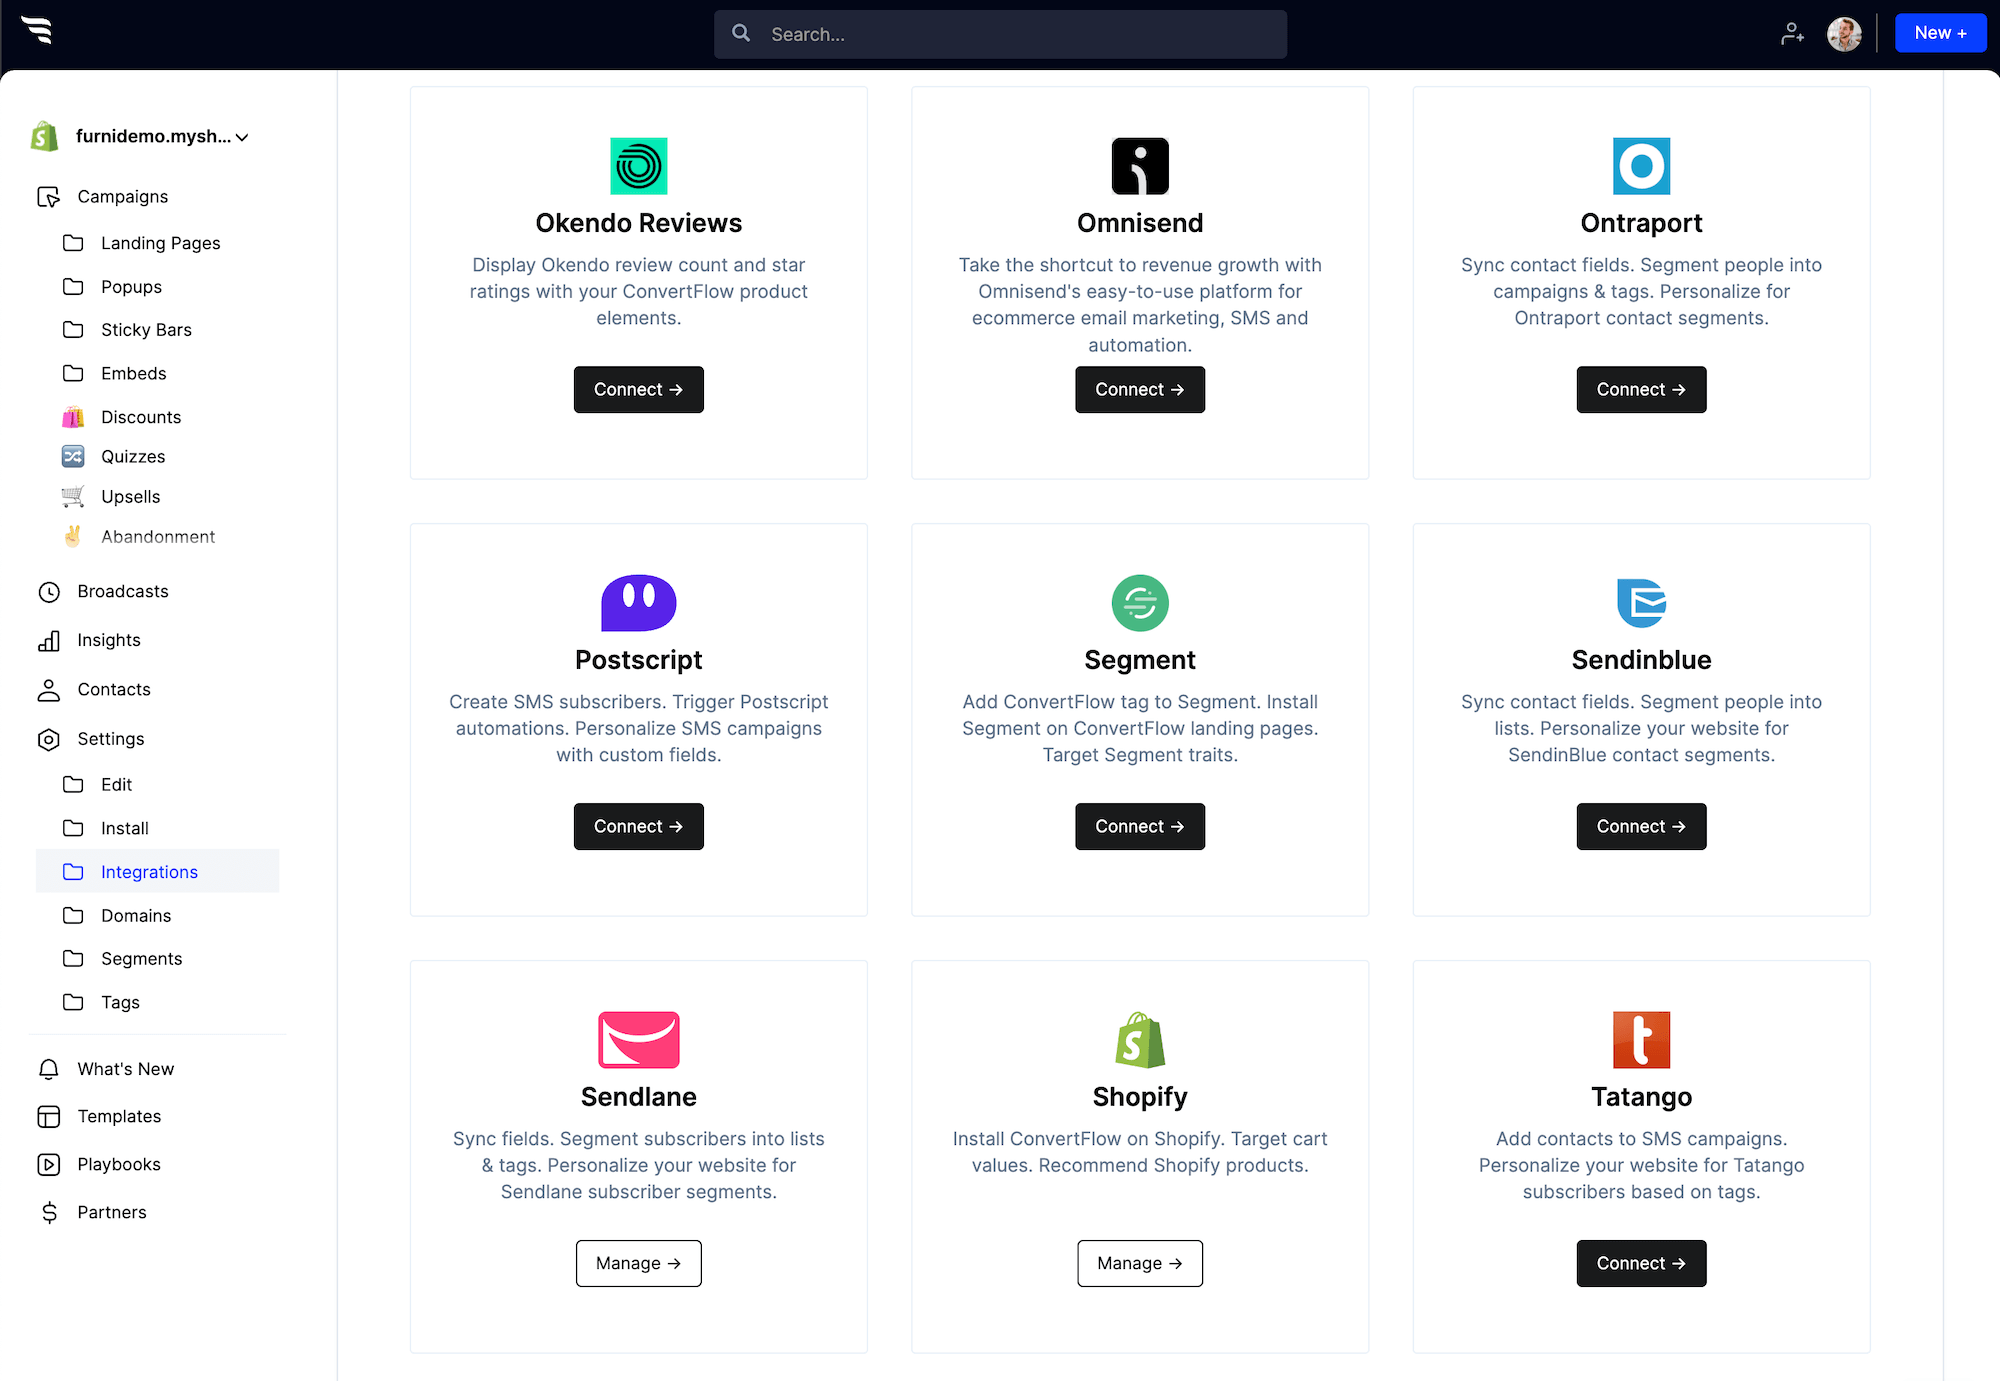
Turn-key integrations with your favorite marketing tools make it easy to sync data and automate everything, while skipping the zaps and custom scripts.
You also don’t need to worry about breaking your site. ConvertFlow works out of the box, regardless of which website platform you use.
Using Shopify, Wordpress, or Google Tag Manager? Installing ConvertFlow takes just one click.
And did we mention you no longer have to wait on developers? That means, no more bugging the tech guys each time you’ve got some new conversion idea to test.
Going deeper with ConvertFlow
It doesn’t end there. ConvertFlow gives you marketing superpowers, with conditional logic, website personalization and more, so you can go deeper and optimize conversions for any shopper segment on your website.
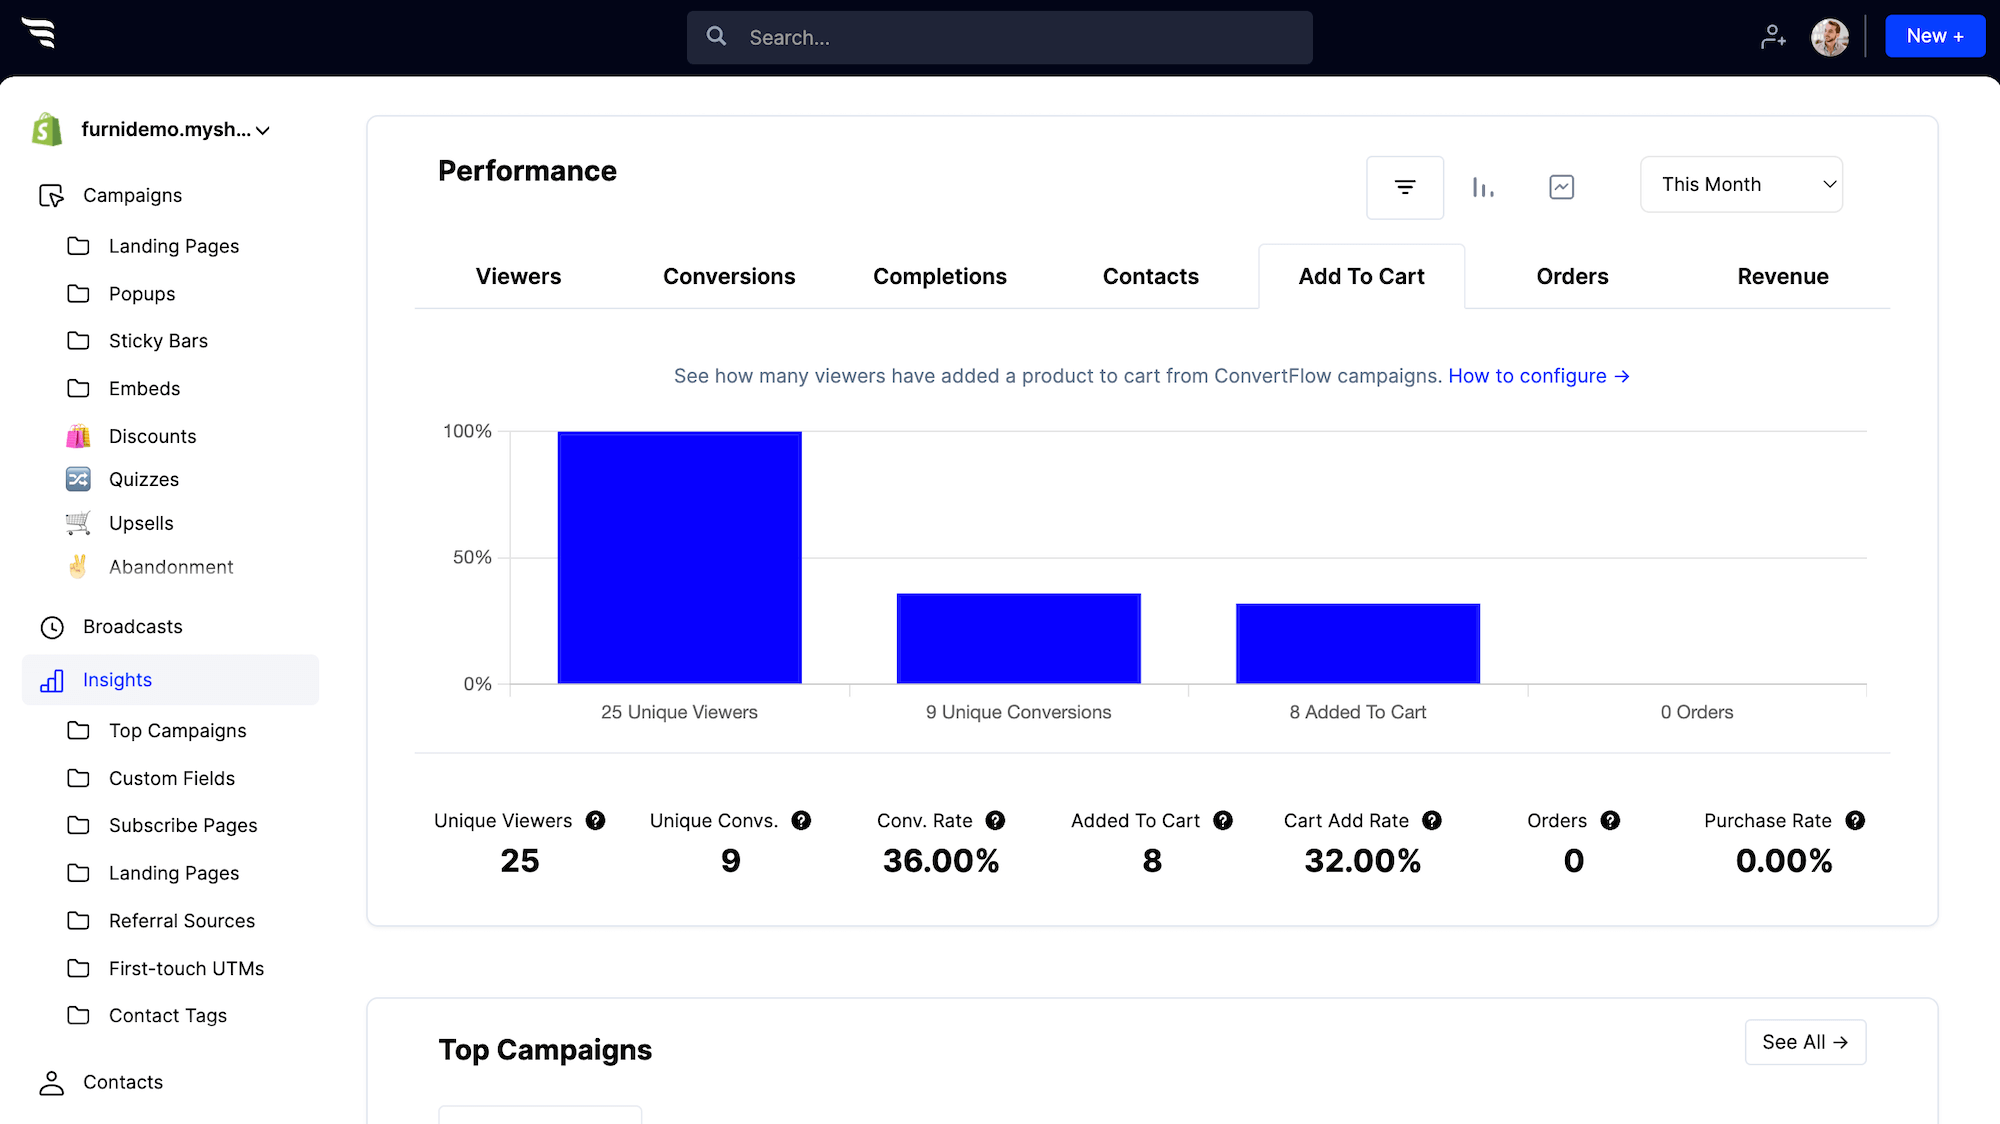
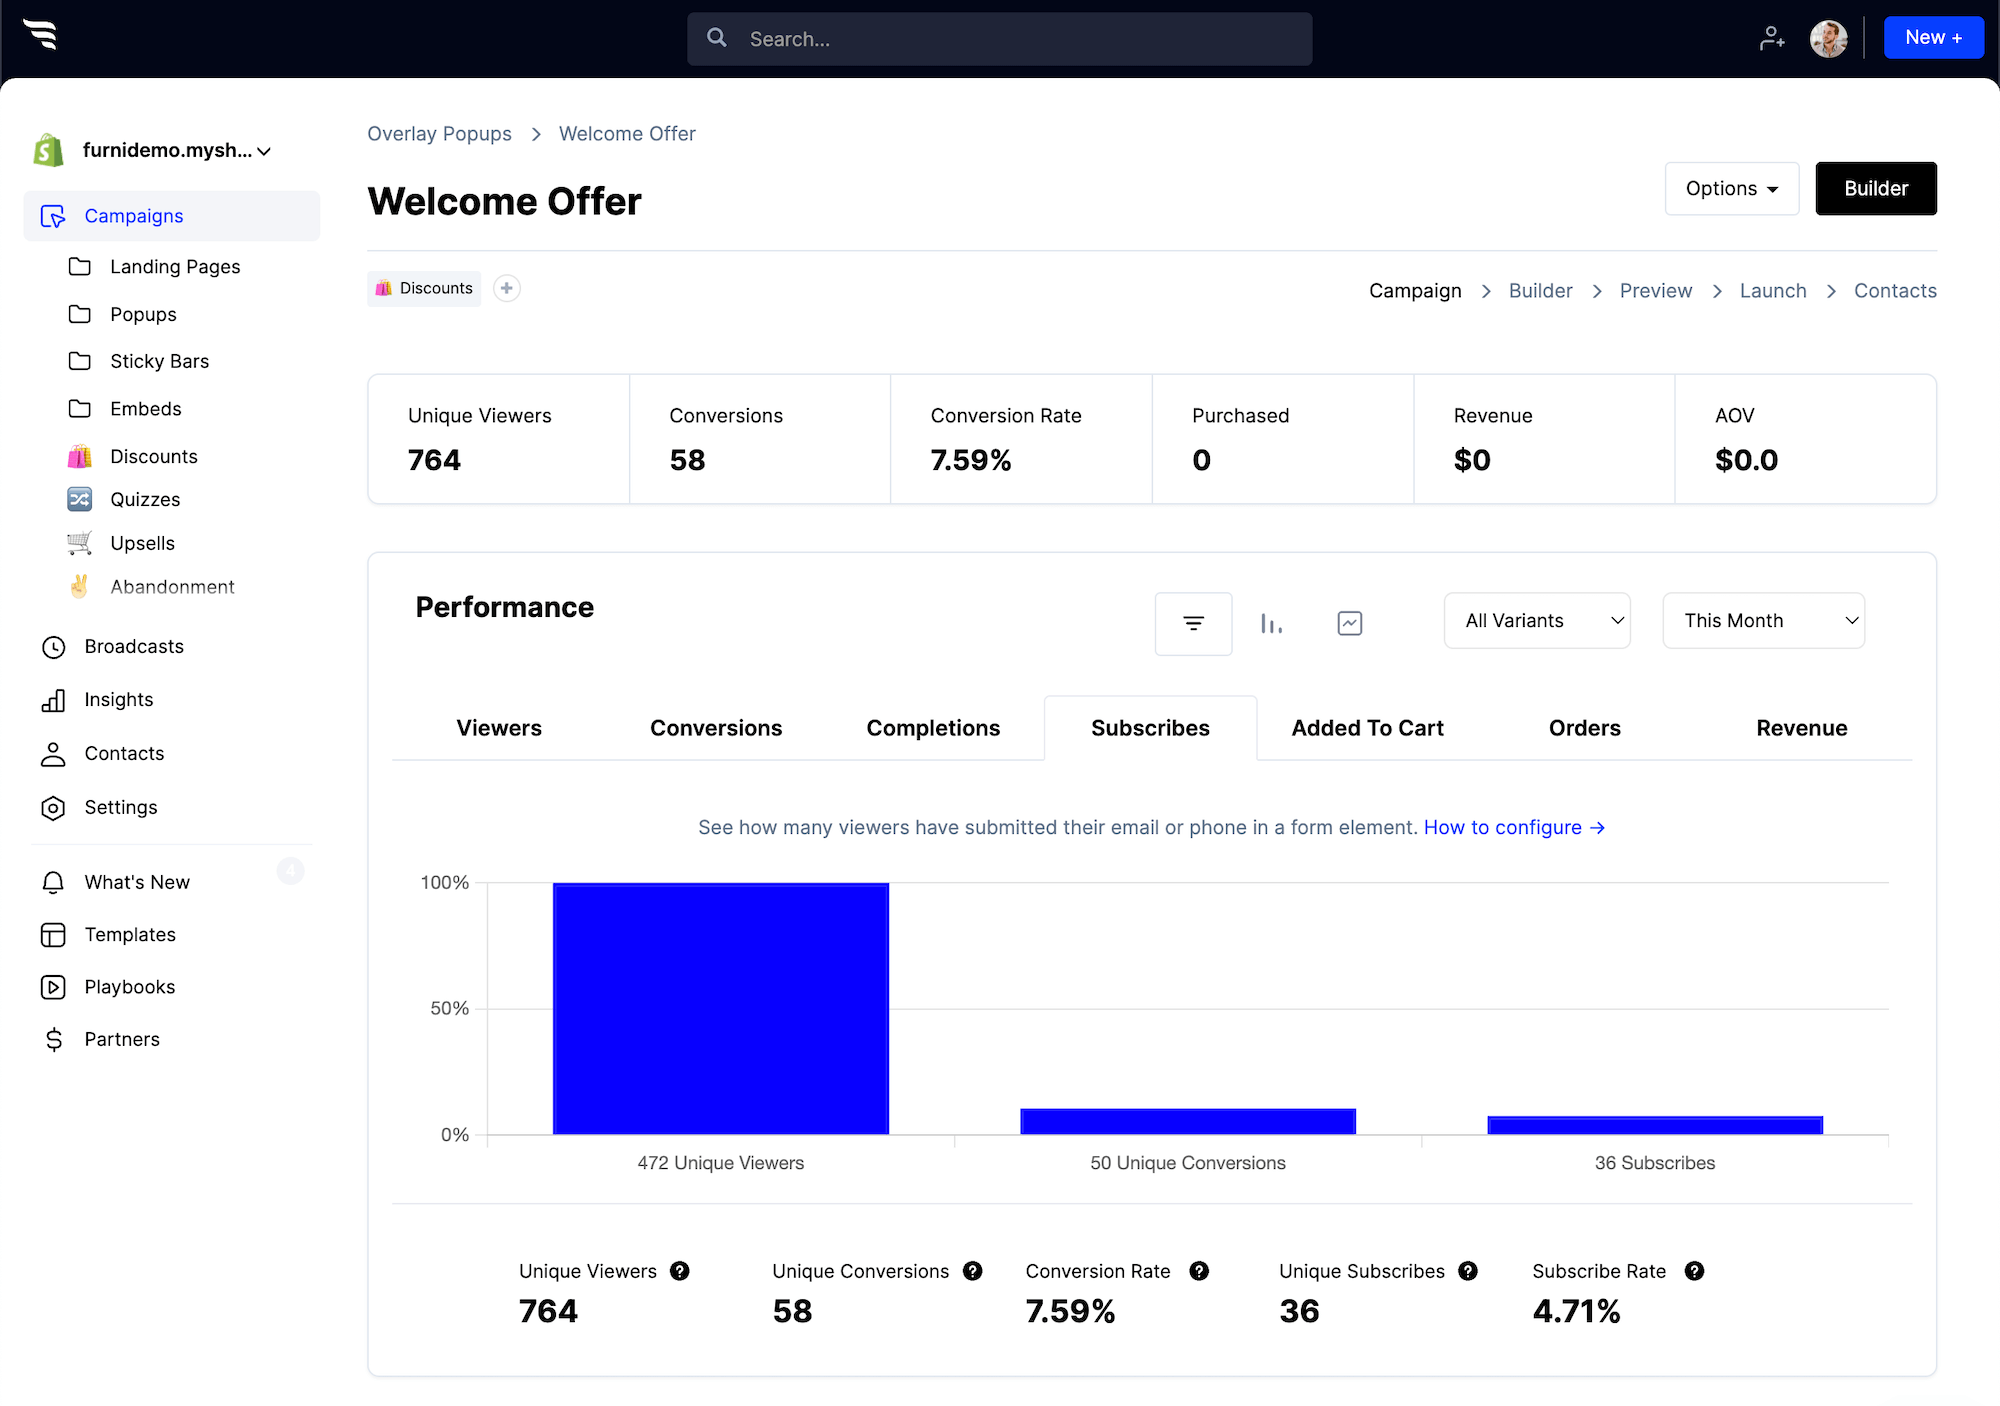
To get a birds-eye view of your performance, head over to the funnel insights page, where you can see list growth reports, attribution insights, top ad campaigns and more.
And if you’re like most marketers using ConvertFlow, before you know it you’ll have dozens, possibly hundreds of live campaigns driving growth for you.
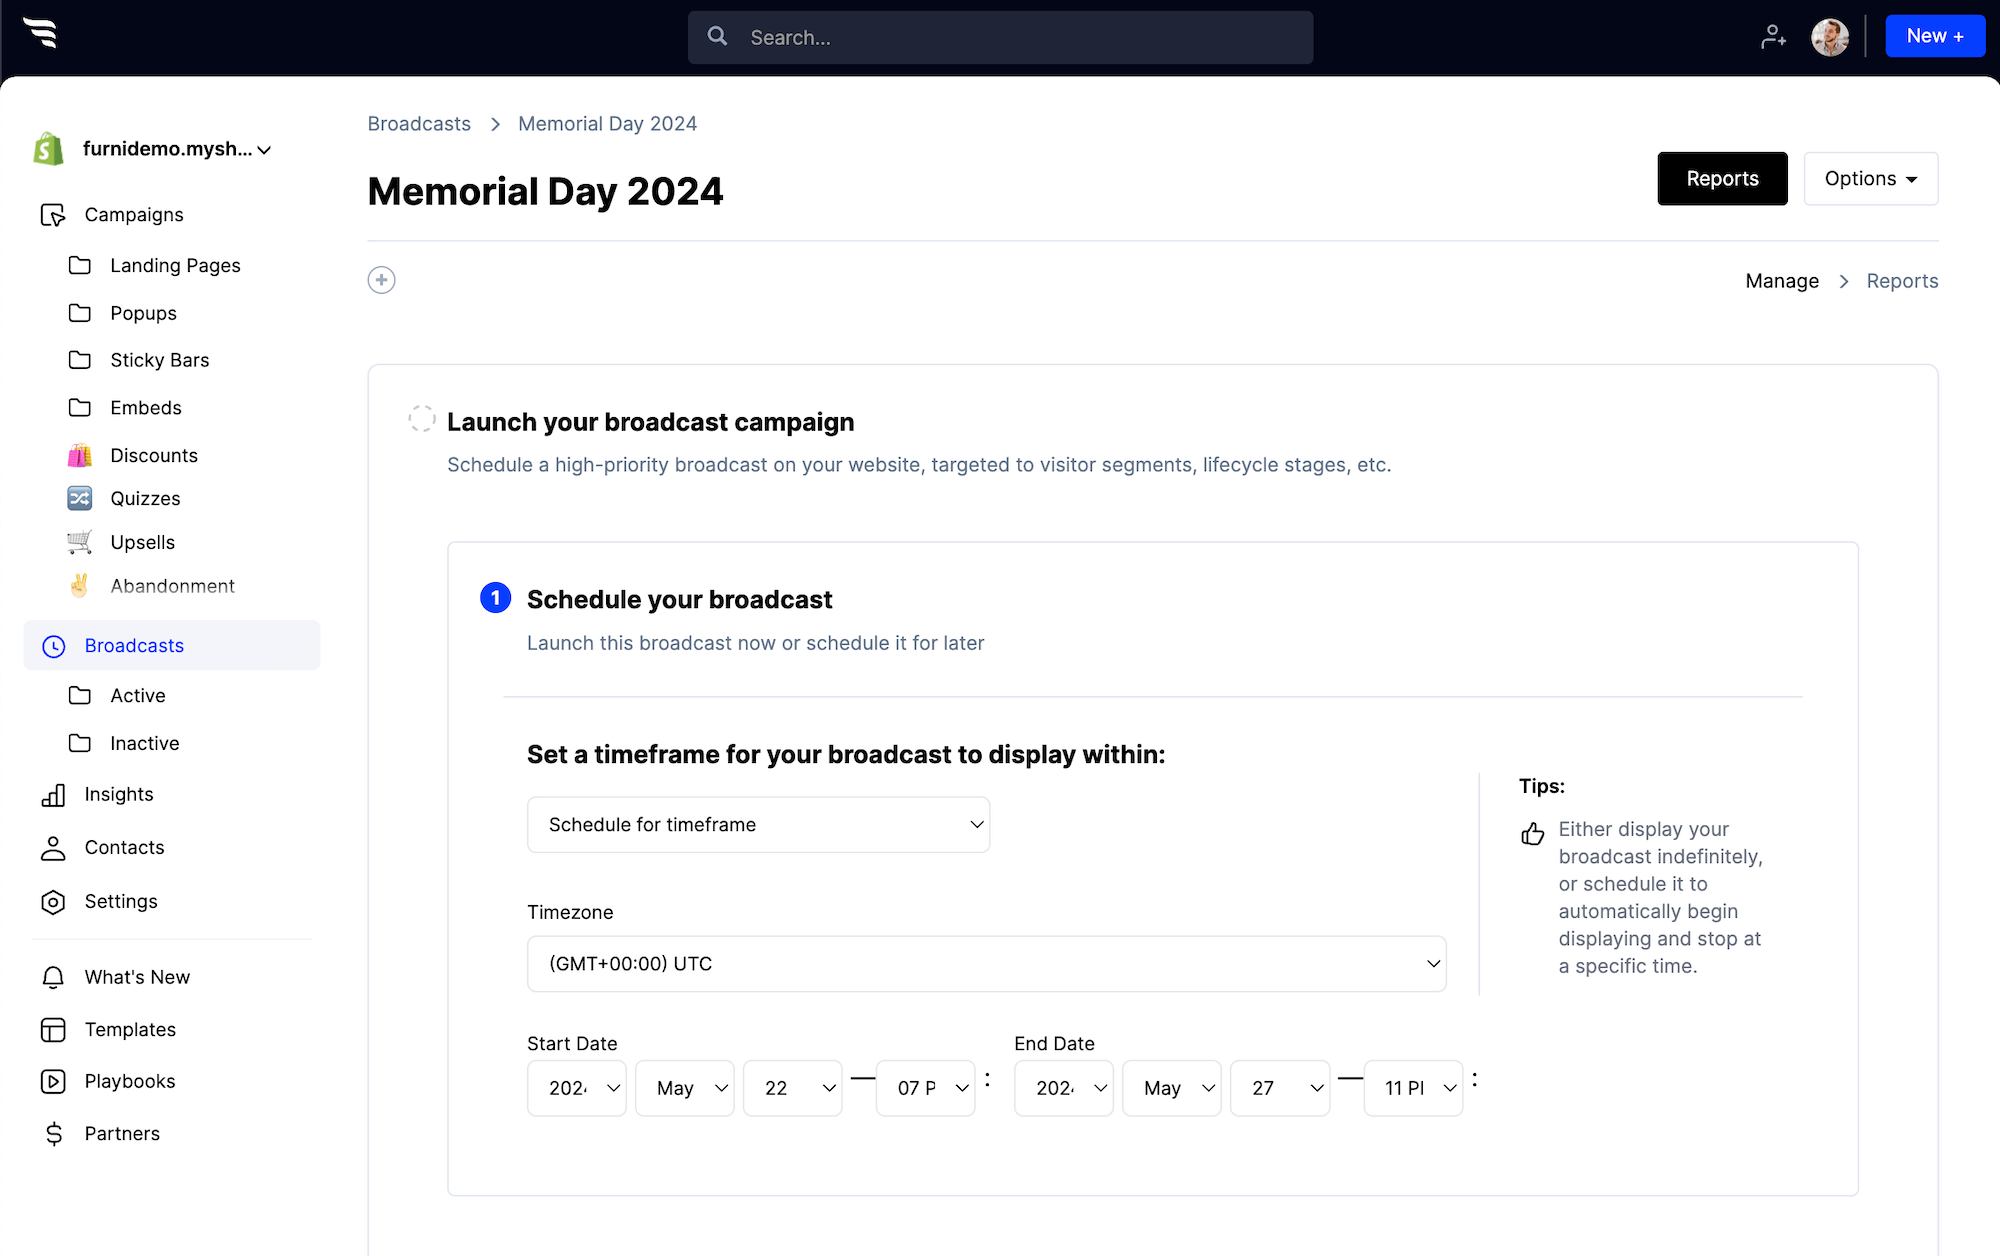
ConvertFlow makes scaling your marketing workflow easy. You can schedule high-priority broadcast campaigns, so that your promotions run on autopilot.
You can also save your own templates, manage multiple websites from one account, set team and client permissions, and so much more.

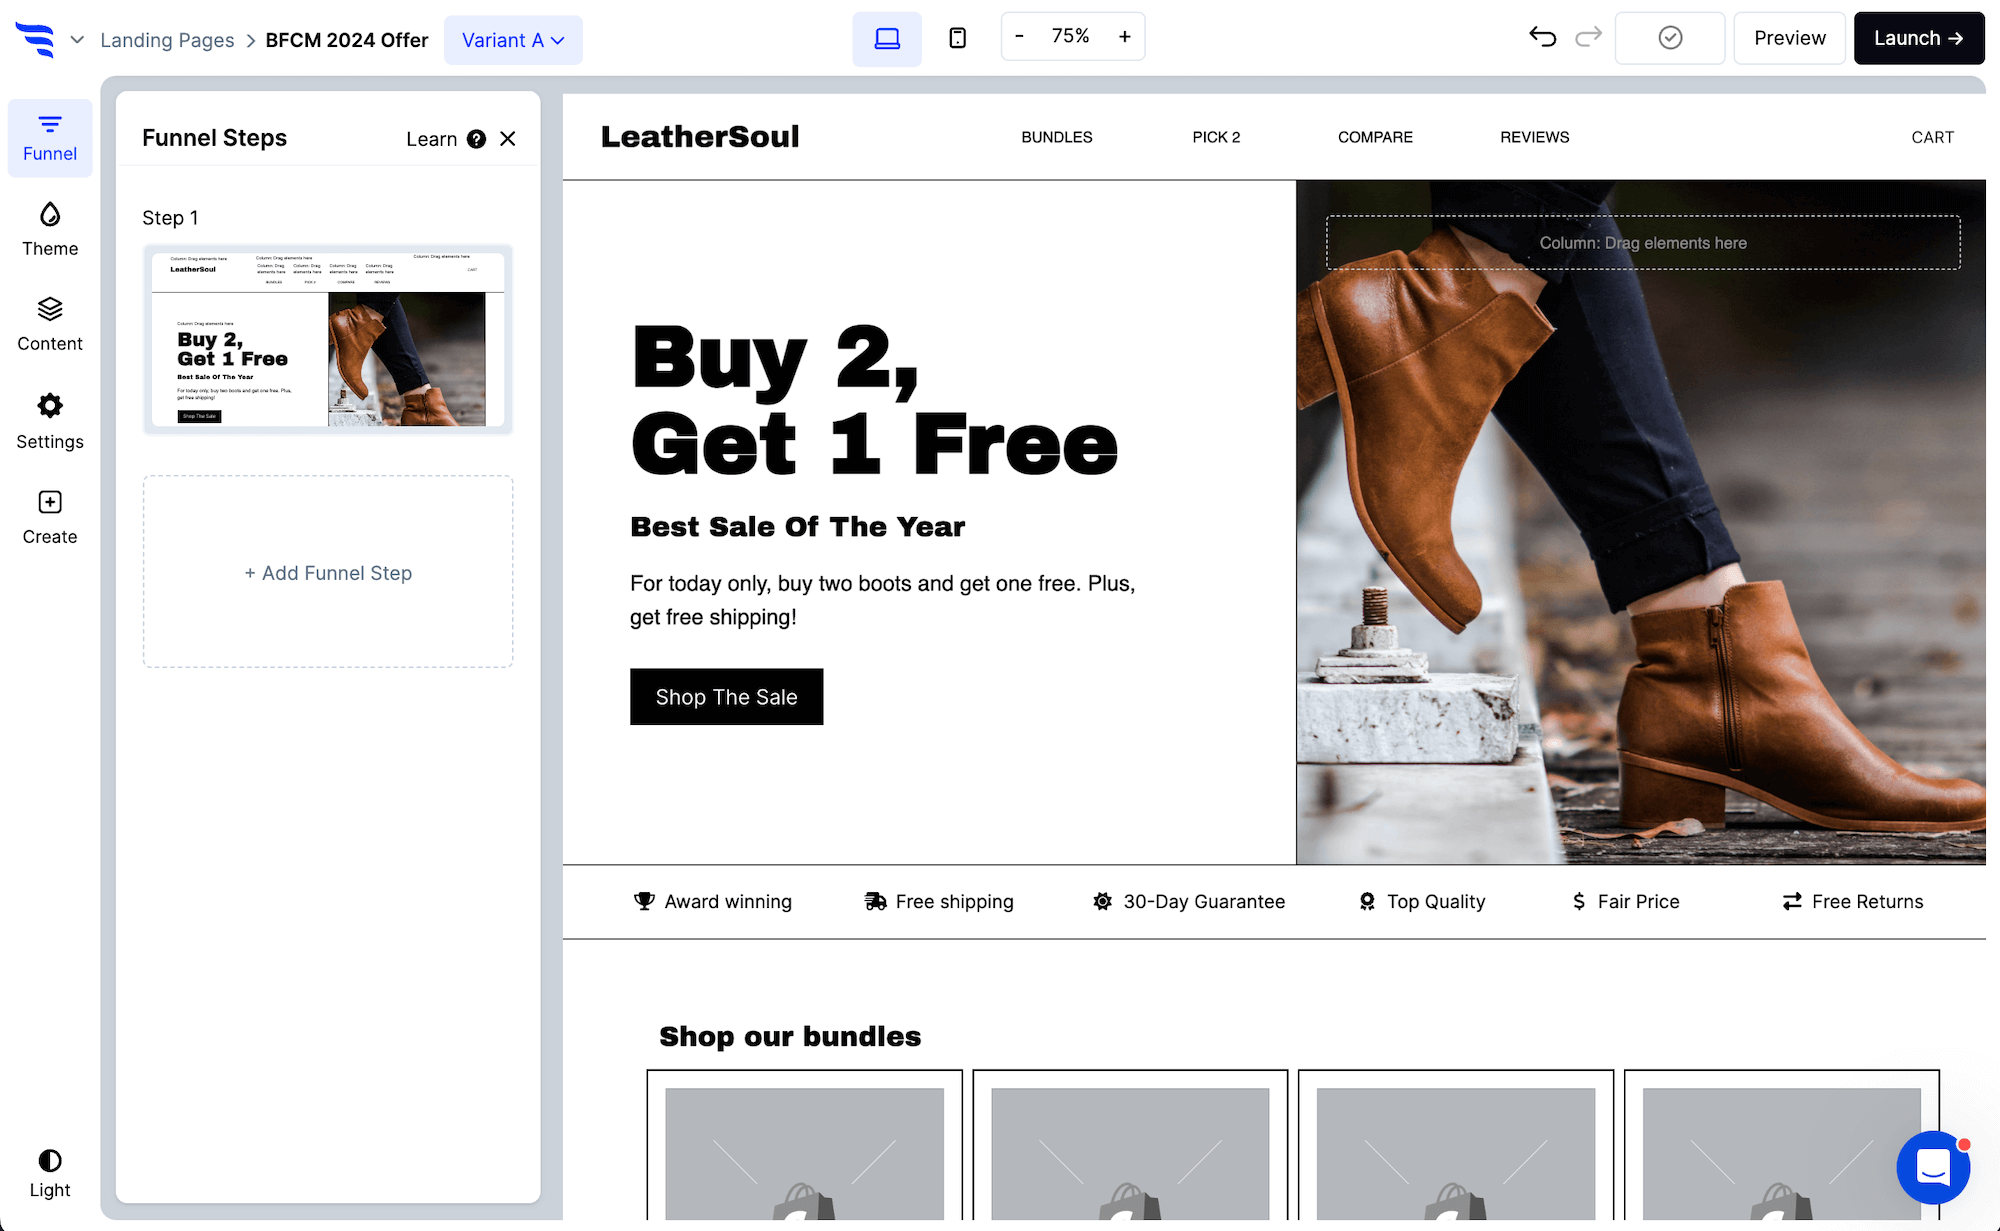
How to launch your first campaign
First, head to the ConvertFlow dashboard. Click to create a new campaign, and you’ll have hundreds of templates to choose from.
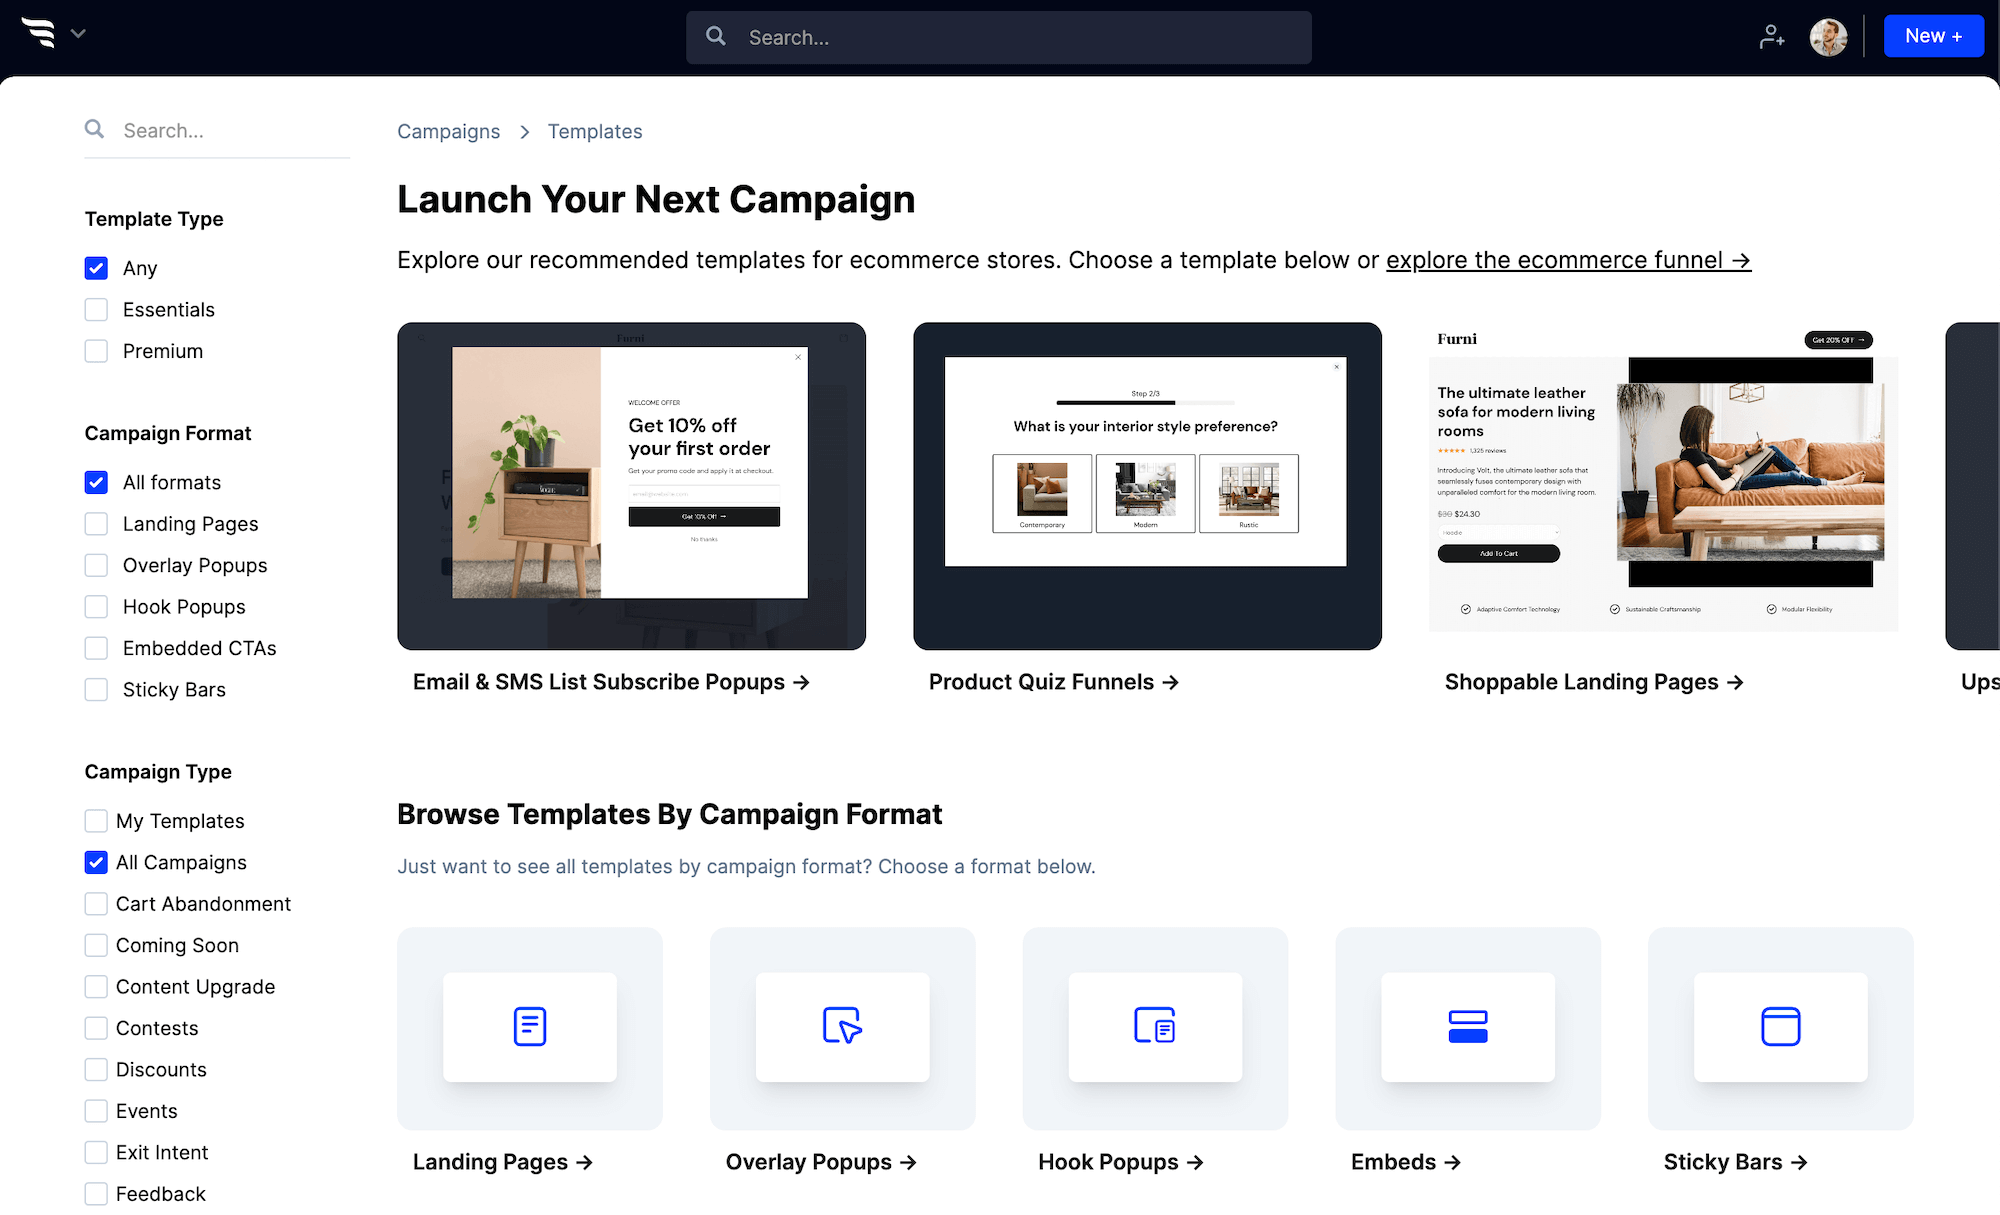
The top campaign templates you need to launch are front and center, based on data from 100,000’s of campaigns created in ConvertFlow and billions of shopper interactions tracked.
Once you see the perfect template for your website, give your campaign a name and click to create it.
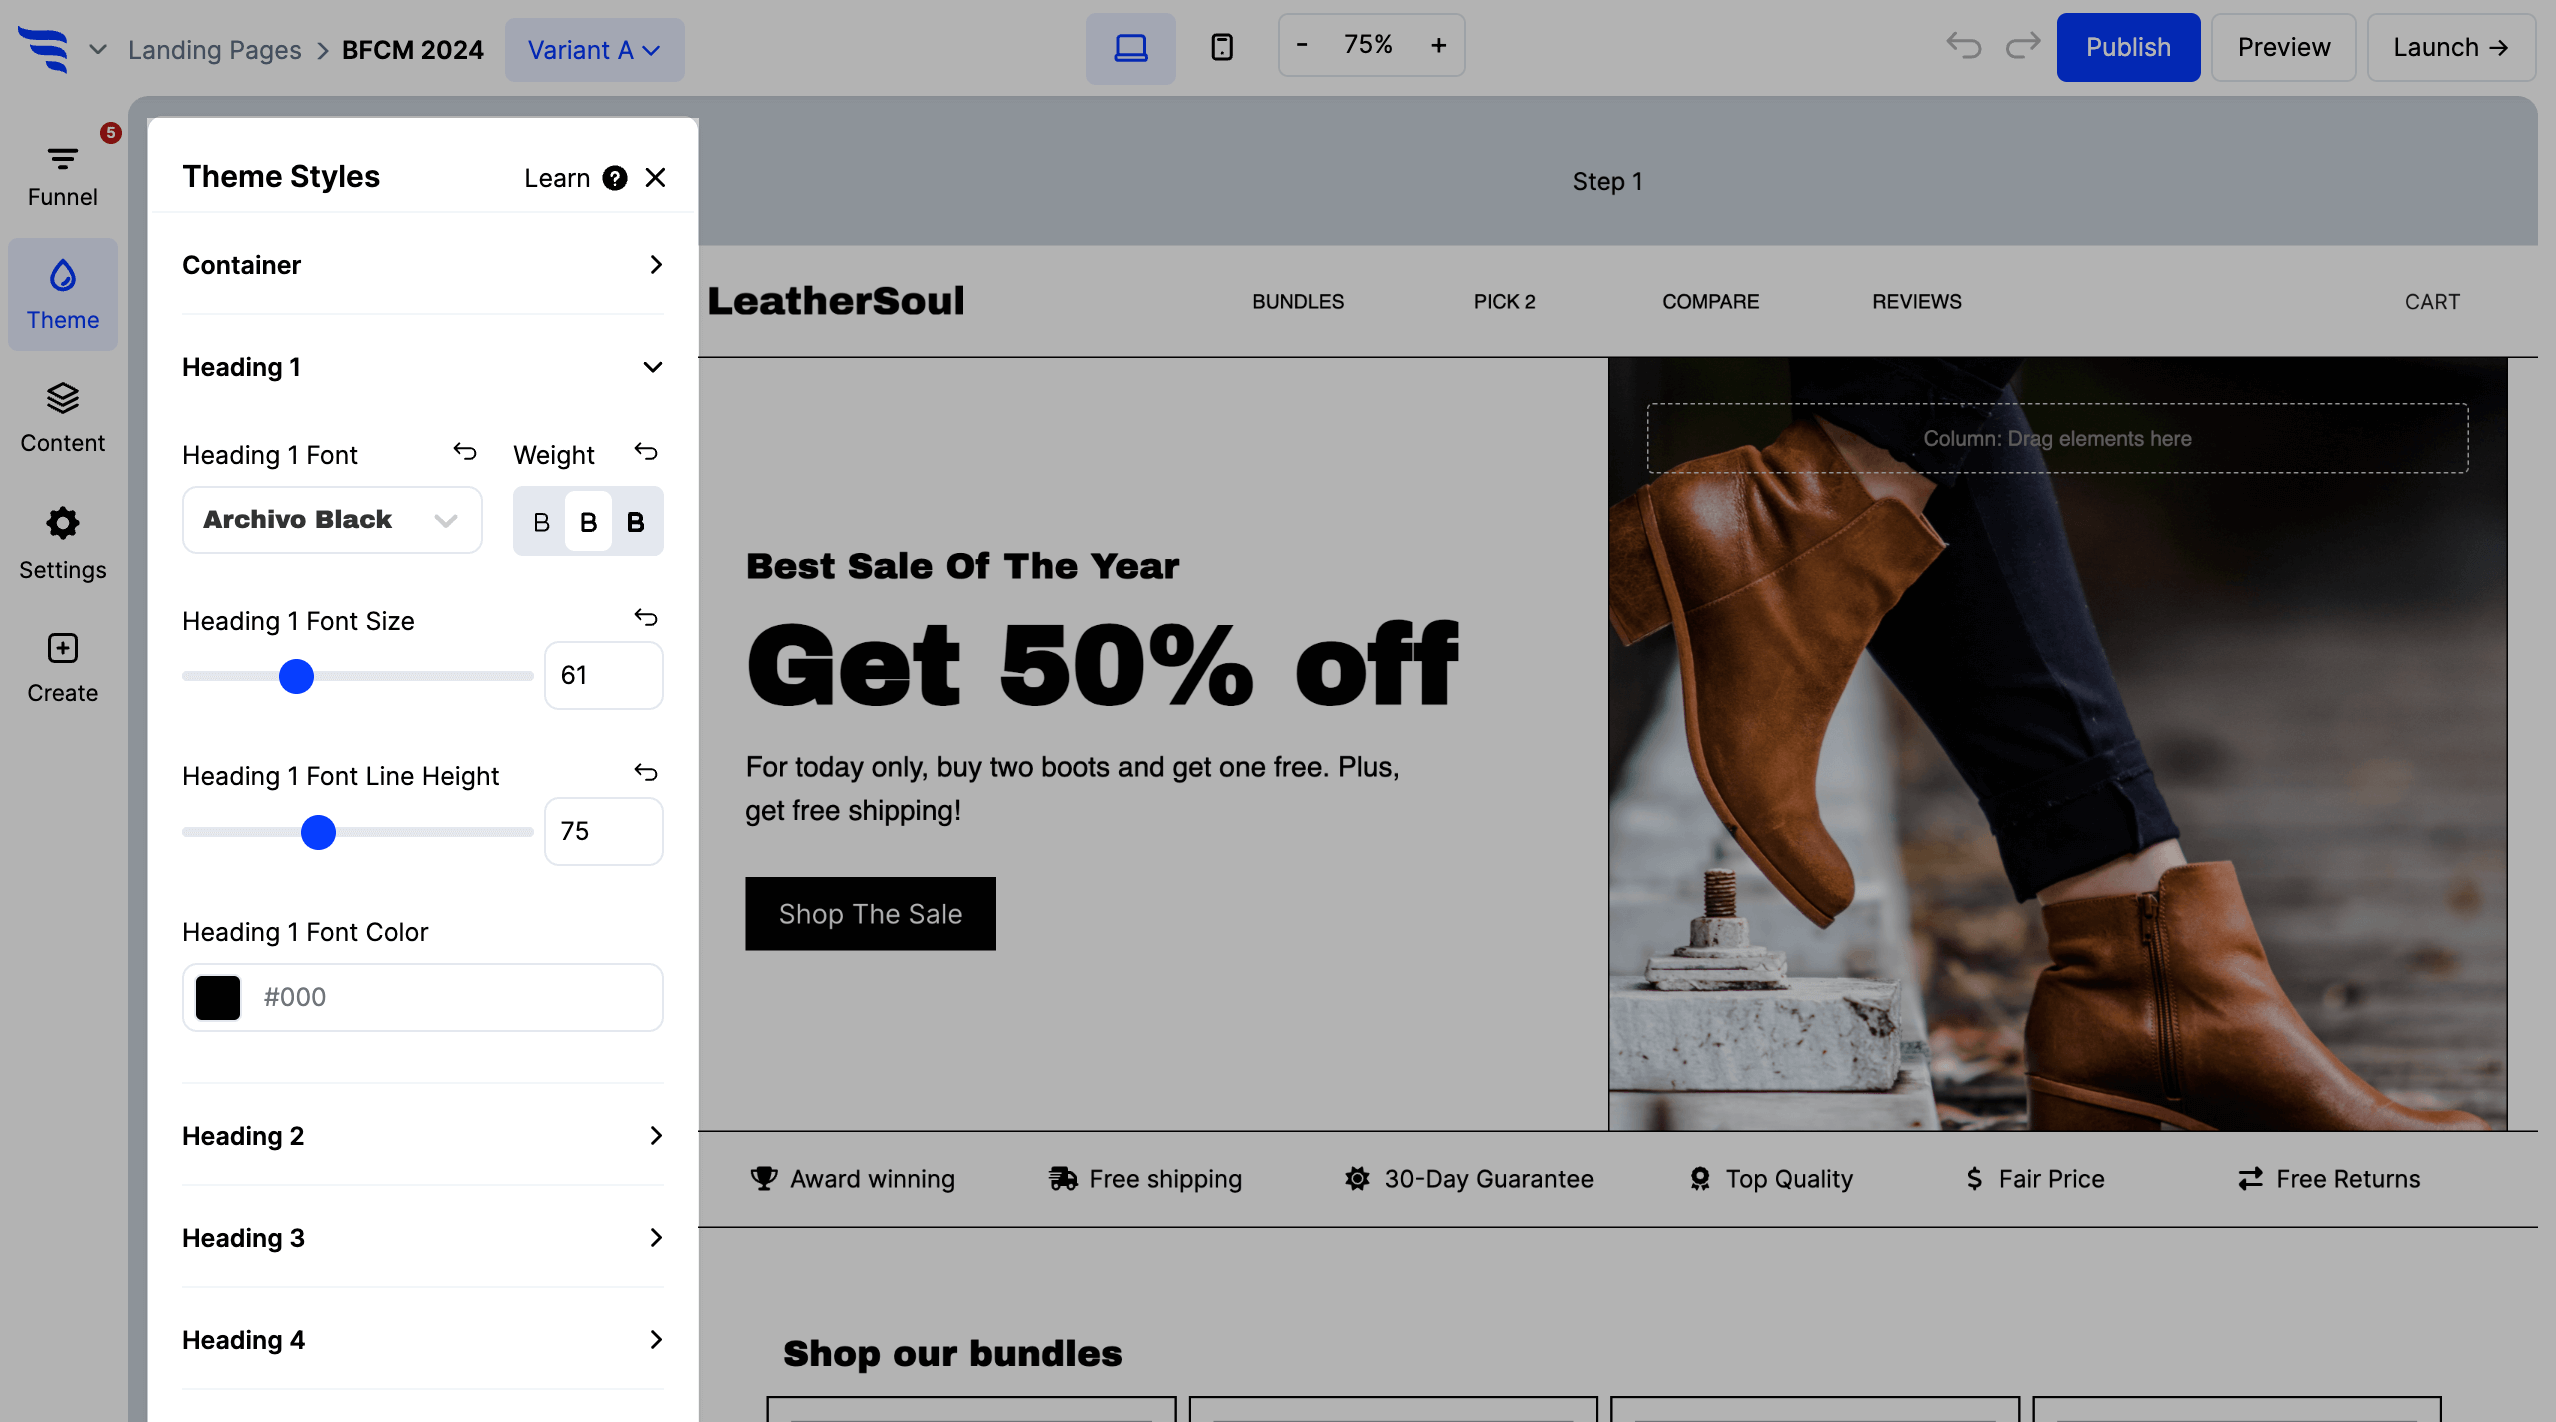
Now, welcome to the funnel builder. With the funnel builder, you can build anything you want, without code. But let’s not get ahead of ourselves, we’ve got a campaign to launch!

Click to edit the text. Use the themes tab to adjust the theme style of your campaign. This allows you to set the styling options of all your text elements, buttons, forms, and more. This way, your campaign’s design will be on-brand in just seconds.
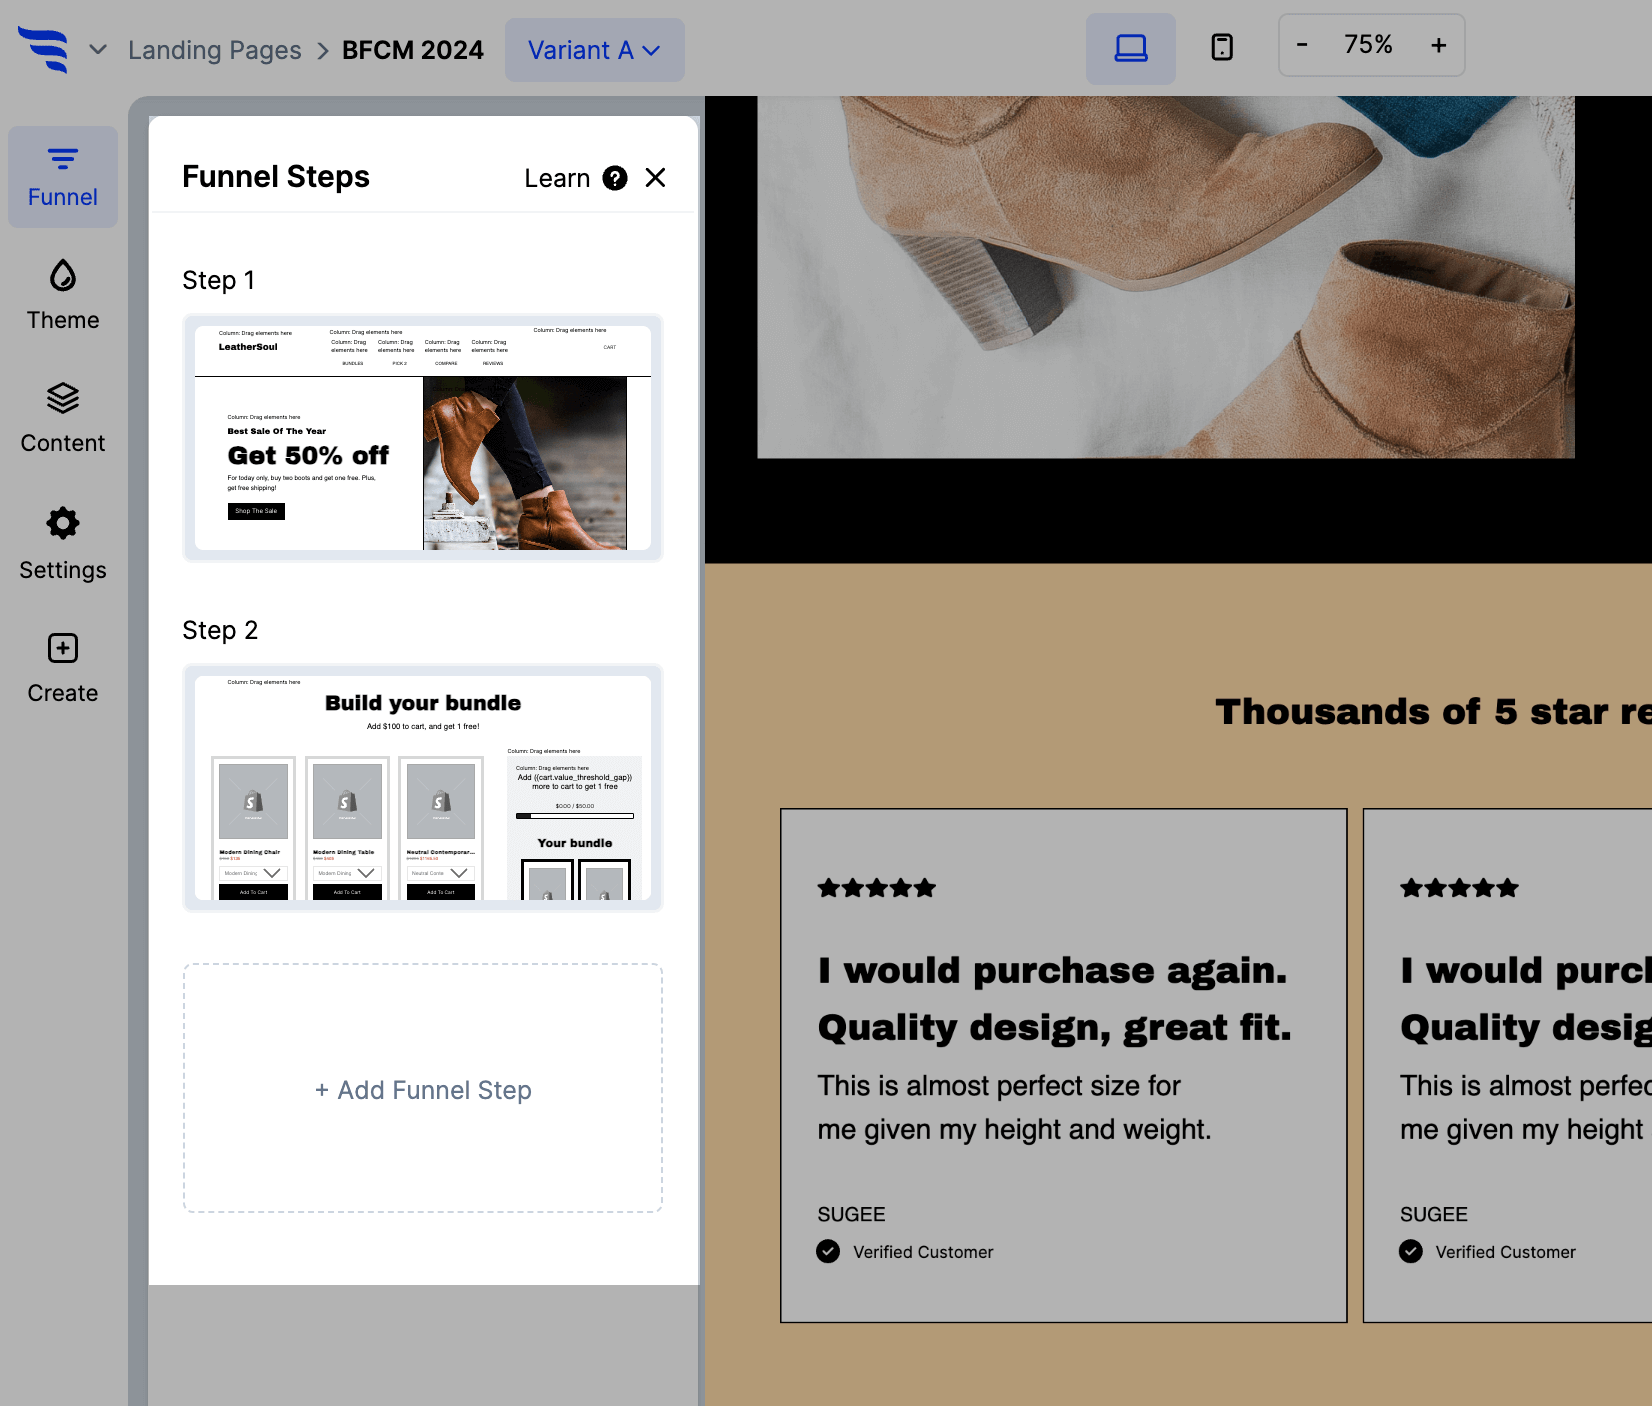
Add, duplicate or remove any elements you want.

Need to add additional funnel steps? Add as many as you’d like.
Launching with a form? Don’t forget to integrate. Connect an integration, and add automations to segment contacts, as well as fire off messages and events in your email & SMS marketing tools.

Launching a popup? Set the trigger settings to pop up based on time spent on page, scroll percentage or even upon exit-intent.

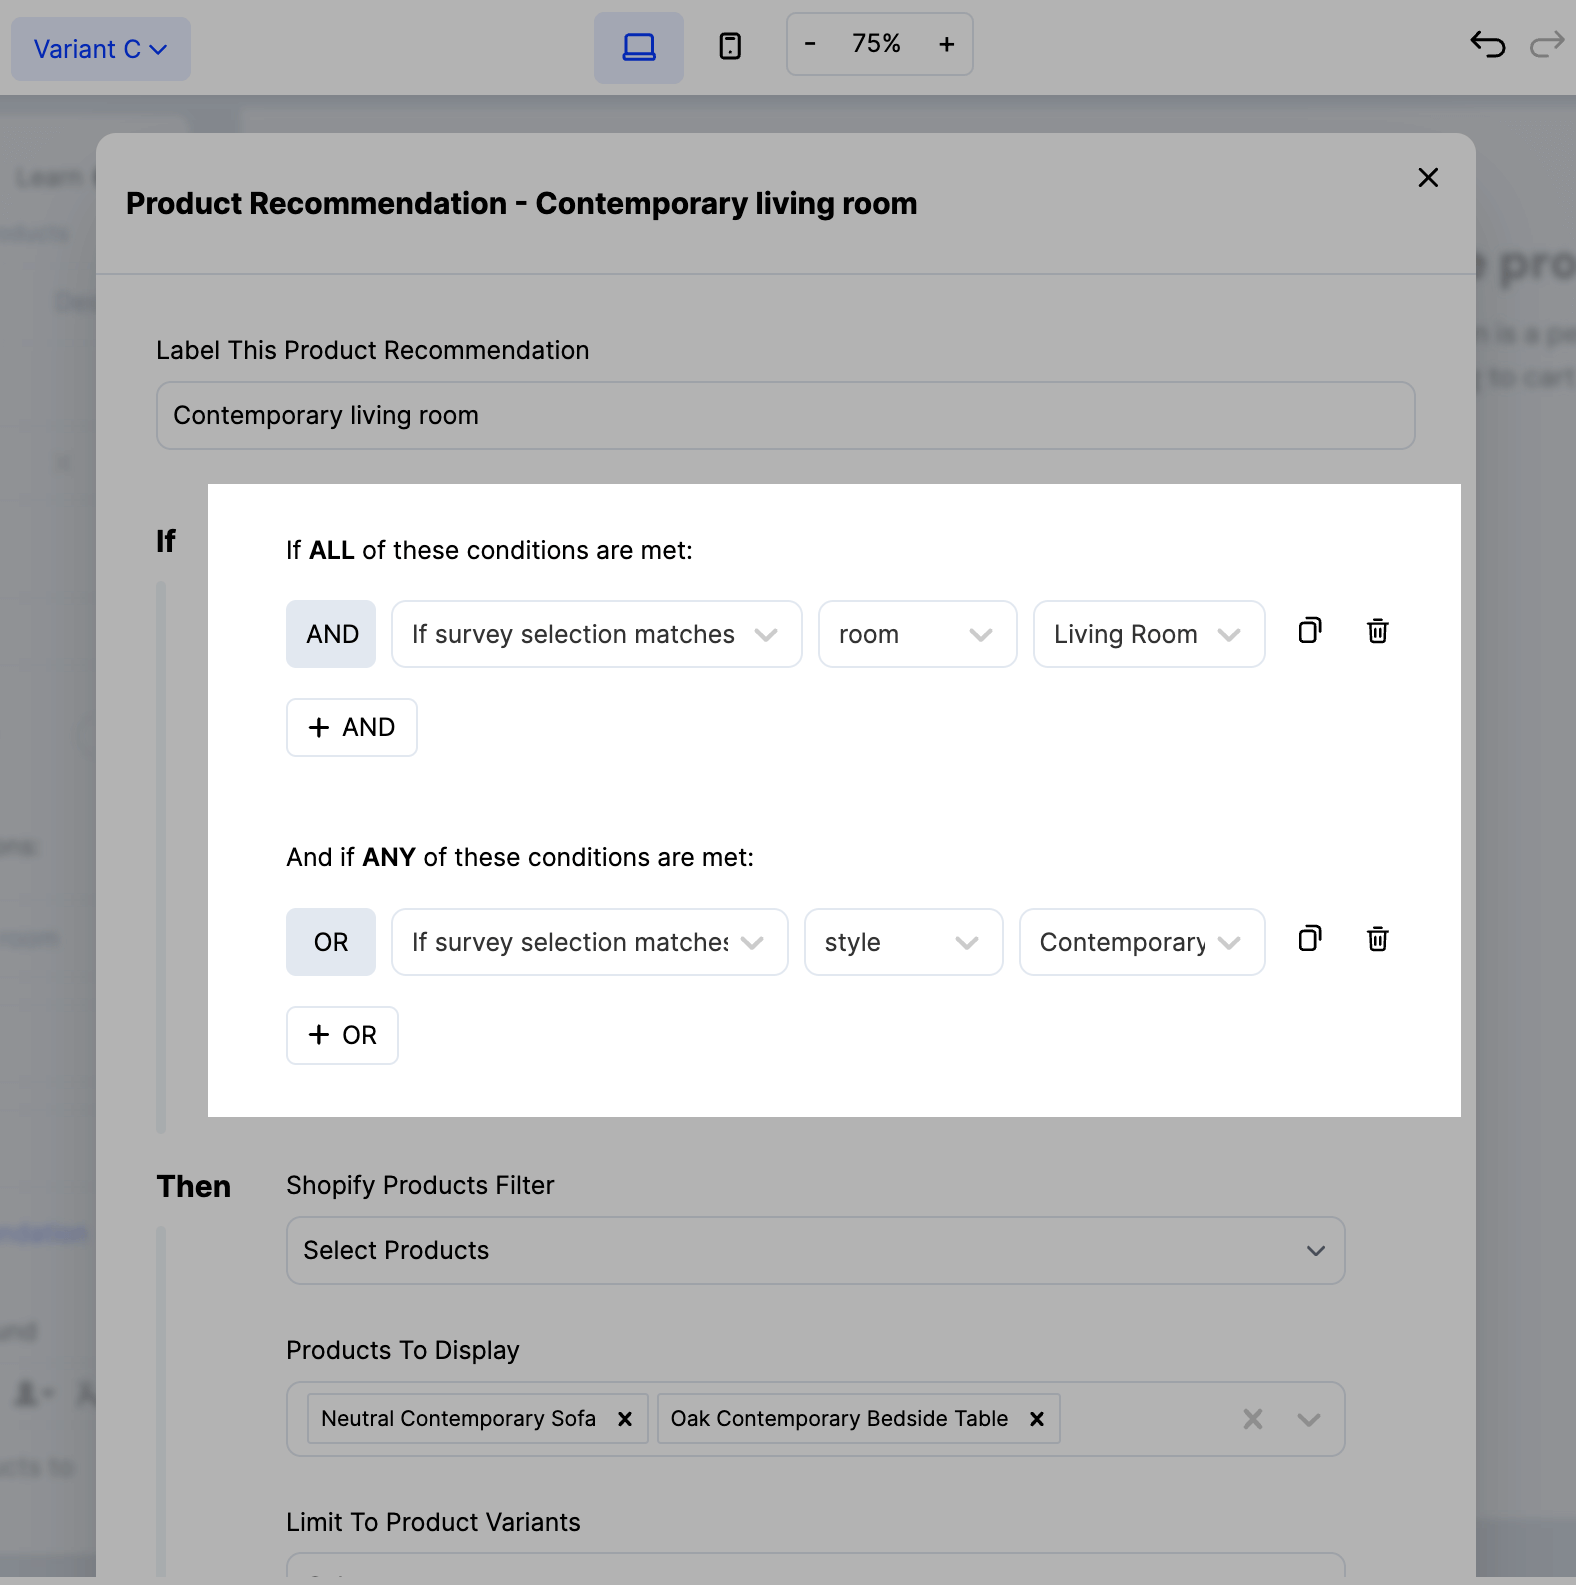
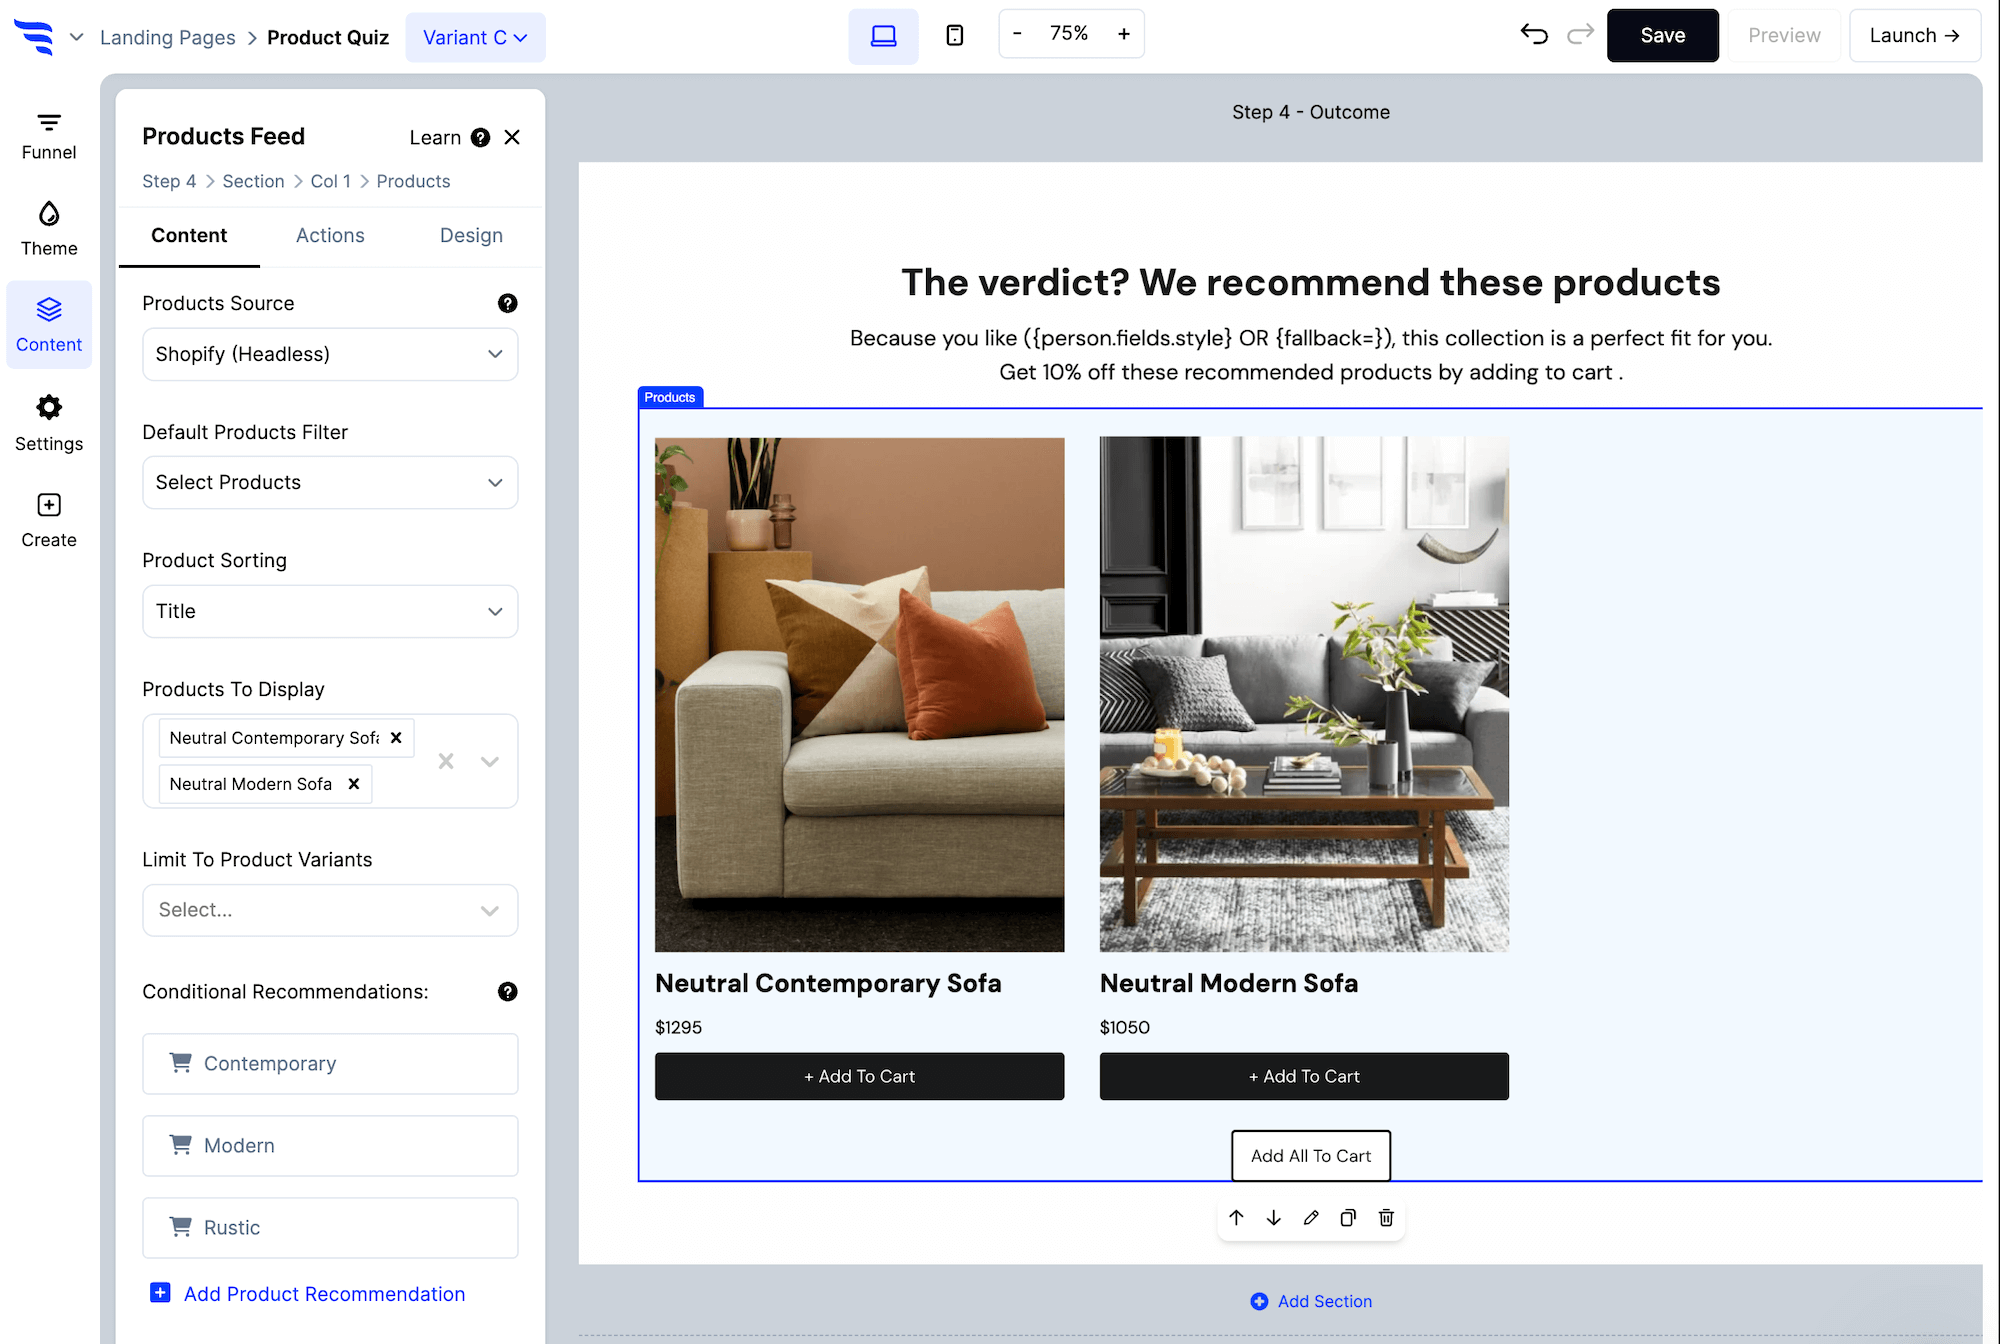
Recommending products? Tell ConvertFlow which Shopify products to showcase with product filters and conditional product recommendations. In one click, shoppers can add products to cart and be guided to checkout.
Don’t forget to save your work, and then preview your changes on desktop and mobile.
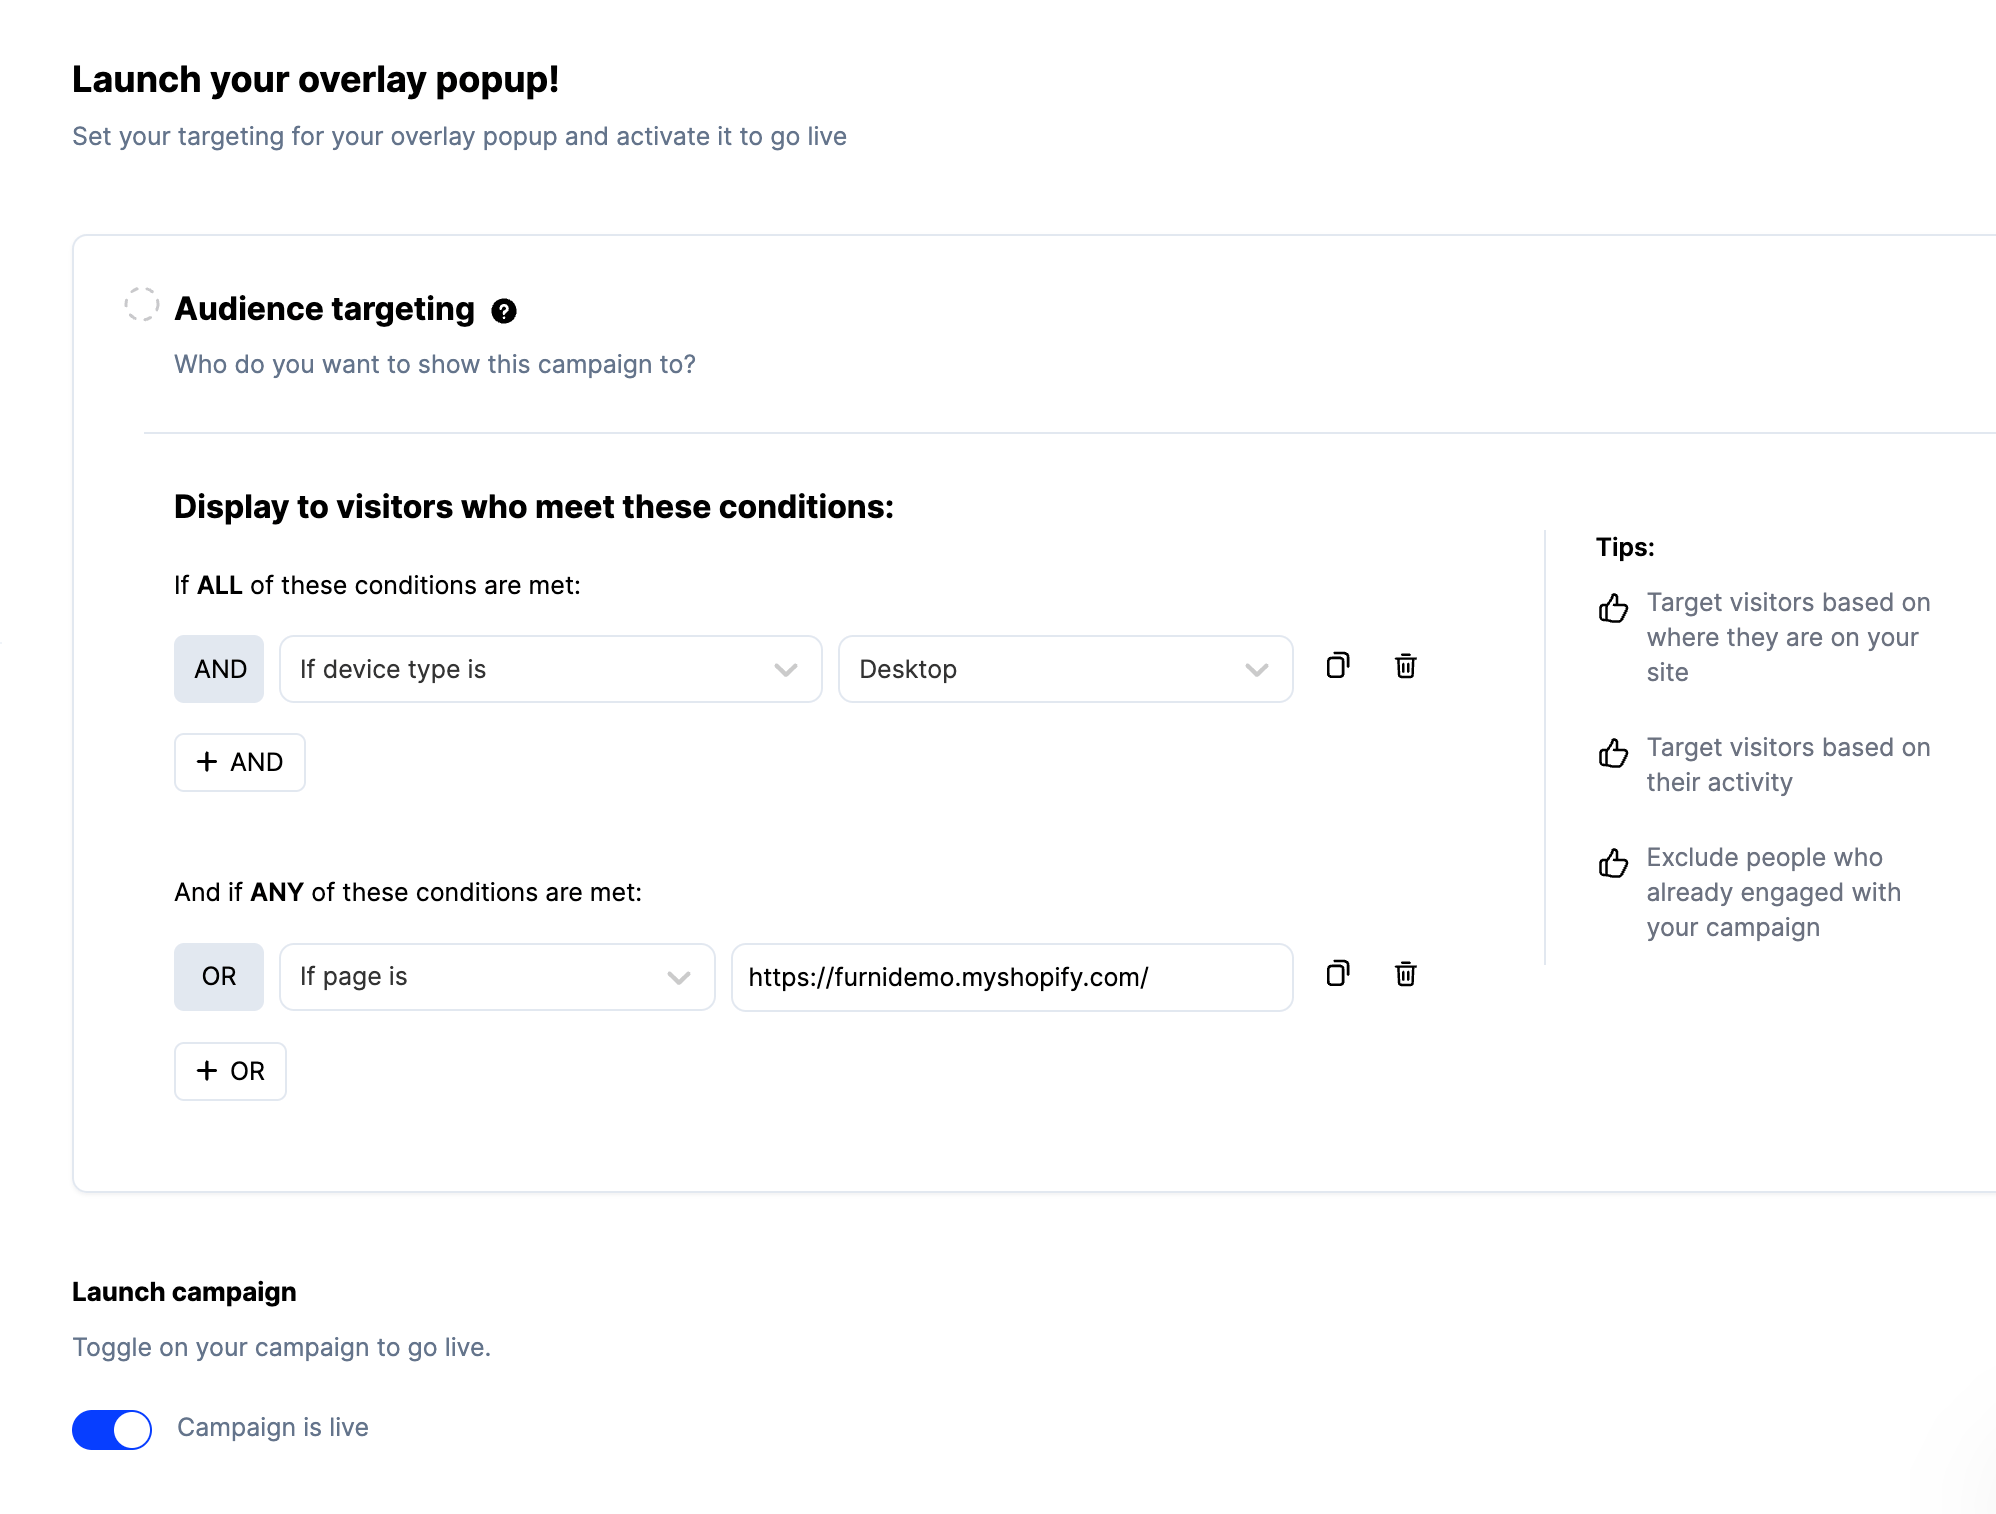
Then, add any campaign targeting conditions need to display your campaign to the right audience on your site.
Once we’re all set, click to launch your campaign.
If it’s a popup, you’ll be able to use ConvertFlow’s 1-click install feature with your favorite website platforms and tag managers.
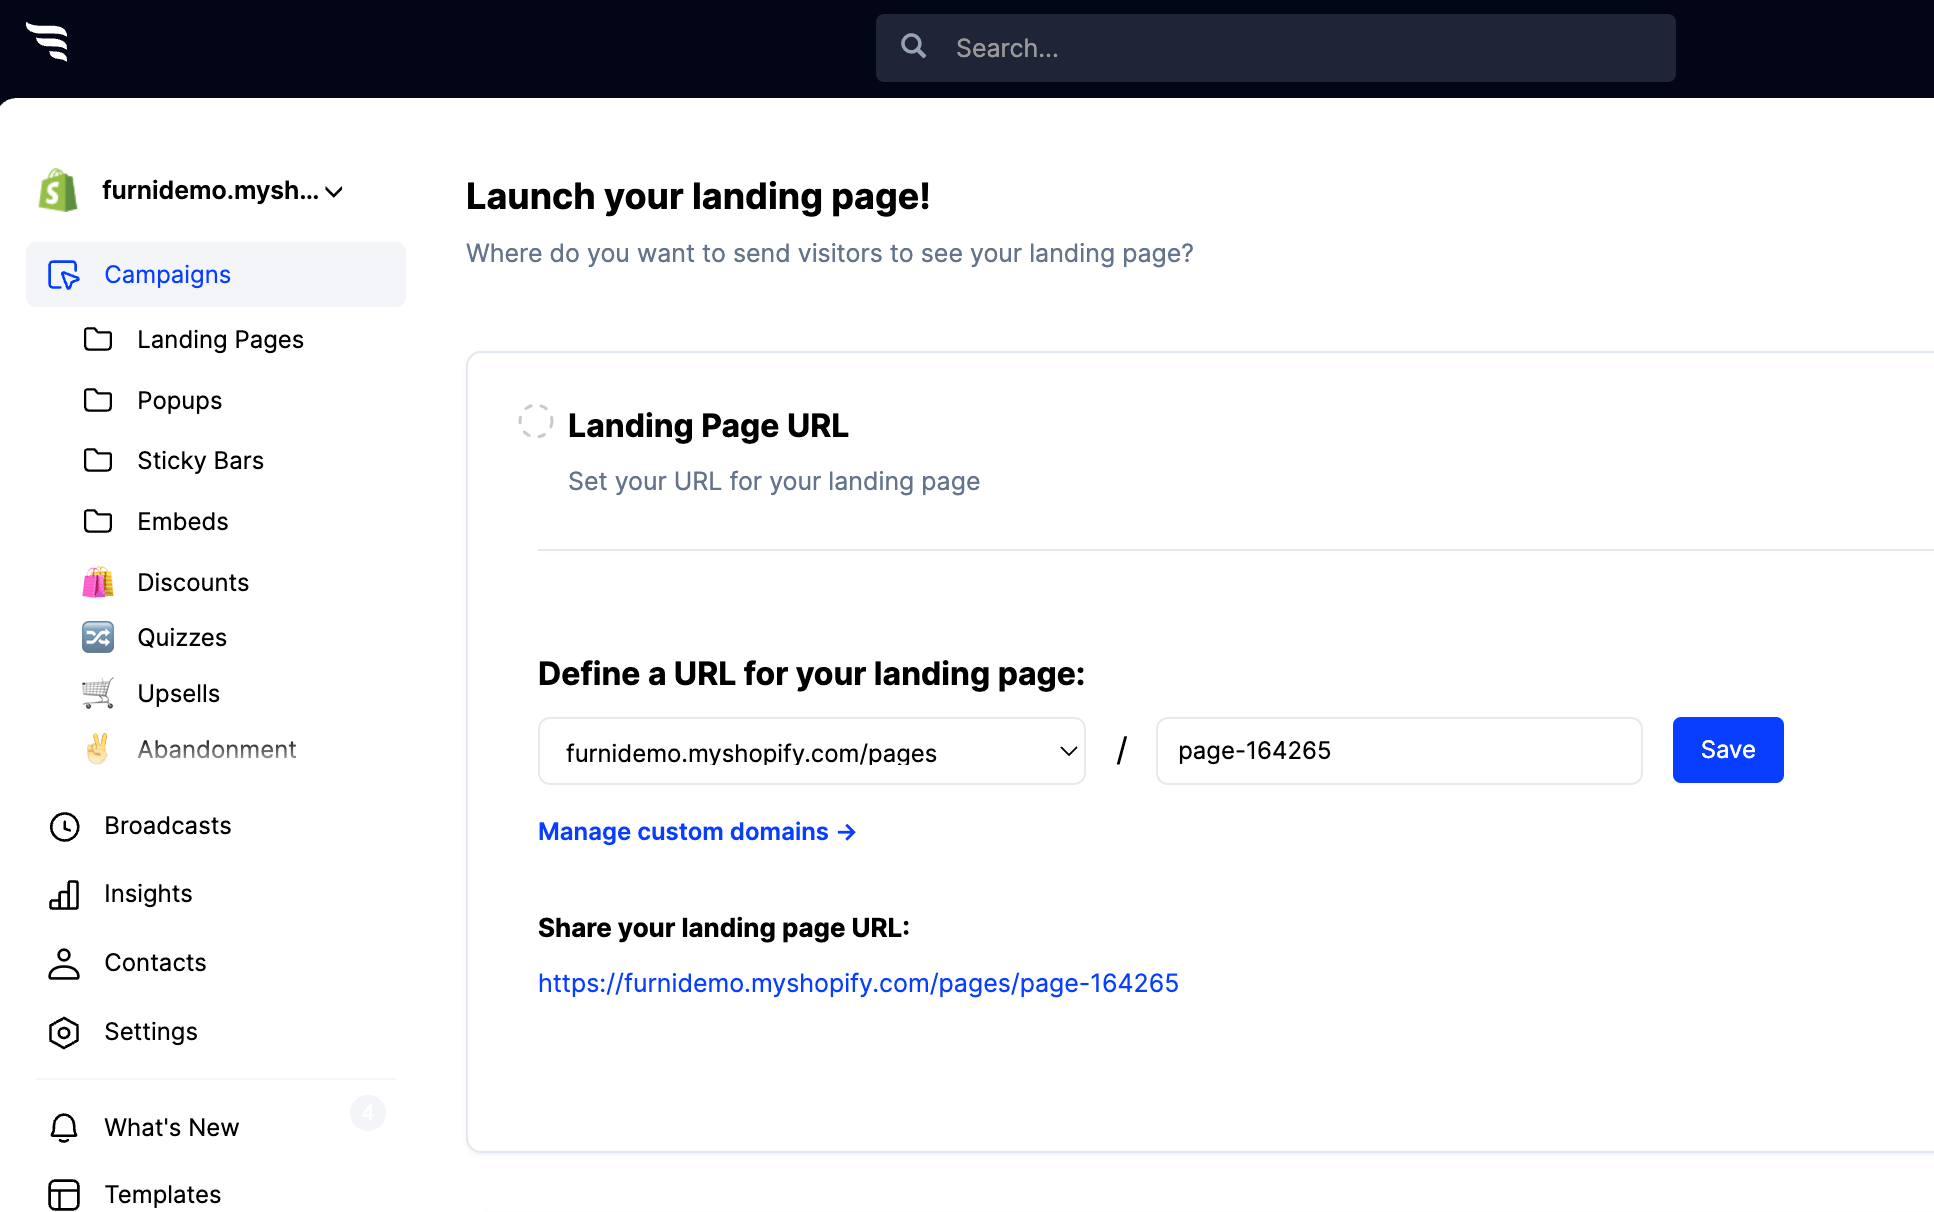
If it’s a landing page, ConvertFlow lets you set a URL on our servers, your own custom domain or publish pages to Shopify.
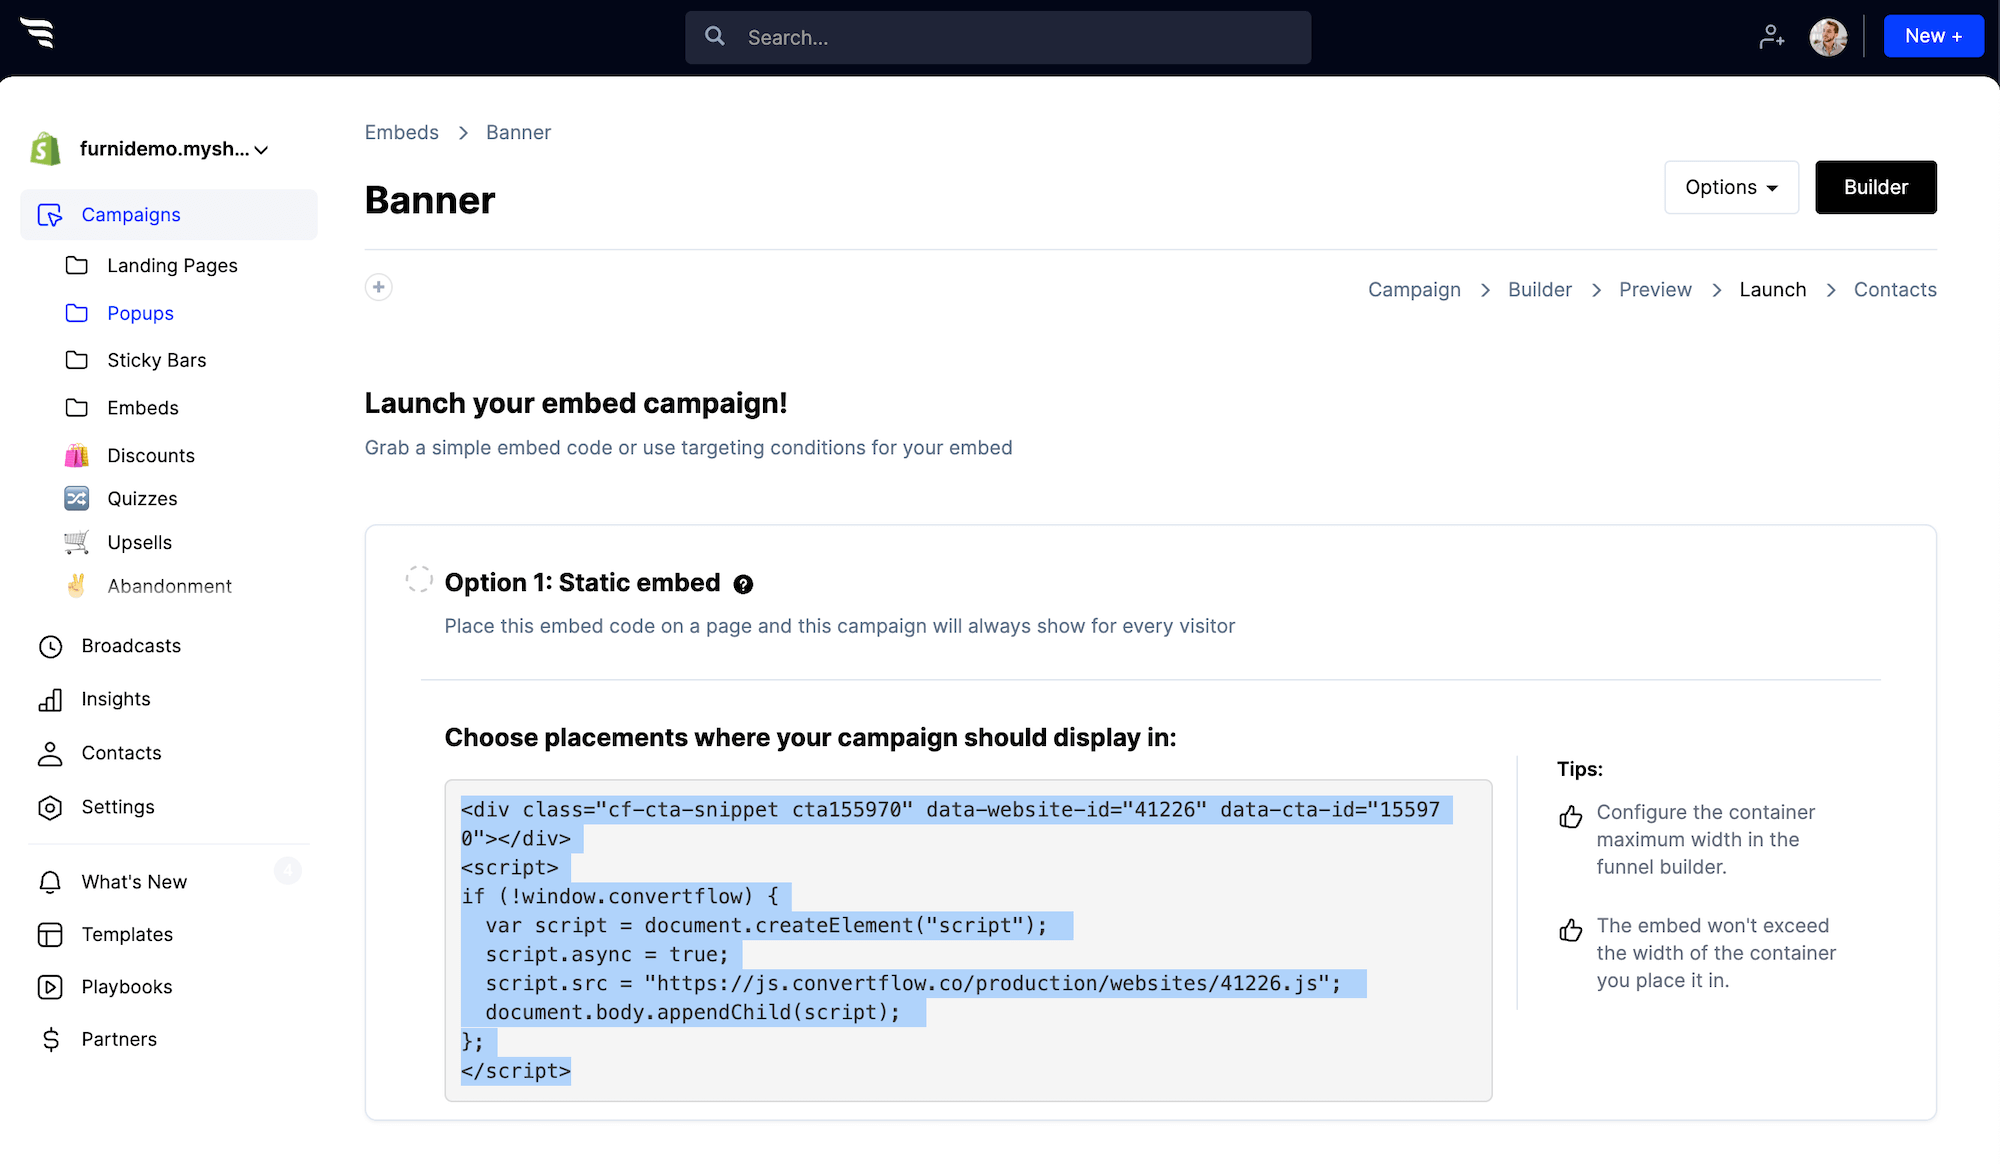
And if it’s an embed, you’ll get a simple embed code you can place anywhere on your site.
Once ConvertFlow’s live, sit back and start watching your conversion reports.
Want to experiment your way to a better conversion rate? Run split-tests by creating variants and adjusting the percentage of traffic you want each variant to receive.

The next step
Whether you’re a marketing team of one, or a world-wide brand, with ConvertFlow, launching campaigns is fast and easy, so go create your first campaign today!
And if you need help, we’ve got your back. Chat with us and together, we’ll build a winning funnel for your brand.


.svg)
