
One of the biggest challenges B2B marketing and sales teams struggle with is lead qualification.
As your website traffic grows, you’ll want to make sure only the most qualified leads can schedule meetings on your sales team’s calendar.
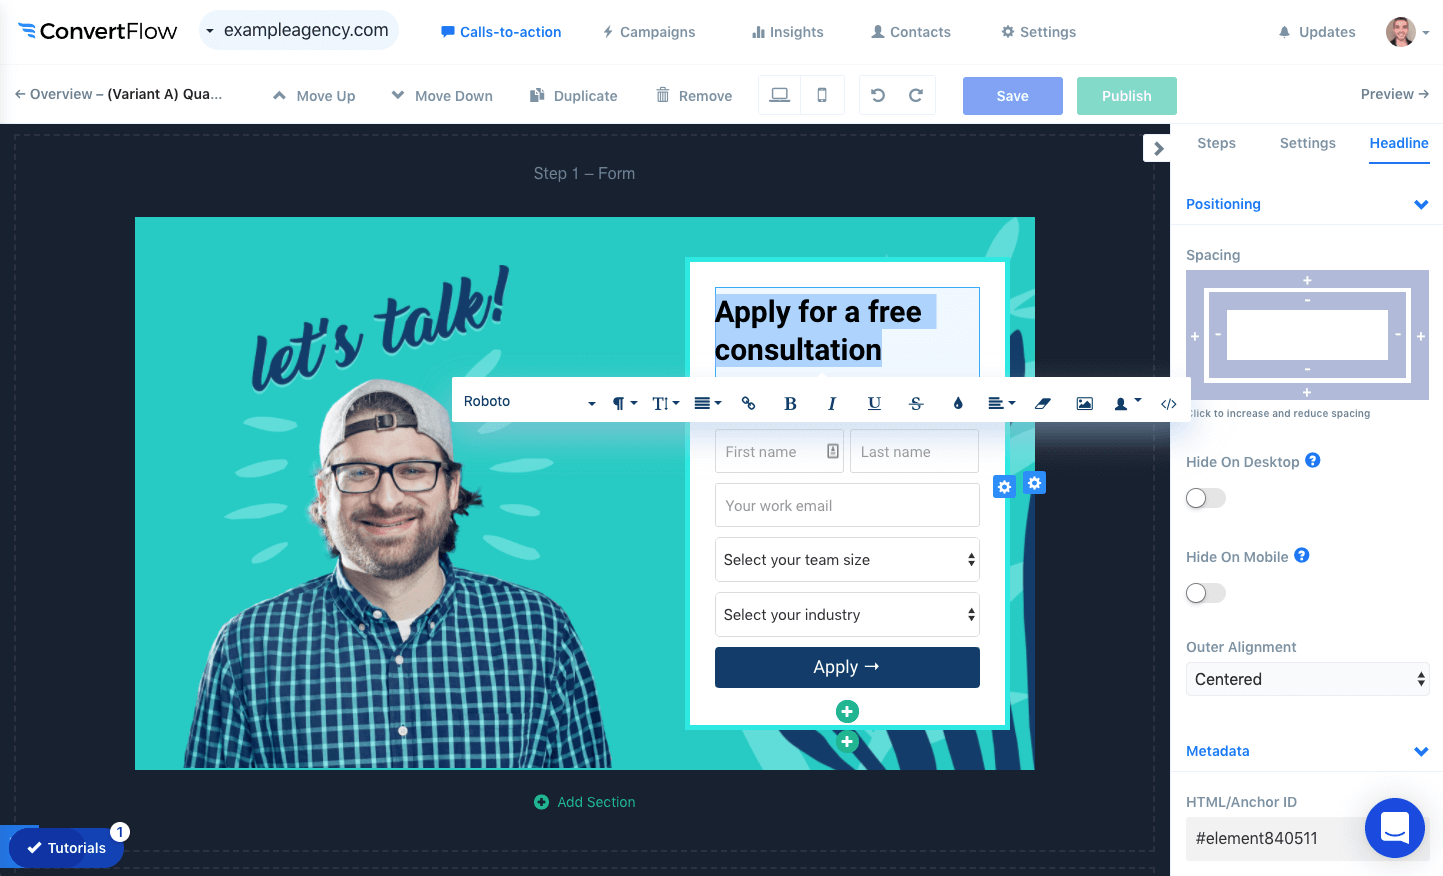
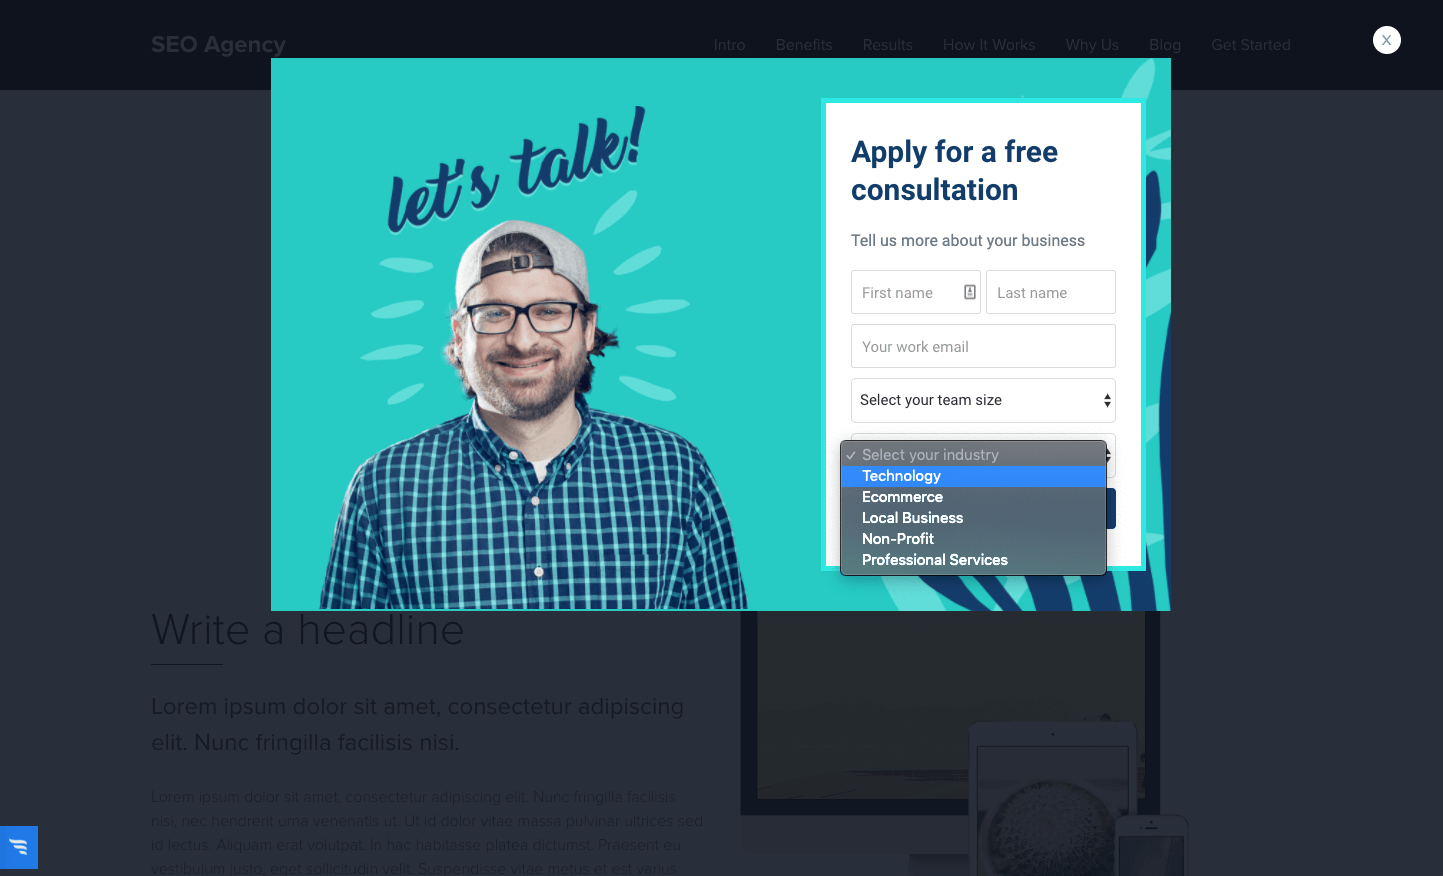
Using this lead qualification form popup template, you can ask potential leads qualifying questions such as their team size and industry.

Then, based on their answer, if they’re meet the criteria of the type of company you want to talk to, you can display them a calendar schedule widget so they can book a meeting immediately.
If they don’t meet the criteria, the lead’s contact info can be sent to your sales team to determine if they want to reach out and offer a demo.
Here’s how to set this up:
Step 1) Use this link to get the lead qualification form popup template for free. If you have already signed up for a ConvertFlow account, using this link will import the CTA into your website.
Step 2) Customize the template’s text, images etc. to match your brand.
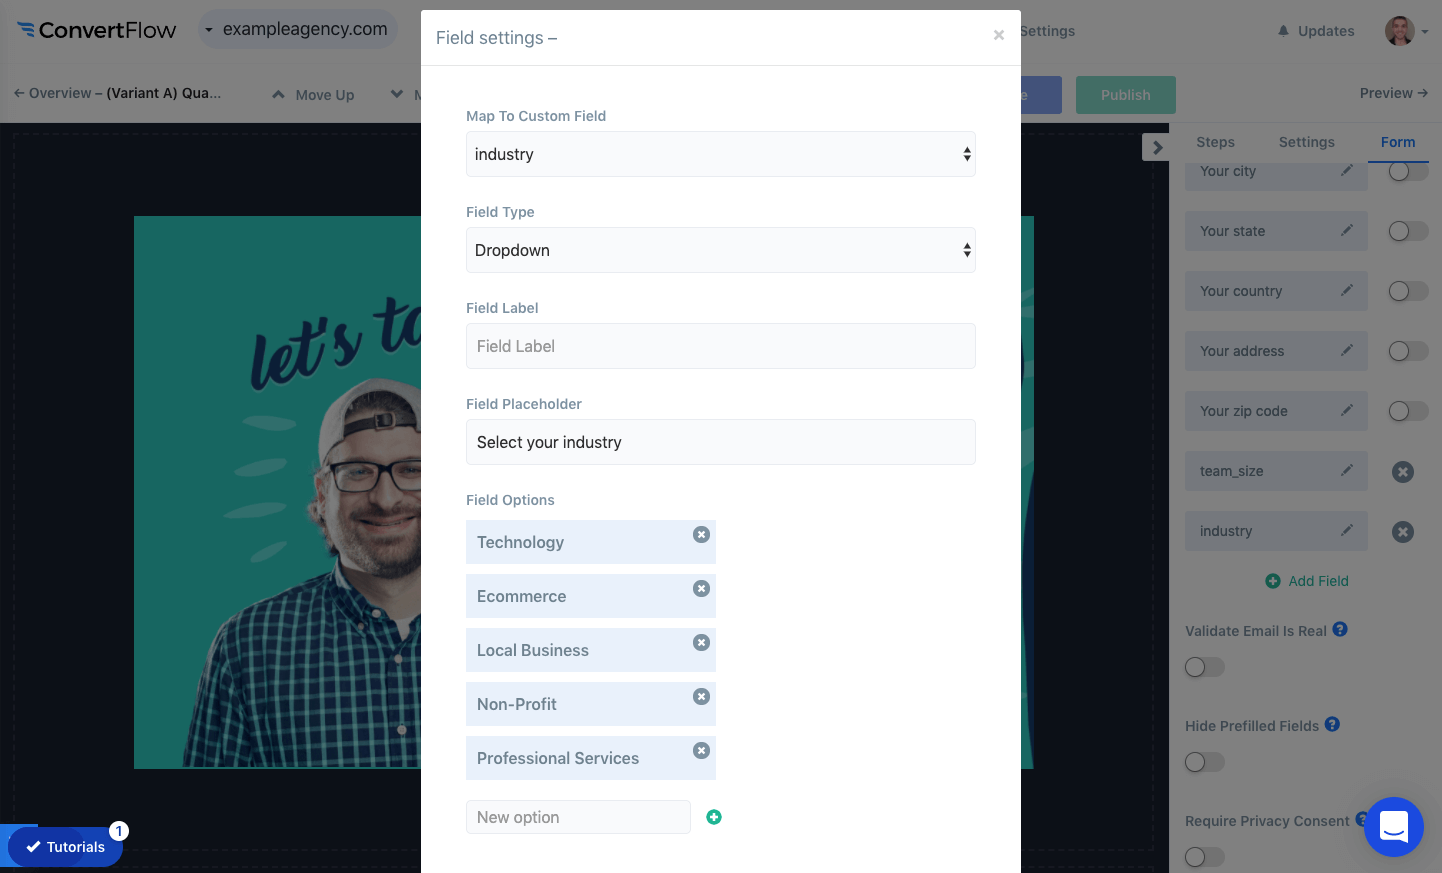
Step 3) Edit the form’s custom field options to best match your ideal lead qualification approach.
Here’s a help doc on editing forms - https://help.convertflow.com/article/190-form-elements-how-to-build-forms-and-collect-contact-info
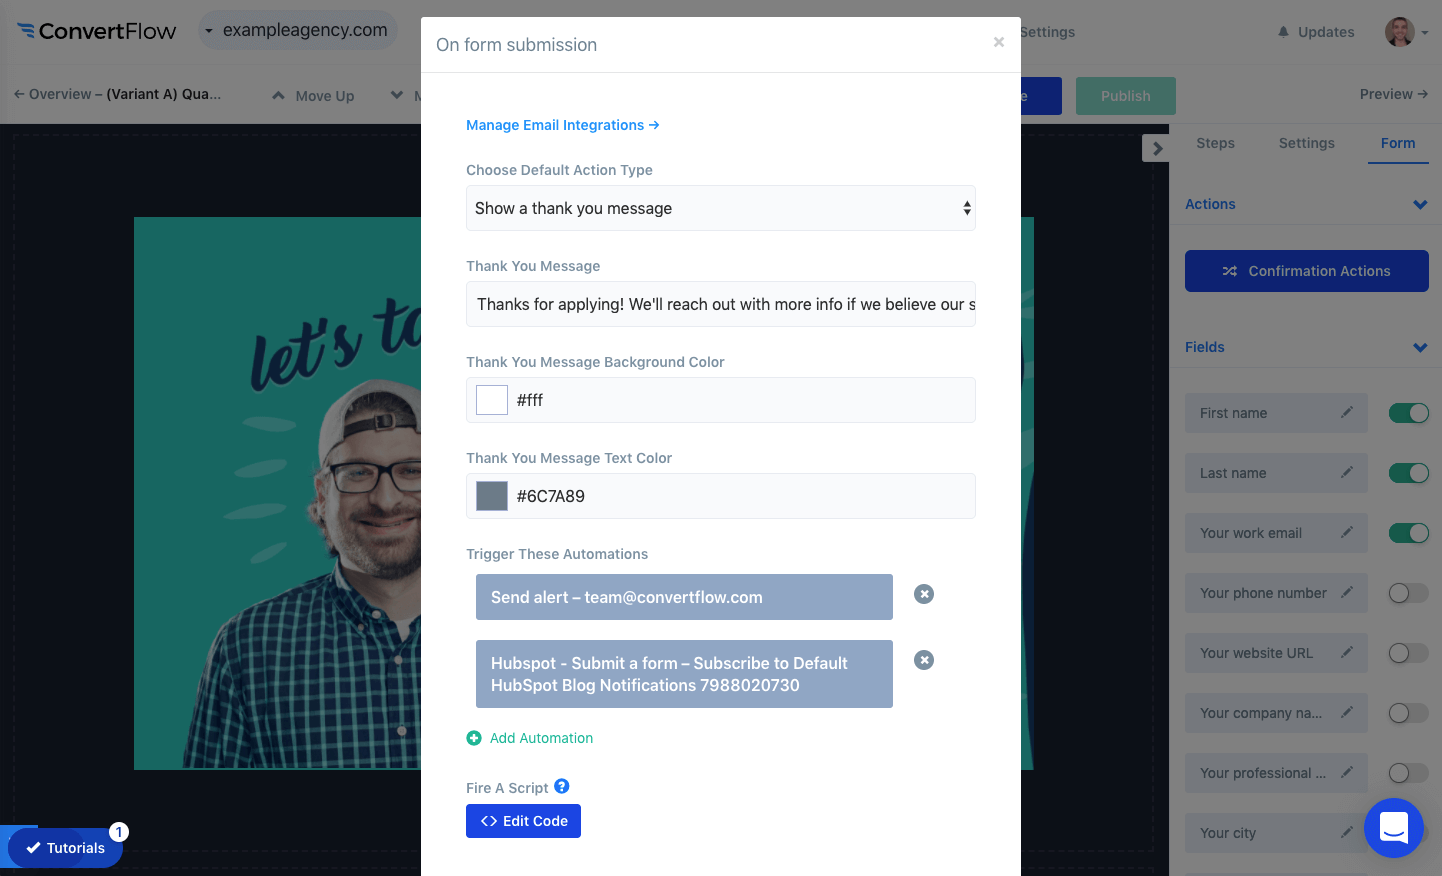
Step 4) Head to the form’s “Confirmation Actions” to control the form submission logic.
Here you’ll want to do 3 things:
- Connect your email service provider / CRM by clicking “Manage Email Integrations” and selecting your ESP/CRM.
- Adjust the default thank you message that shows to unqualified leads who submit the form
- Add default automations. Examples include sending a lead alert to your sales team, tagging the contact in your CRM as having requested a form, etc.
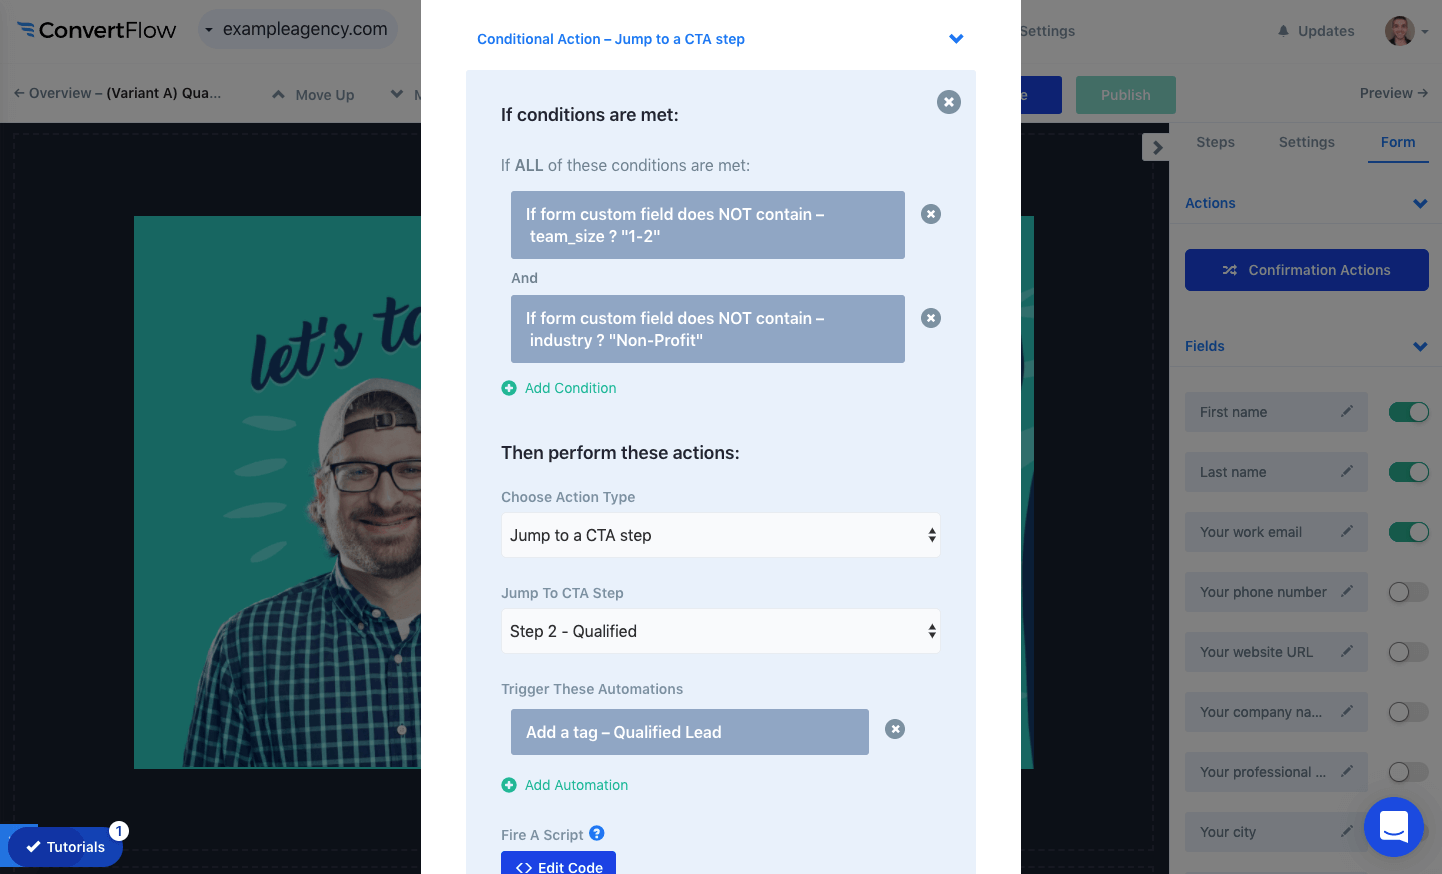
Step 5) Below that, click “Add Conditional Logic”.
Add form conditions like “If form custom field does NOT contain” to define which leads can immediately see the calendar schedule widget.
Set it so these qualified leads are progressed to step 2, instead of seeing the default thank you message you had previously defined.
You can also trigger automations just for these qualified leads, such as applying qualification tags and sending lead alerts to team members.
For more info on how to use conditional actions, here’s documentation - https://help.convertflow.com/article/193-conditional-actions-defining-multiple-paths-for-visitors-to-take-upon-conversion
Step 5) Once your qualification conditions have been set, scroll down in the builder to step 2 of the form.
This step should only display to leads who meet the conditions you had defined.
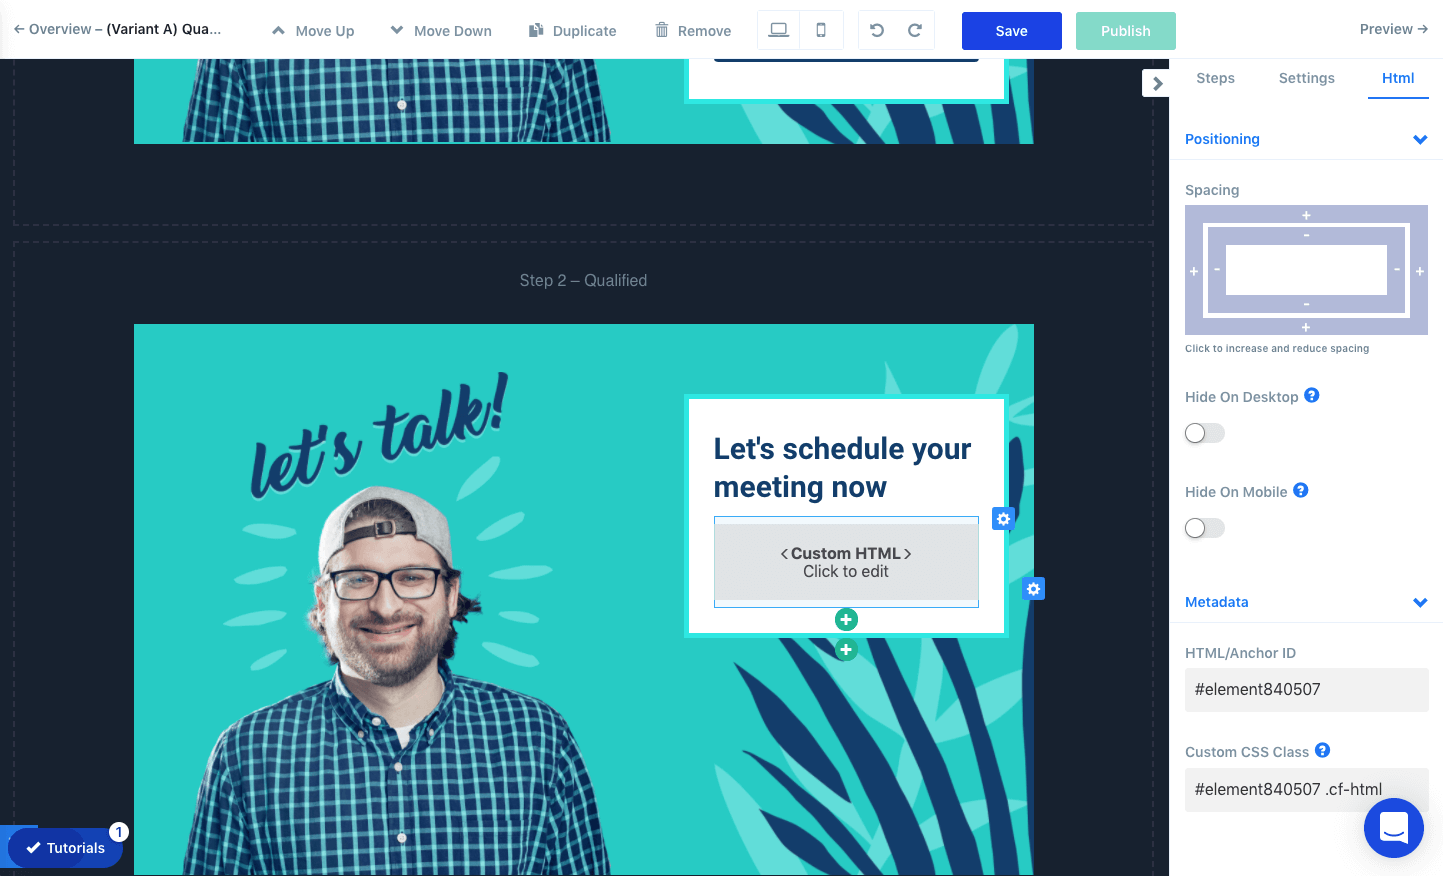
You’ll want to customize the messaging here, and then click to edit the custom HTML element.
Head to your favorite meeting scheduling app and copy an embed code for their calendar widget.
Place it within the custom HTML element’s code editor, and it will display to your qualified leads.

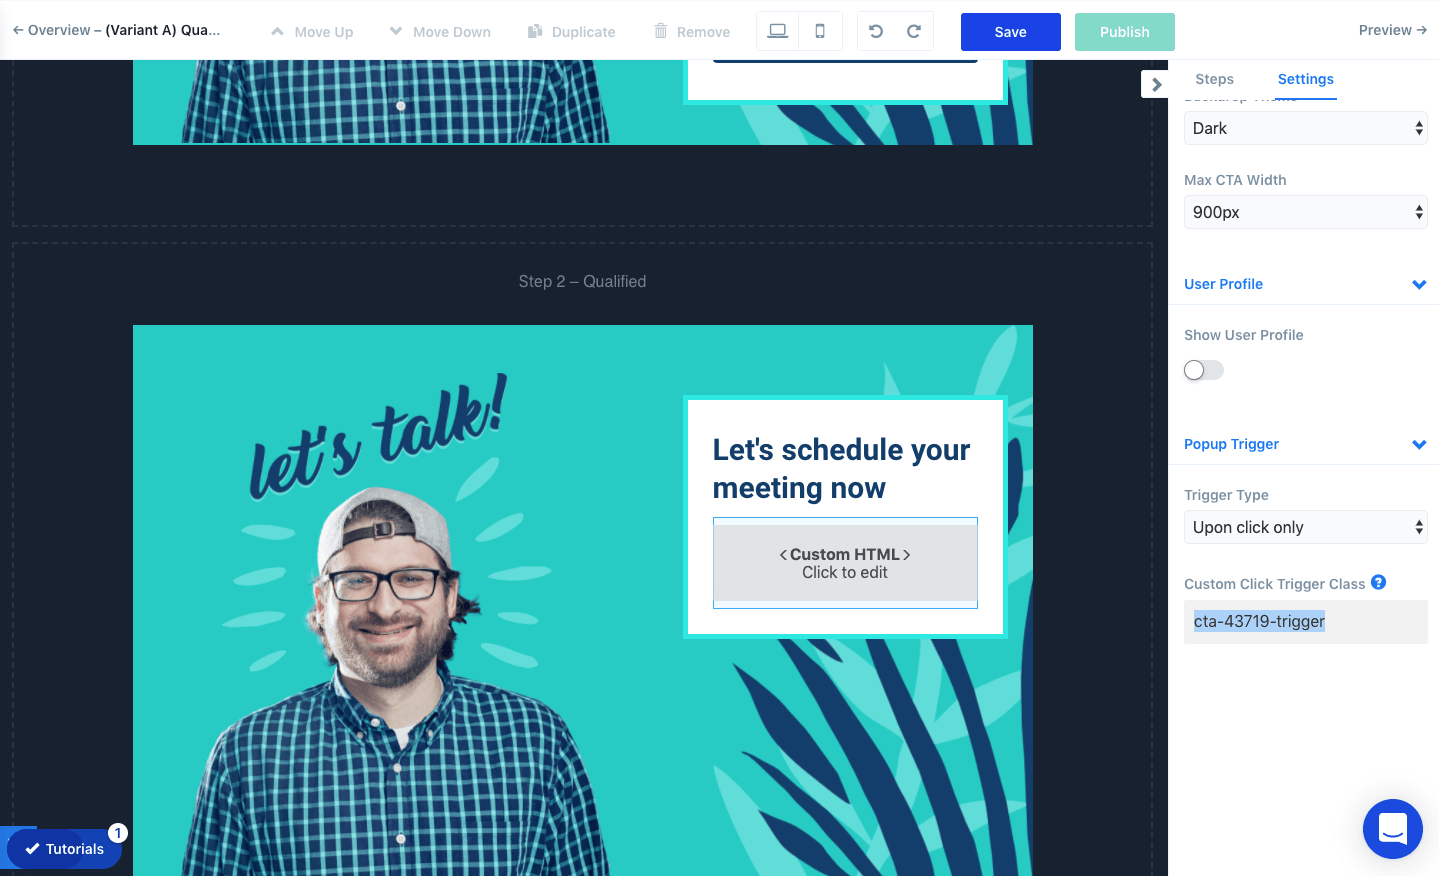
Step 6) Next up, you’ll want to click the “Settings” tab in the builder panel and then adjust the popup trigger settings to control when this popup shows.
If you want the popup to trigger only upon click, select “Upon click only”.
You can then either build an embedded CTA button in ConvertFlow that links to your qualification popup, or copy your popup CTA’s custom click trigger class and apply it to an existing button or link on your website.
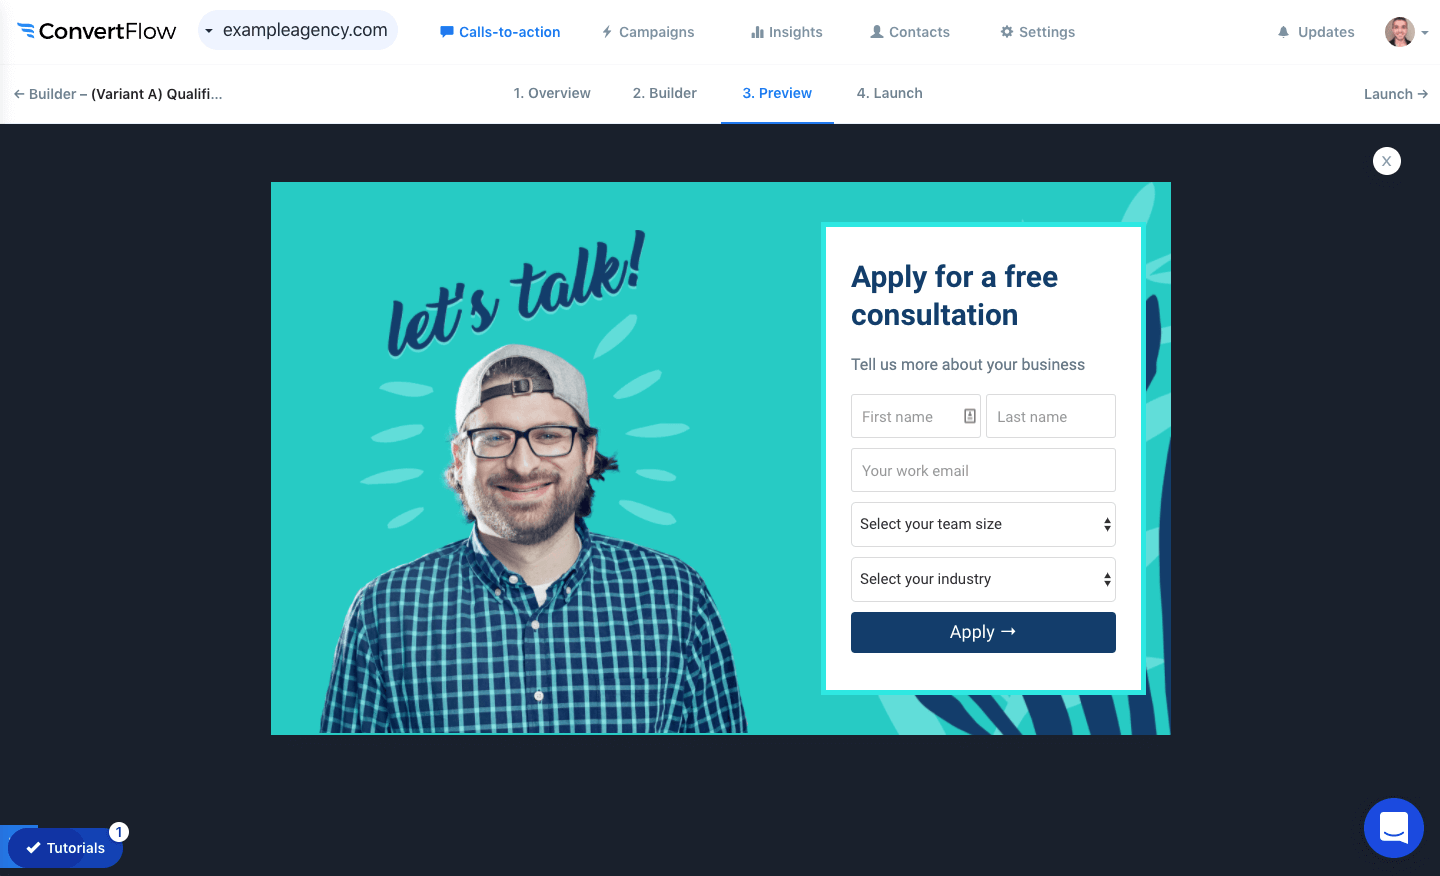
Step 7) Save and publish your changes. Click “Preview” to see how the popup looks and works.
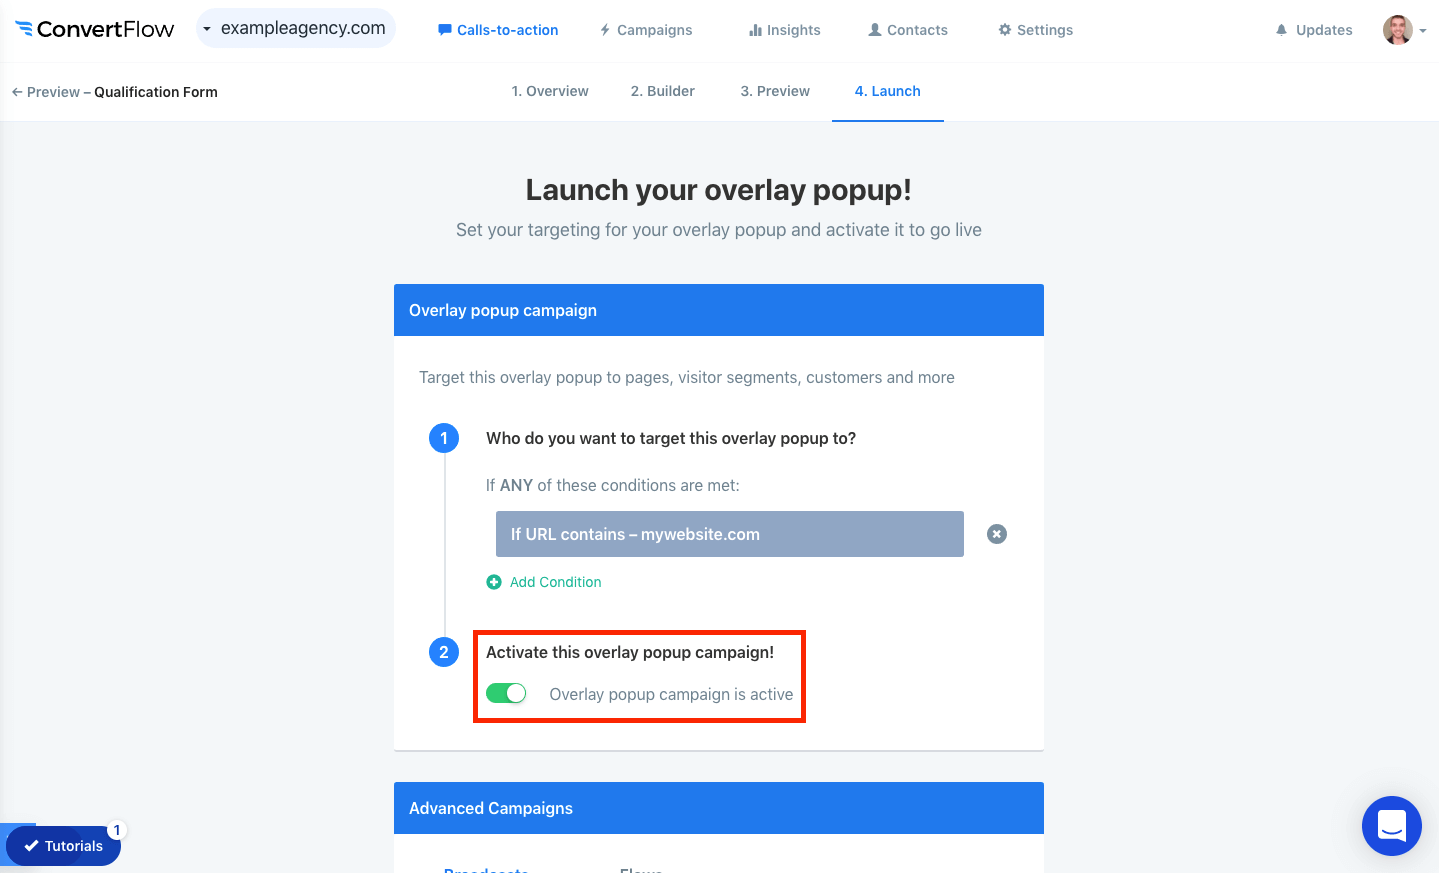
Step 8) Click to the “Launch” page and then add targeting conditions for your popup to control on what parts of your website that the popup will load.
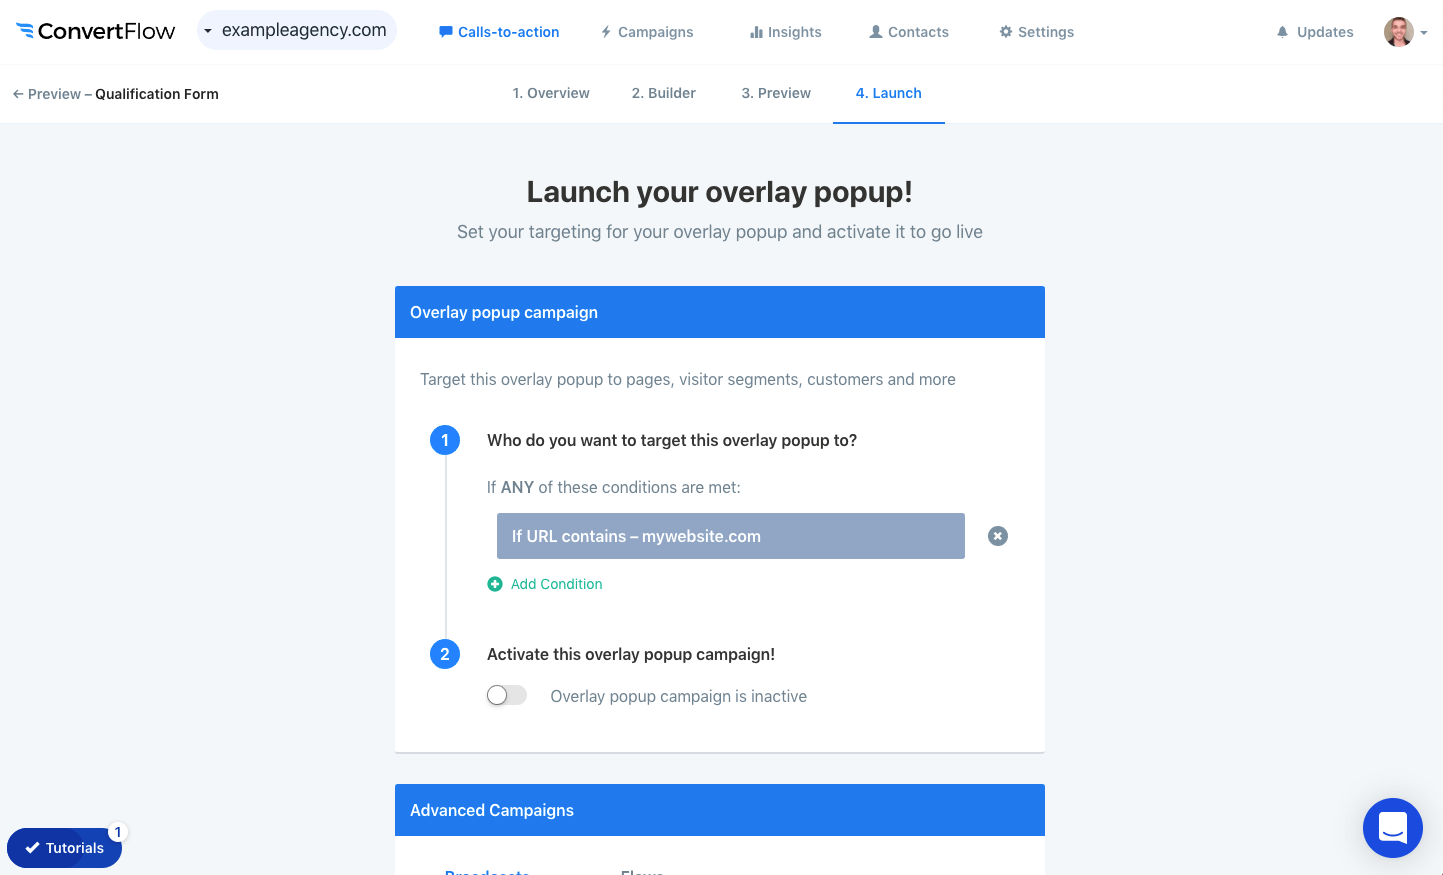
Step 9) Click the status toggle to activate the popup on your website.
If you haven’t already set up ConvertFlow on your website, you’ll then be given your ConvertFlow script.
Get that set up on your website, and if your popup is set to be triggered upon a button/link click only, connect your embedded buttons to your next popup CTA.
Now, head to your website and trigger your popup to see it live!
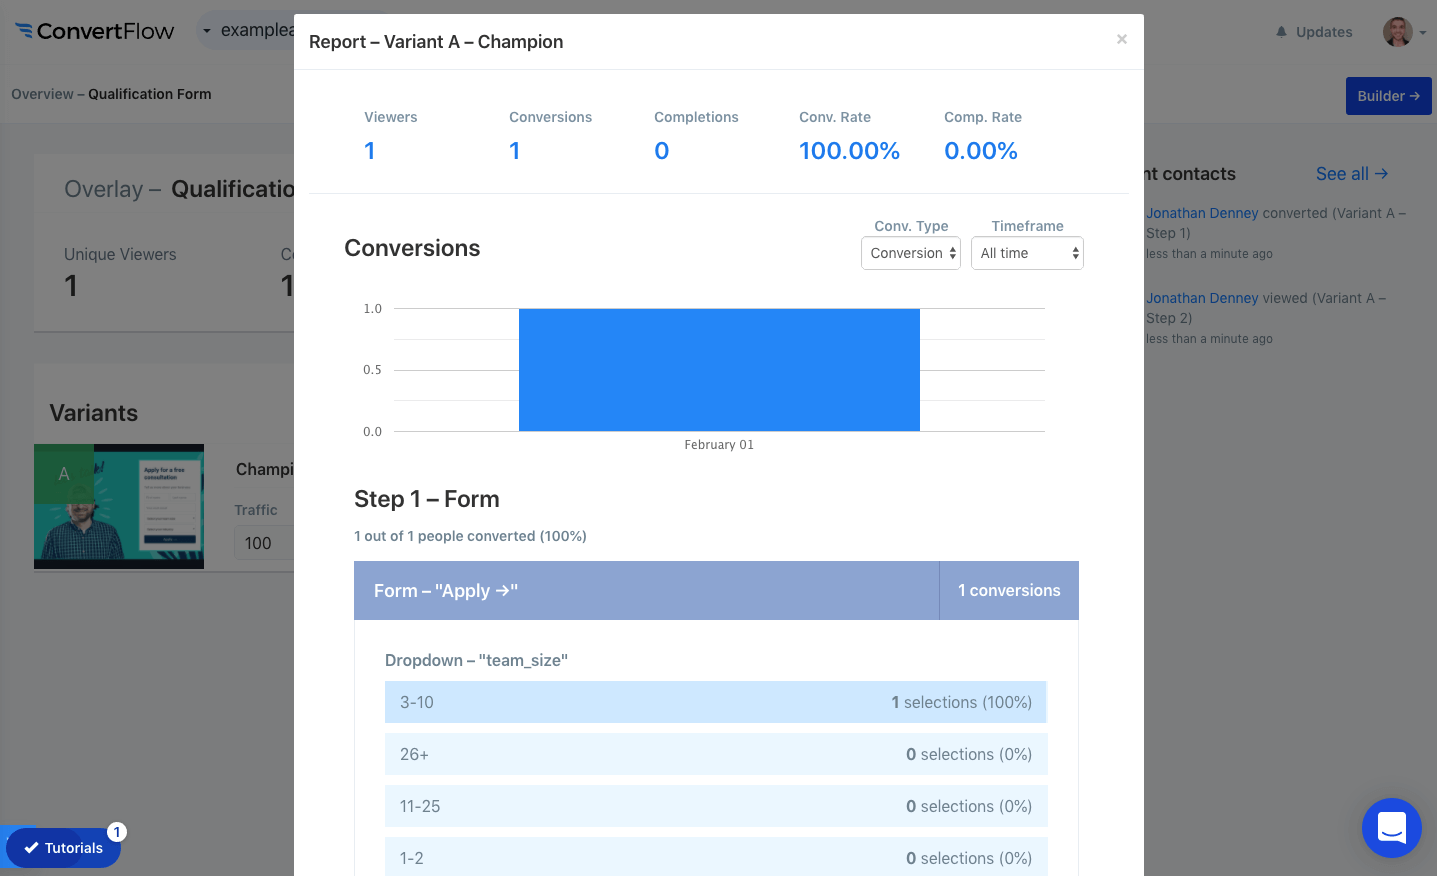
As your qualification form schedules more demos for you and your team, you’ll want to head back to the CTA’s “Overview” page and report on its stats.
These reports will provide valuable insights into your audience and possibly suggest how to optimize further.


.svg)
