
Playbook summary
Create an exit-intent popup targeted specifically at visitors with at least one item in their cart. You can remind people why they should buy and create a CTA button that drives them back to your store's cart or checkout page.
- Industry:Ecommerce
- Metrics affected:Sales Conversion Rate
- Campaign type:Popups
Tools you'll need
- ConvertFlow
- Shopify (suggested)
Quick setup
- Trigger: Exit-intent
- Content: Show cart contents
- Call-to-action: Direct to cart or checkout
- Targeting: Show everywhere; If cart contains items
Most ecommerce stores rely on email and SMS to recover abandoned carts. But, why wait until someone has already left before attempting to rescue the sale?
A well-timed popup can:
- Remind abandoners why they should buy
- Direct them to the cart or checkout page
In this playbook, we take you through step-by-step instructions on how to set one of these up on your store using ConvertFlow.
Step 1: The creative
This is a critical first step. Anyone can get the technical bits of this popup set up, but great marketers will use creative that compels people to take action.
With this in mind, there are two key things to consider in an abandoned cart popup:
- Remind people why they were thinking about buying in the first place with strong imagery and emotive language
- Address common objections your shoppers tend to have (pricing, sizing issues, trustworthiness, etc.)
Here’s a great example from Pandora Jewelry:

Notice how the image on the left evokes emotion. There’s also an image of the item being left behind, social proof in the form of people viewing the item, and objection handling by helping people find a local store.
You could also try incorporating a discount offer into the popup—especially if you already offer one in your abandoned cart email follow-ups.
With all this in mind, simply choose a popup template to get started. Here are a few suggestions:
Once you’ve chosen a template, either create a ConvertFlow account or log in if you already have one. You’ll now be able to customize your chosen template in the builder.
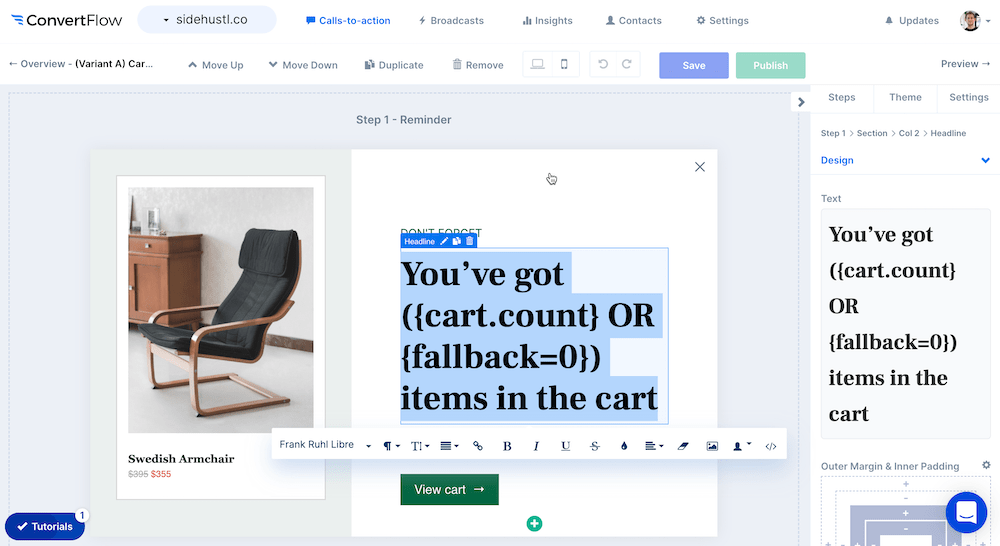
Just click into individual elements to edit the copy, images, and styling—and add new element types as you like:
For more inspiration on creative, check out some real-life examples in our campaign library post on cart abandonment popups.
Merge tag options
ConvertFlow lets you add dynamic text in the form of merge tags. If you’ve got Shopify connected, you’ll be able to display text based on a visitor’s shopping cart data:

You can use merge tags anywhere there’s a text or headline in ConvertFlow’s builder. The most relevant options for this type of popup are probably the “Cart - Item Count” or “Cart - Value” merge tags.
Product details
You’ll also be able to use the Products Element to add product details into the popup’s creative design. This is a great way to provide a visual reminder of the items a visitor added to their cart and why they added them in the first place.
Shopify users can use a live product feed from their store to input the data. Just click on the products element and in the side panel:
- Choose “Shopify” as the product source
- Set the filter to “Products Added to Cart”
- Set a desired discount (if any)
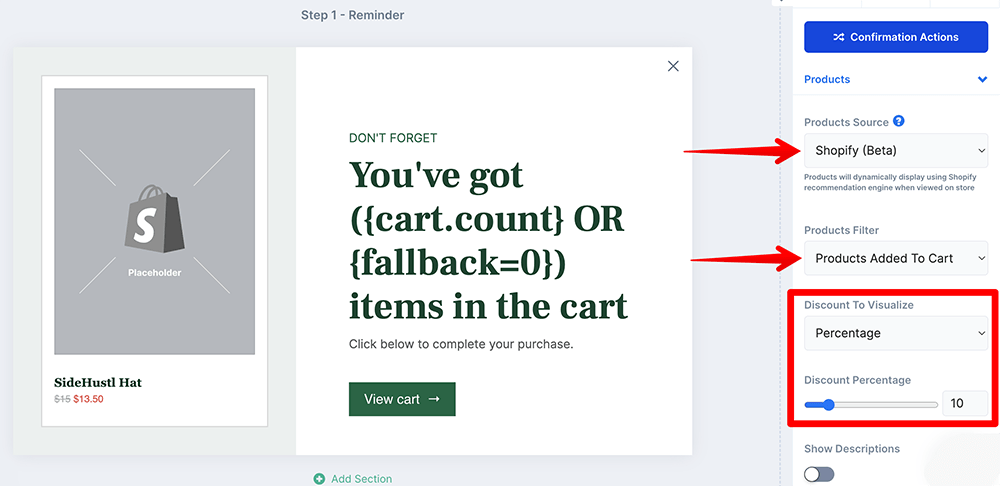
This means the product(s) a person has in their cart are displayed in the popup at the time it gets triggered. You can limit the items to display and control the design further down in the side panel settings.
Non-Shopify users can manually add items directly to ConvertFlow and use this is the products source:

Note: This manual option does not have the “Products Added to Cart” filter. You’ll need to create a different popup campaign for each product and set the targeting conditions to show only when that product is in the Shopify cart.
Step 2: The technical setup
There are two things to consider in the technical setup step:
- Trigger settings
- Button actions
We want to use an exit-intent trigger for this popup. This means it will show whenever a visitor goes to leave the website.
Most abandonment templates will have the trigger settings all setup and ready. But, if you’re customizing a different template (or starting from scratch), make sure you have it set to trigger on exit-intent.
Head to the “Settings” tab in the builder’s side panel to verify:

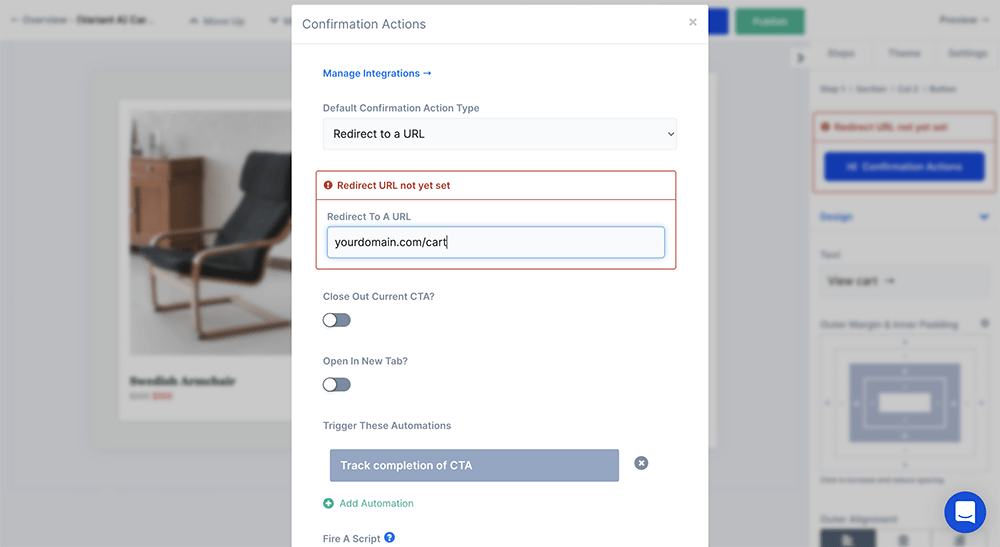
After this, you’ll want to set an action on any buttons to send people clicking on them back to the relevant place. In this case, it will either be to the cart or checkout page (whichever one you prefer).
To do this, click the button you want to control and select “Confirmation Actions” from the side panel. Then, choose “Redirect to a URL” as the default action type and enter the URL of your store’s cart or checkout page:
Make sure to save and publish the campaign. Then, click the “Preview” button in the top right to see a live preview of it in action.
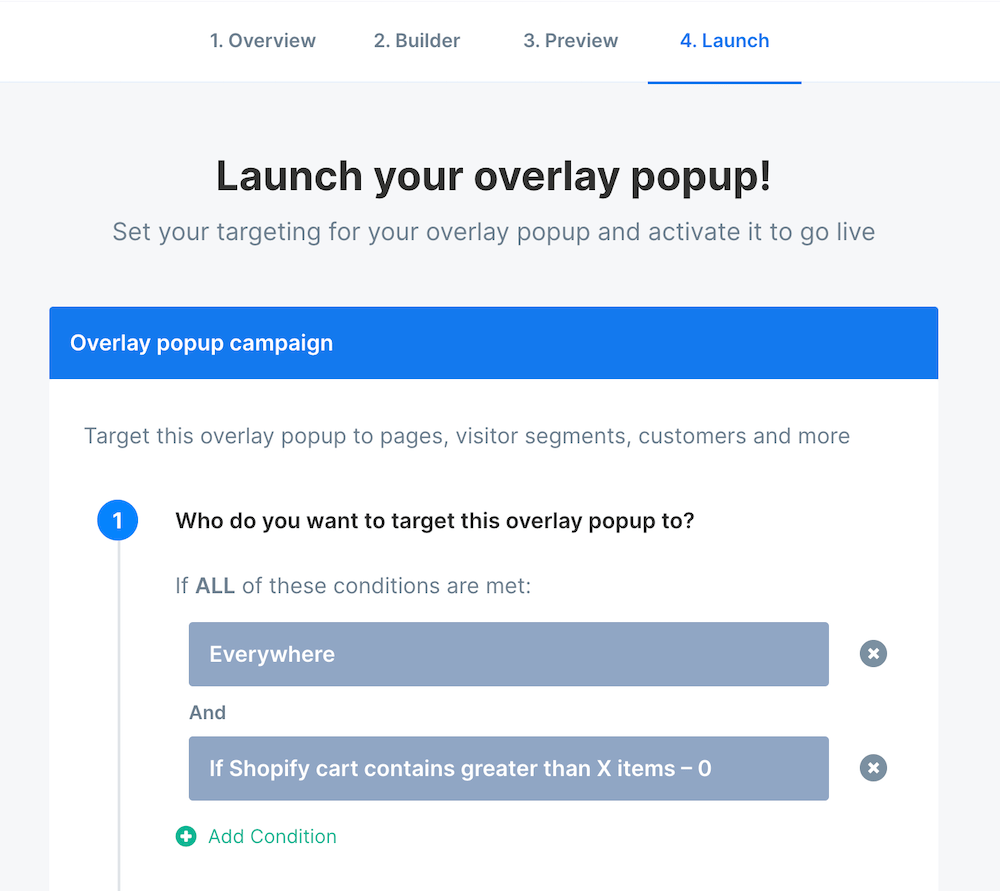
Step 3: The targeting
Once you're happy with how everything looks and works, click through to the final step where you should be taken to the “Launch” screen. Here, we’ll add some targeting conditions to make sure our cart recovery popup only displays when we want it to.
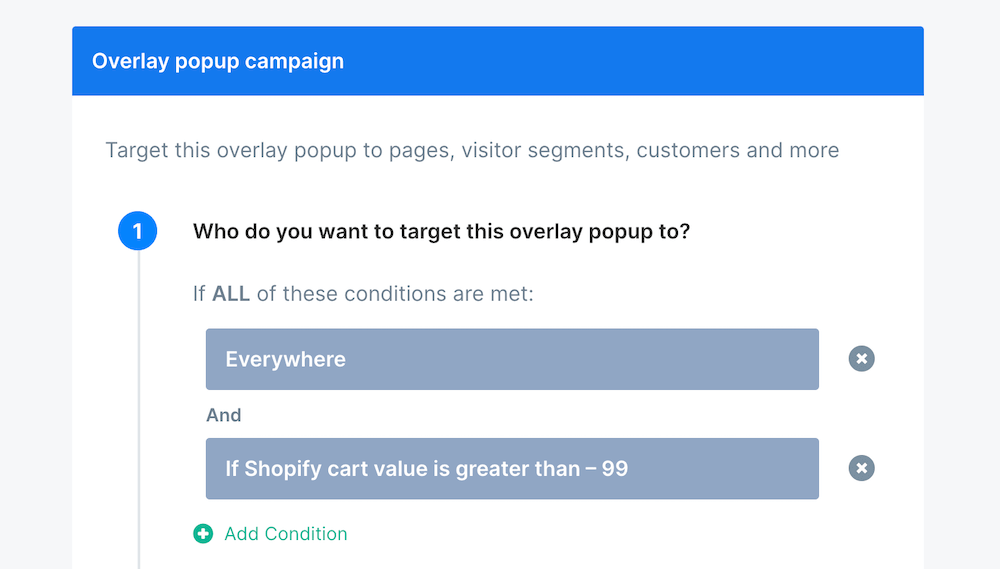
We want this to display everywhere on our site, but only if the visitor actually has something in their cart.
So, let’s add these as targeting conditions:
However, you can also experiment with different targeting.
For example, you might want to build out different abandonment popups according to the value of a visitor’s cart:
Or even for different individual products altogether:

The possibilities and combinations are (almost) endless. Learn more about different targeting conditions in ConvertFlow with this help guide.
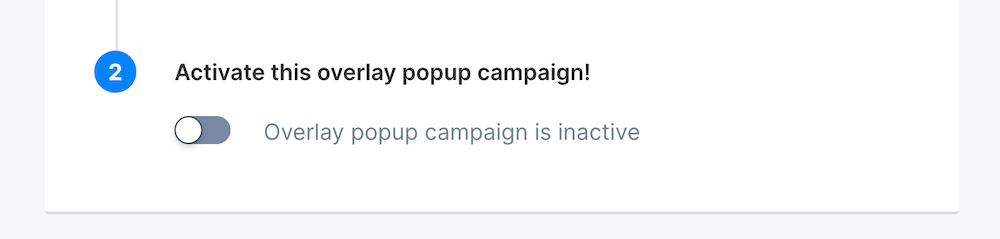
Set the popup live
Once you’ve setup your design, automations, and targeting, all that’s left to do is activate your popup and set it live. Make this happen by simply toggling the switch while still on the final “Launch” step we set the targeting conditions on:
If you’ve already got the ConvertFlow pixel installed on your website, the popup will now start showing!
First-time ConvertFlow users will be prompted to install the pixel. Simply follow the on-screen instructions to get this done in a few clicks.


.svg)
