
In this chapter, we're going to show you how to quickly launch an on-site retargeting campaign that generates leads from your site using ConvertFlow.
1. What you need to get started
A clear goal for your on-site retargeting campaign
As a first step, let's define a clear goal for our on-site retargeting campaign. A good place start in your business is by choosing to improve the metric that would impact growth the most in your business.
For many businesses that is generating more leads. So, for this example, generating more leads will be the primary goal of the on-site retargeting campaign we build. However, you're free to choose any goal that is specific to your website's marketing funnel.

What are the conversion goals needed to achieve this main goal?
Once you’ve defined a clear goal for your on-site retargeting campaign, you can then set conversion goals and optimize your marketing campaigns to get visitors to complete those goals.
For this example we have…
- Subscribe to newsletter
- Sign up for free product
- Sign up for full trial
- Upgrade to paid plan
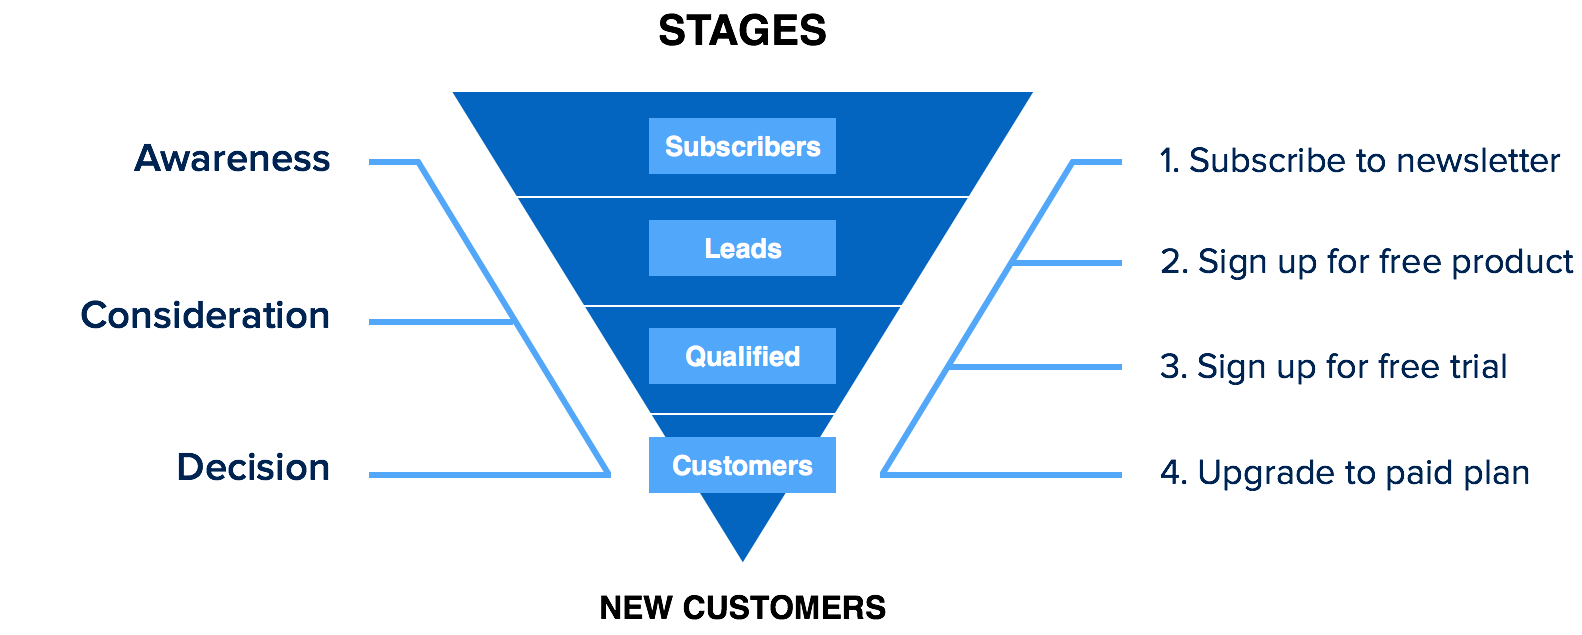
On your site you should promote these goals with calls-to-action that are personalized for each visitor based on which stage they’re at in your conversion funnel.
These calls-to-action could proactively engage your visitors like some of the examples we showed you earlier, or they could be part of the inline content of your website. The idea is that you want to make these dynamic and show visitors the right ones based on which step they need to take next.
Choose an on-site retargeting solution
For years, marketers using marketing automation have been limited to creating simple marketing campaigns that deliver the same messages in the same sequence to every person.
Creating intelligent marketing that updates and responds in real-time to prospects as they interact with a brand was hard, expensive, and the technology that made this possible was only available to large companies with big budgets, especially if it personalized the experience for each visitor on websites.
Nowadays, tools like ConvertFlow make it easy to engage prospects on your website with targeted on-site messages and on-site calls-to-action based on who they are and what they do, guiding them through a company’s sales funnel.
2. Add ConvertFlow to your website
Once you've created your account in ConvertFlow, follow this short step-by-step process and you'll see how to add ConvertFlow to your website and launch your first on-site retargeting campaign.
Creating and managing websites
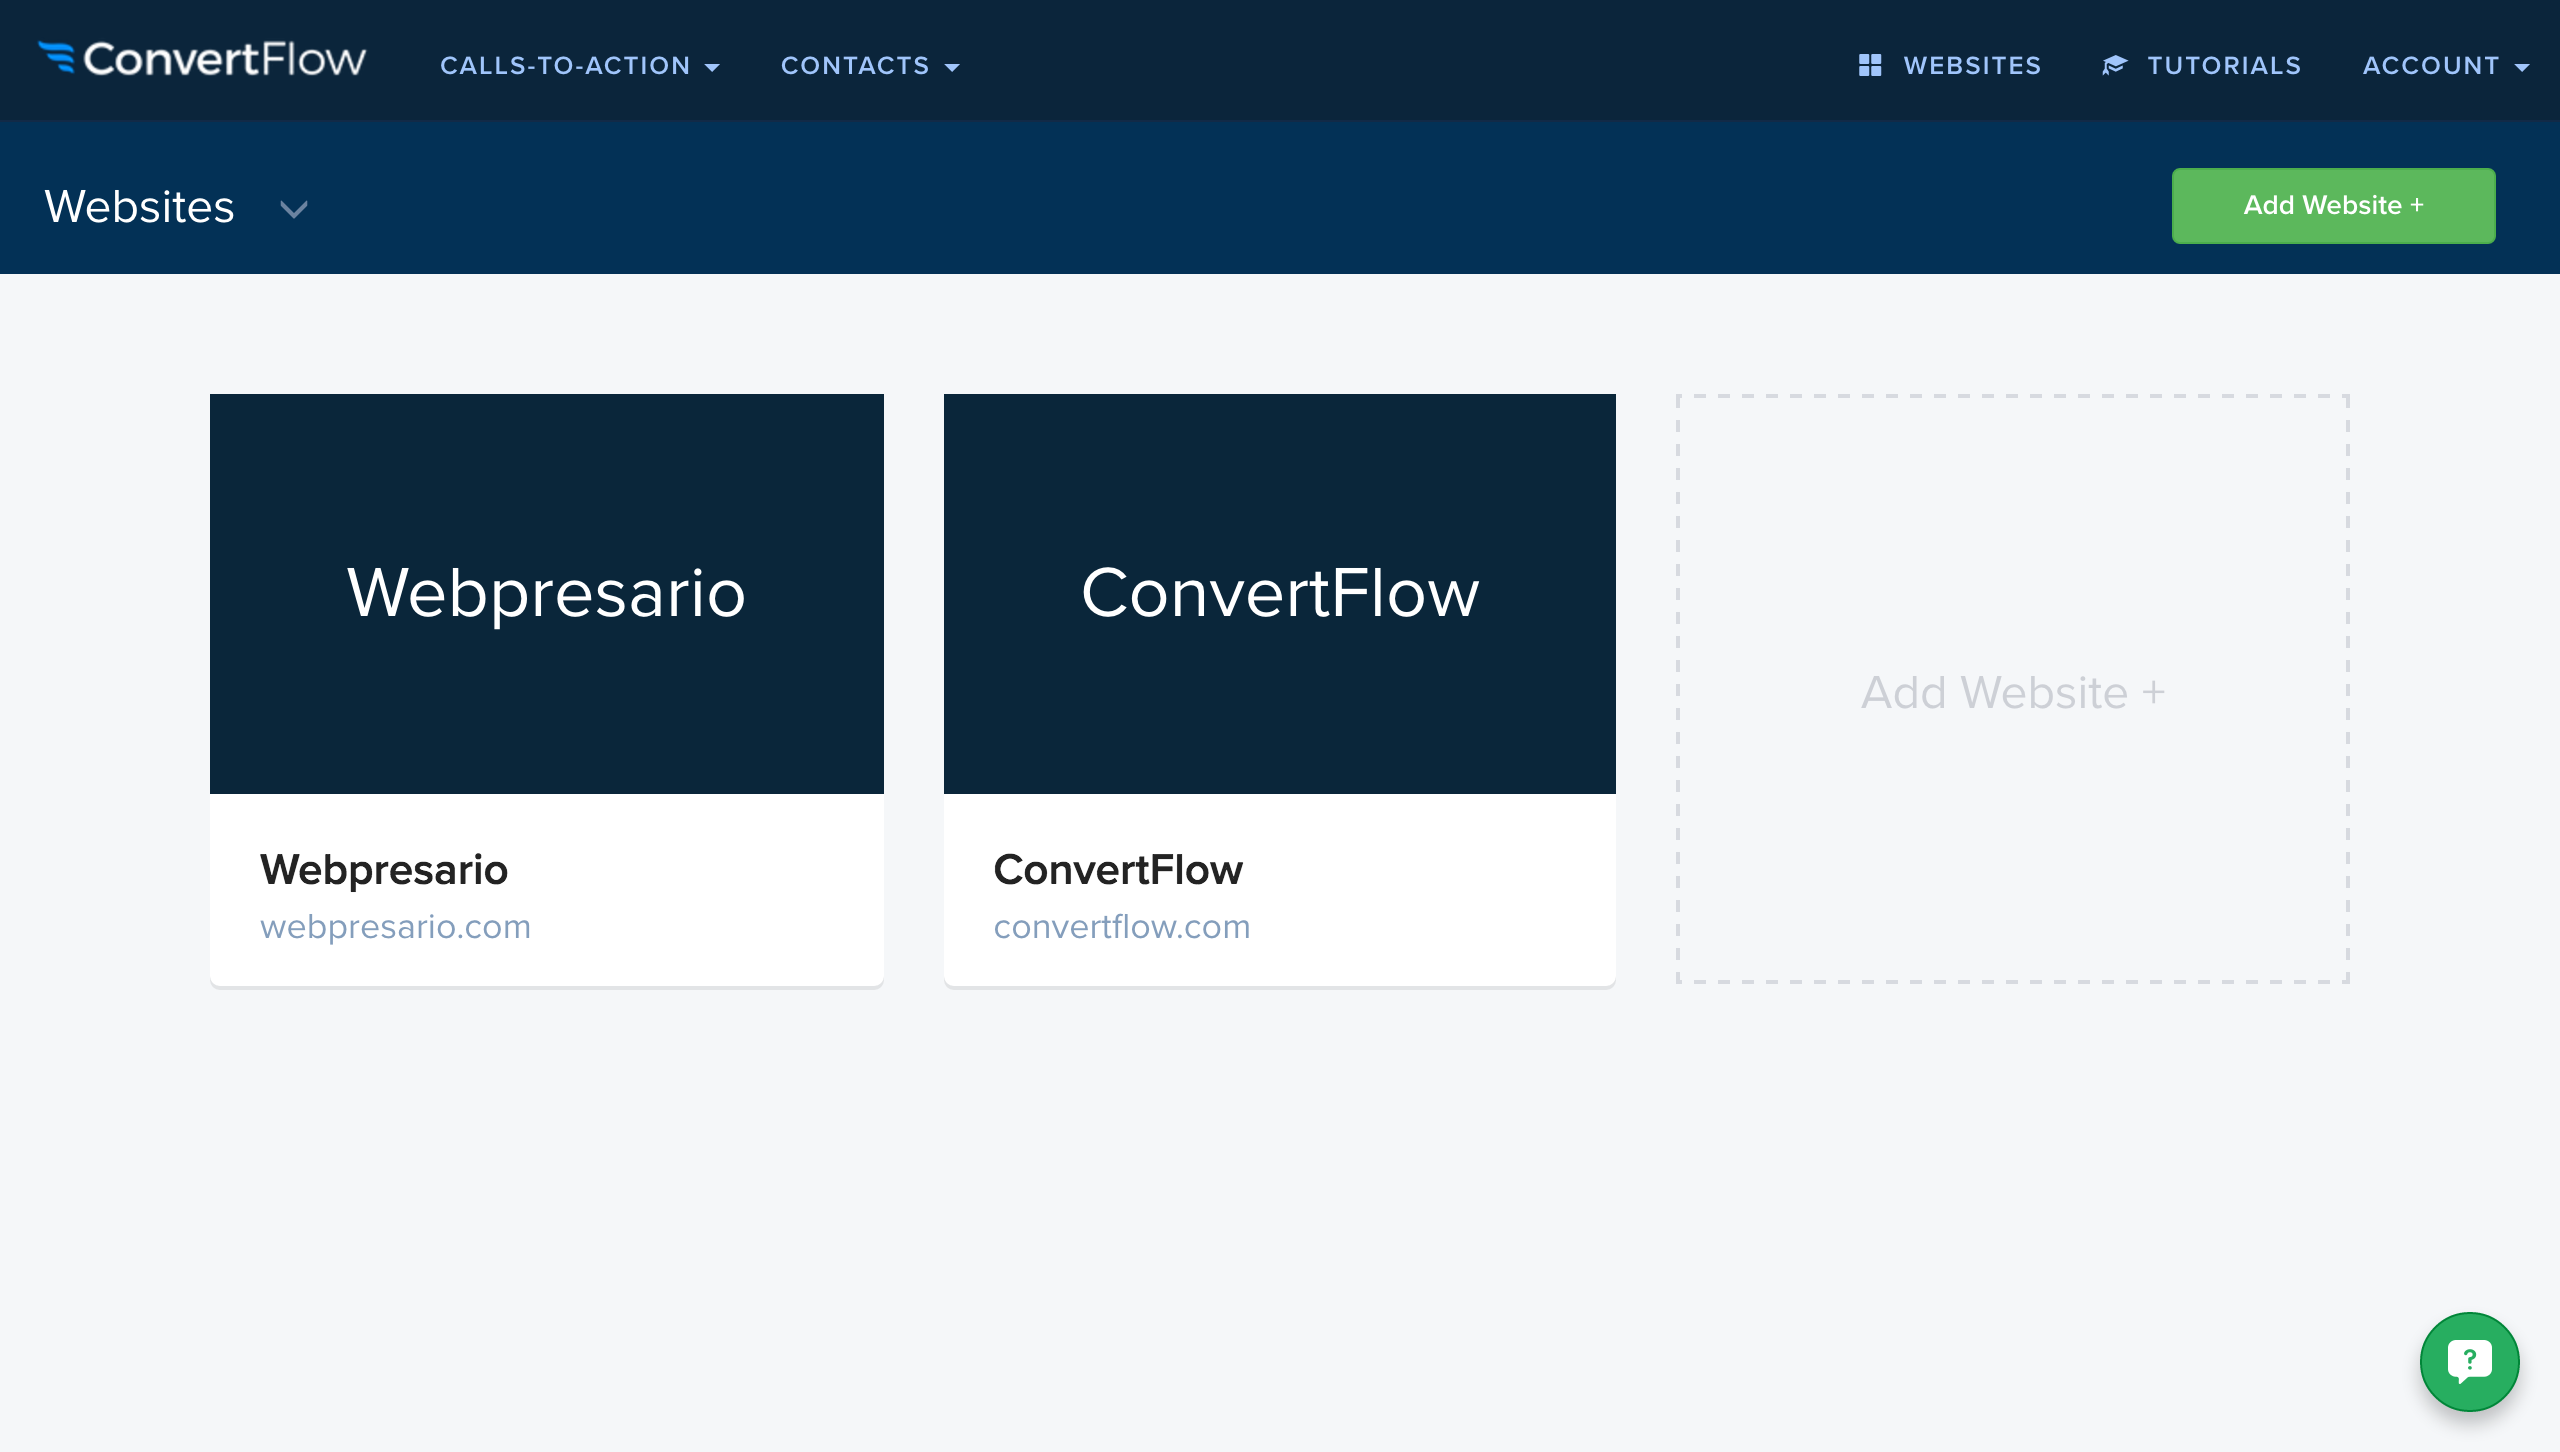
Everything in ConvertFlow, your calls-to-action, flows, contacts, etc. are associated with a "Website". When you log into your account, you'll see a list of your websites. Here you can either click through to a website's dashboard, or you can create a new website.
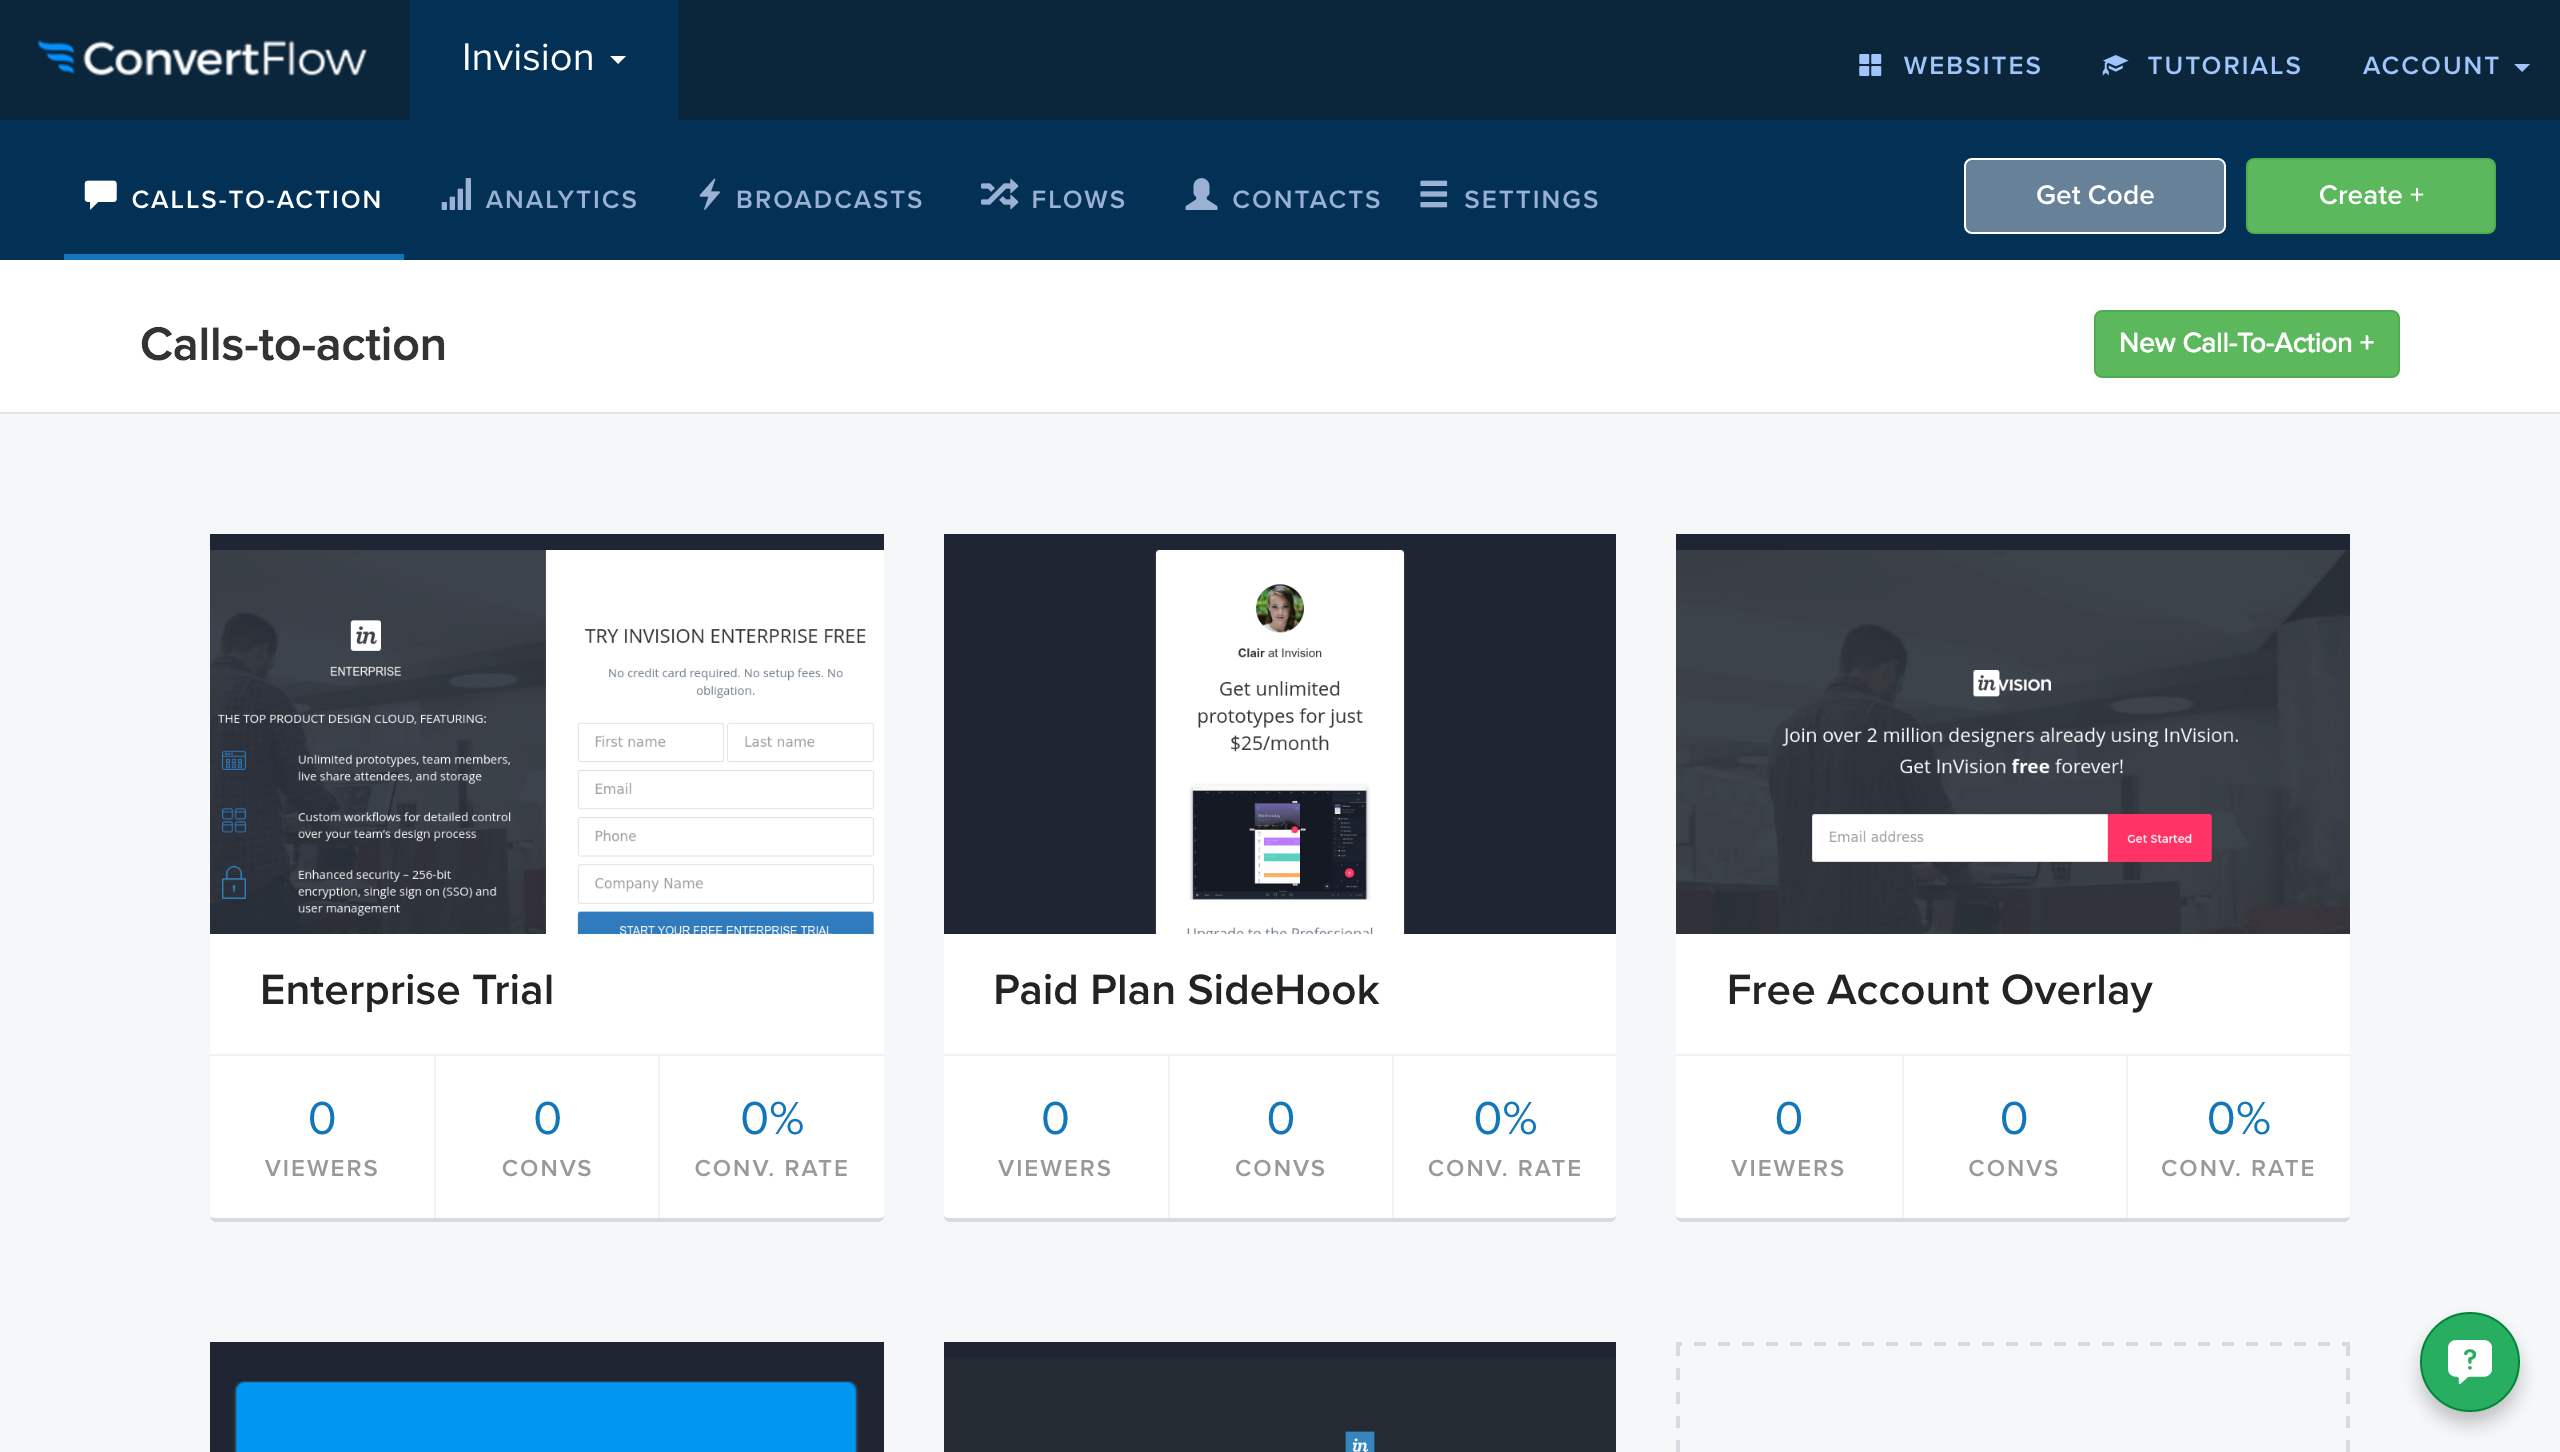
The website dashboard
Once you've created a website and click to access it, you'll land on the website's dashboard. Here you have easy navigation to quickly access the calls-to-action, analytics, flows, broadcasts and contacts in this website.
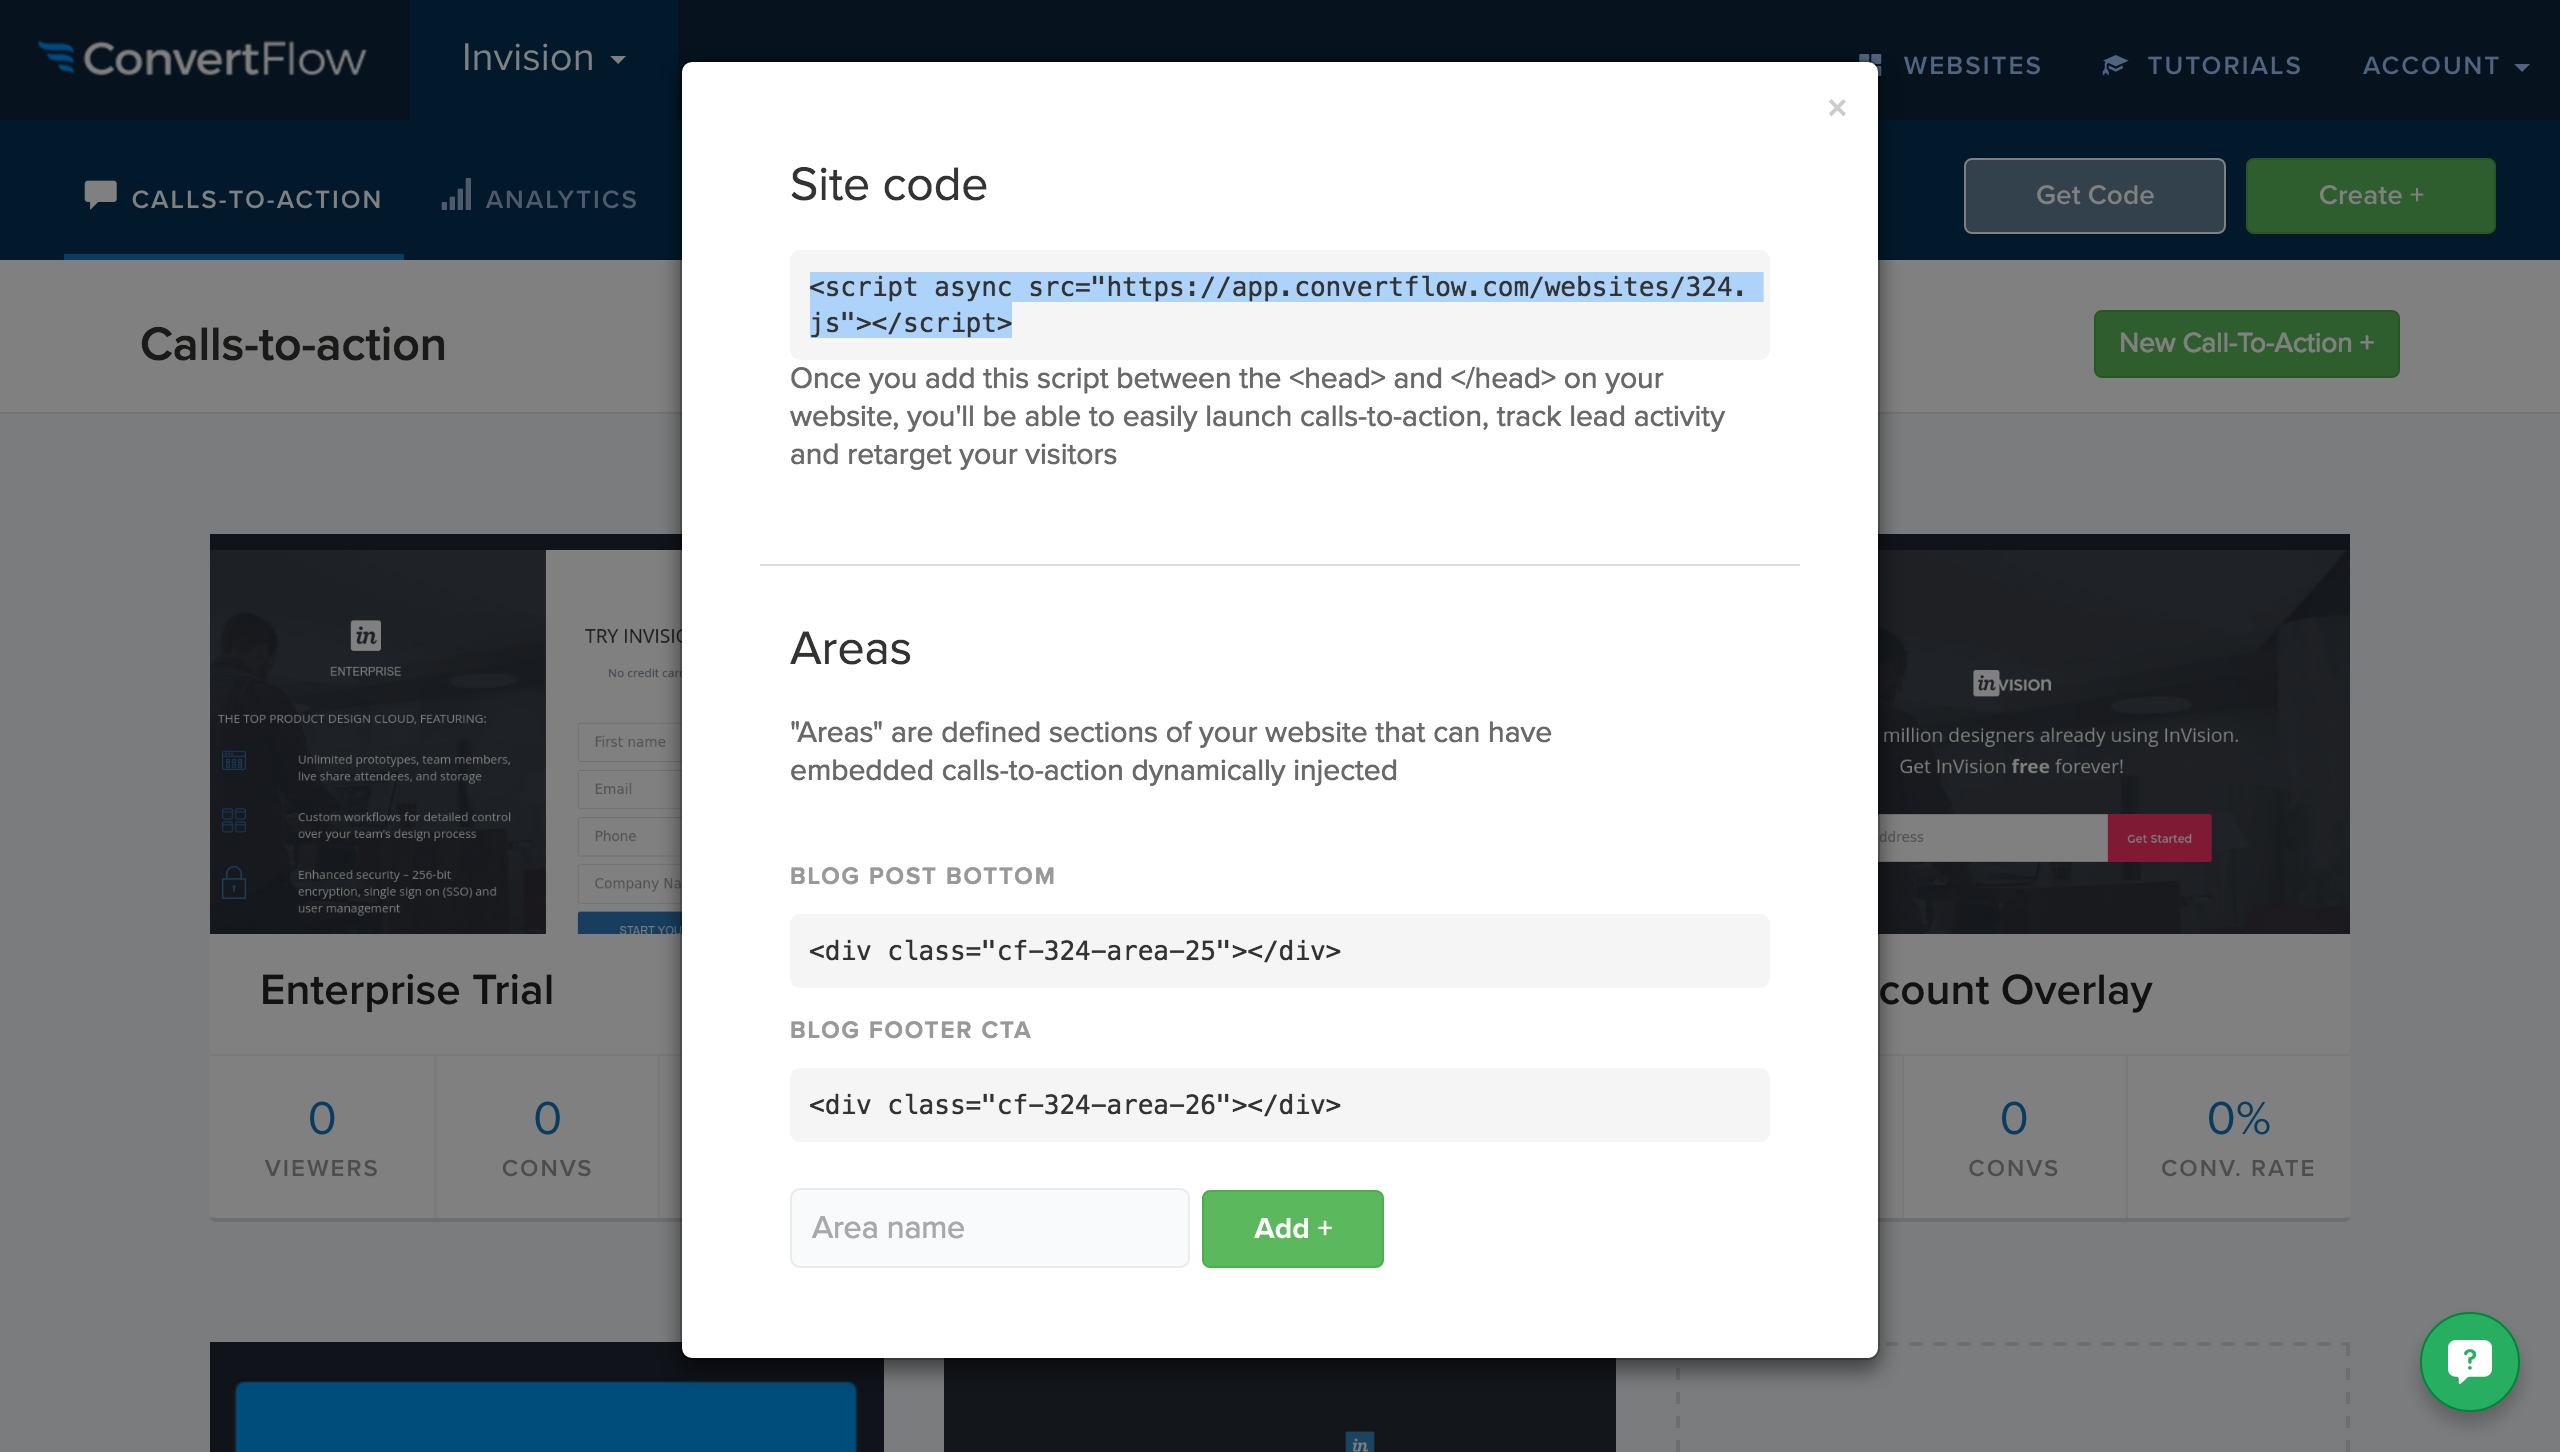
Getting your website's code
By clicking the "Get Code" button to the top right, you'll be able to quickly access your website's code. Place this code in between the tags of your website.
Once this code is on your site, ConvertFlow will start tracking your website visitors and you'll be able to launch calls-to-action on your website without placing any more scripts.
Note: ConvertFlow uses cookies to remember who your website visitors are. This cookie will apply to the root domain name (ex: website.com), so any URL that the ConvertFlow code loads on will contribute to visitor tracking. These include subdomains (ex: pages.website.com)
3. Sync ConvertFlow with your marketing automation service to engage your leads on your website & by email with the right message
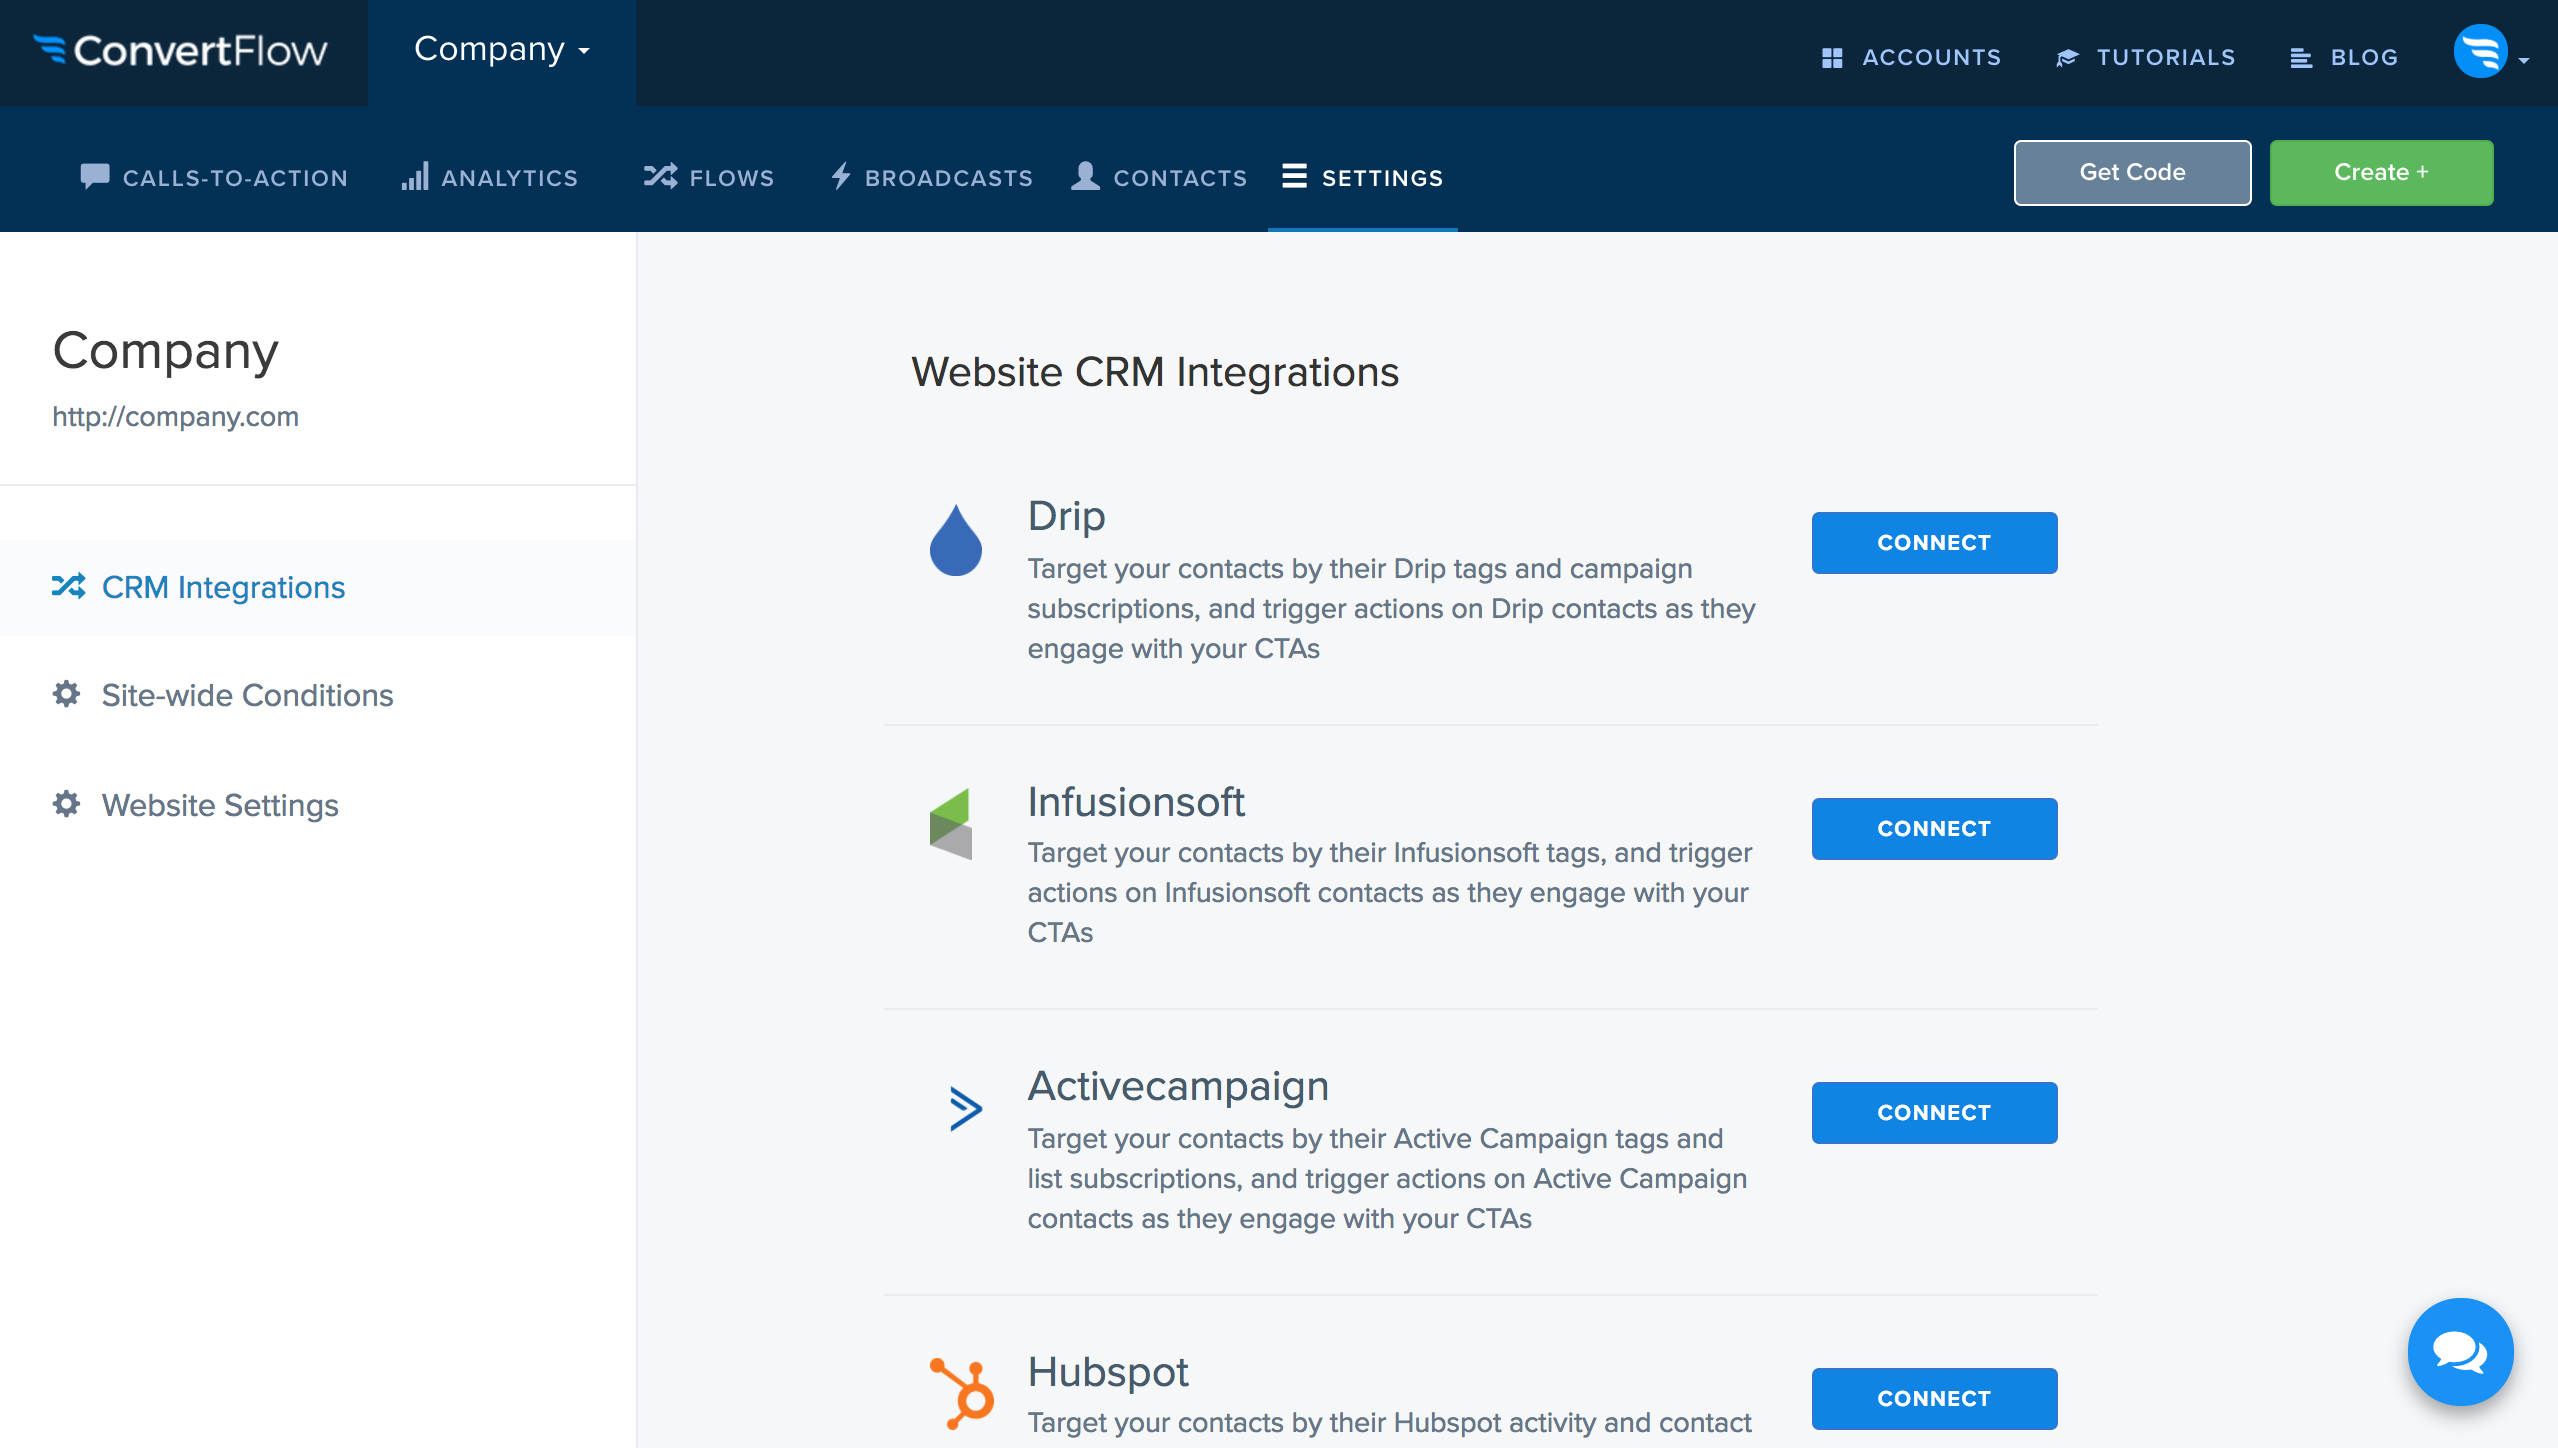
From ConvertFlow’s dashboard, head over to the CRM integrations page under the menu’s settings tab.
Find your marketing automation service and click the “Connect” button to sync your account with ConvertFlow.
Once you’ve integrated both tools, you’ll be able to access your marketing automation tool's data from within ConvertFlow, and use it to determine which email subscribers will see the calls-to-action you launch with ConvertFlow. You’ll also be able to choose which campaigns and actions you want to run on contacts as they interact with your site and move through your funnel.
4. Create an on-site retargeting campaign in ConvertFlow
The first step to retargeting prospects on our website with the right calls-to-action based on where they are in our funnel is to create a conversion flow in ConvertFlow.
Below, we’ll show you how to do this by building an example lead generation campaign that uses on-site retargeting to capture, engage and convert your prospects on your website and automated workflows to nurture and drive them back to your website using email marketing campaigns.

Creating a flow
Visit the flows tab in the menu, and click the “New Flow” button to create a new flow.
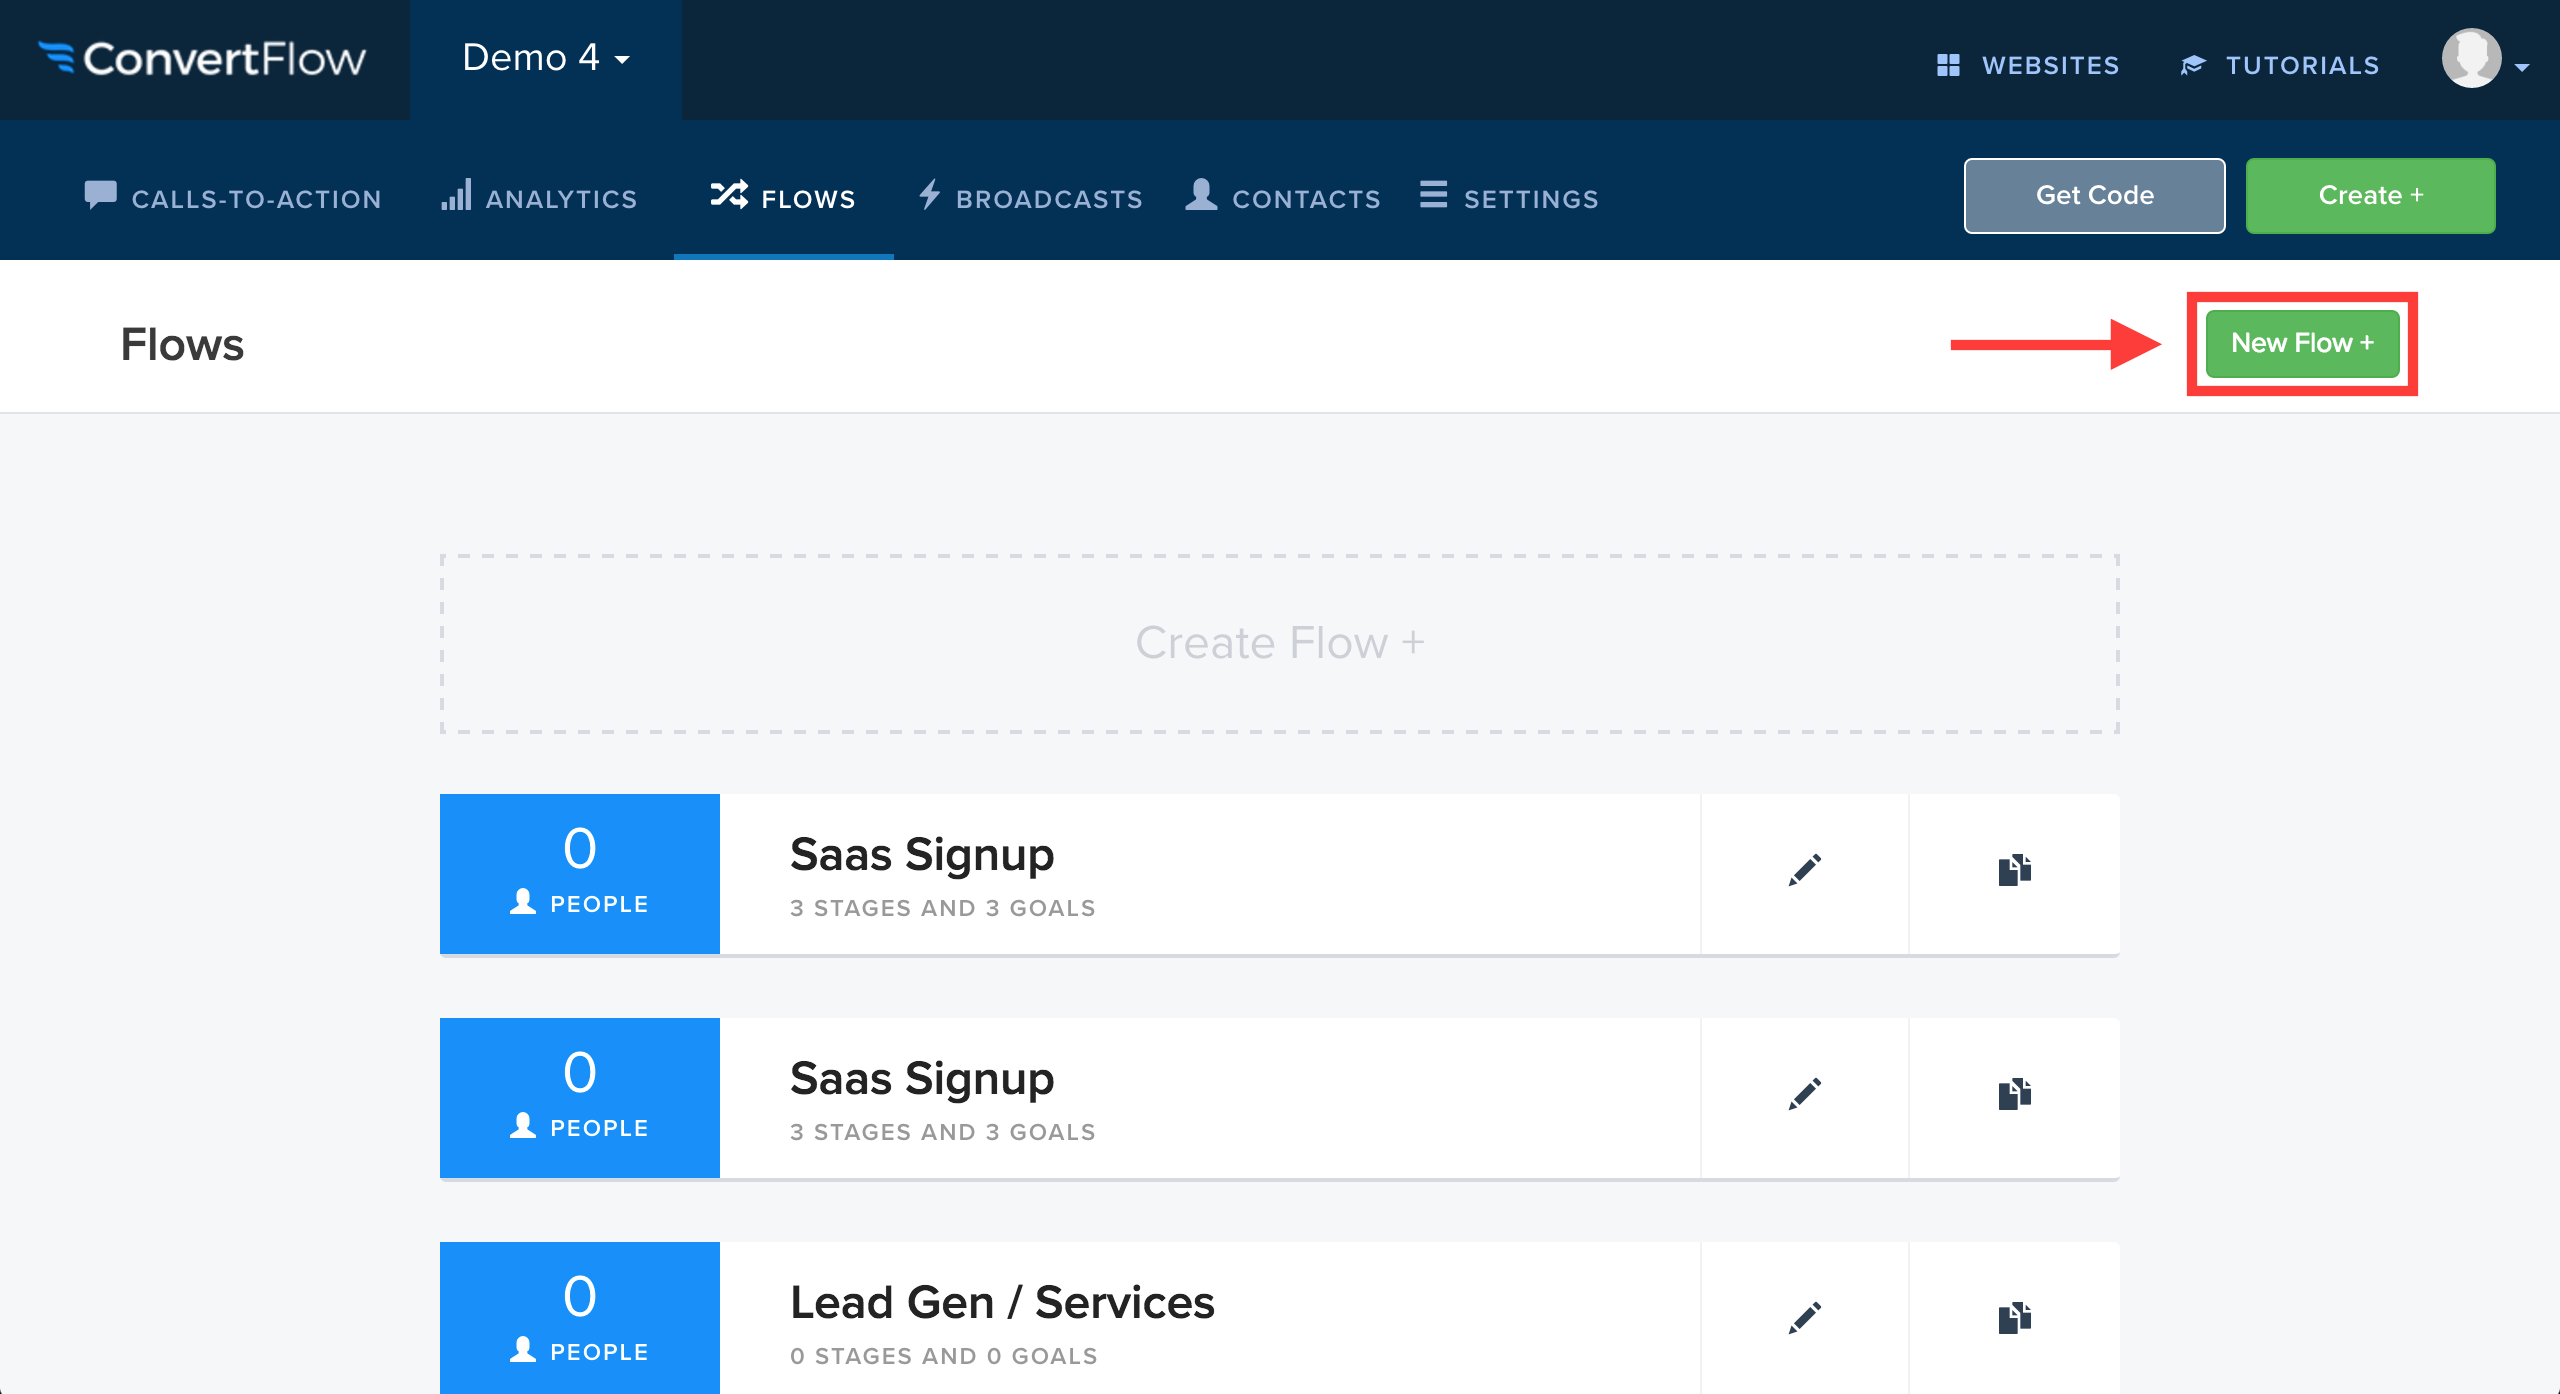
Next, we’re going to create the first stage in our flow called “New visitors”. This will contain the conversion goals we’ll promote to all new website visitors.

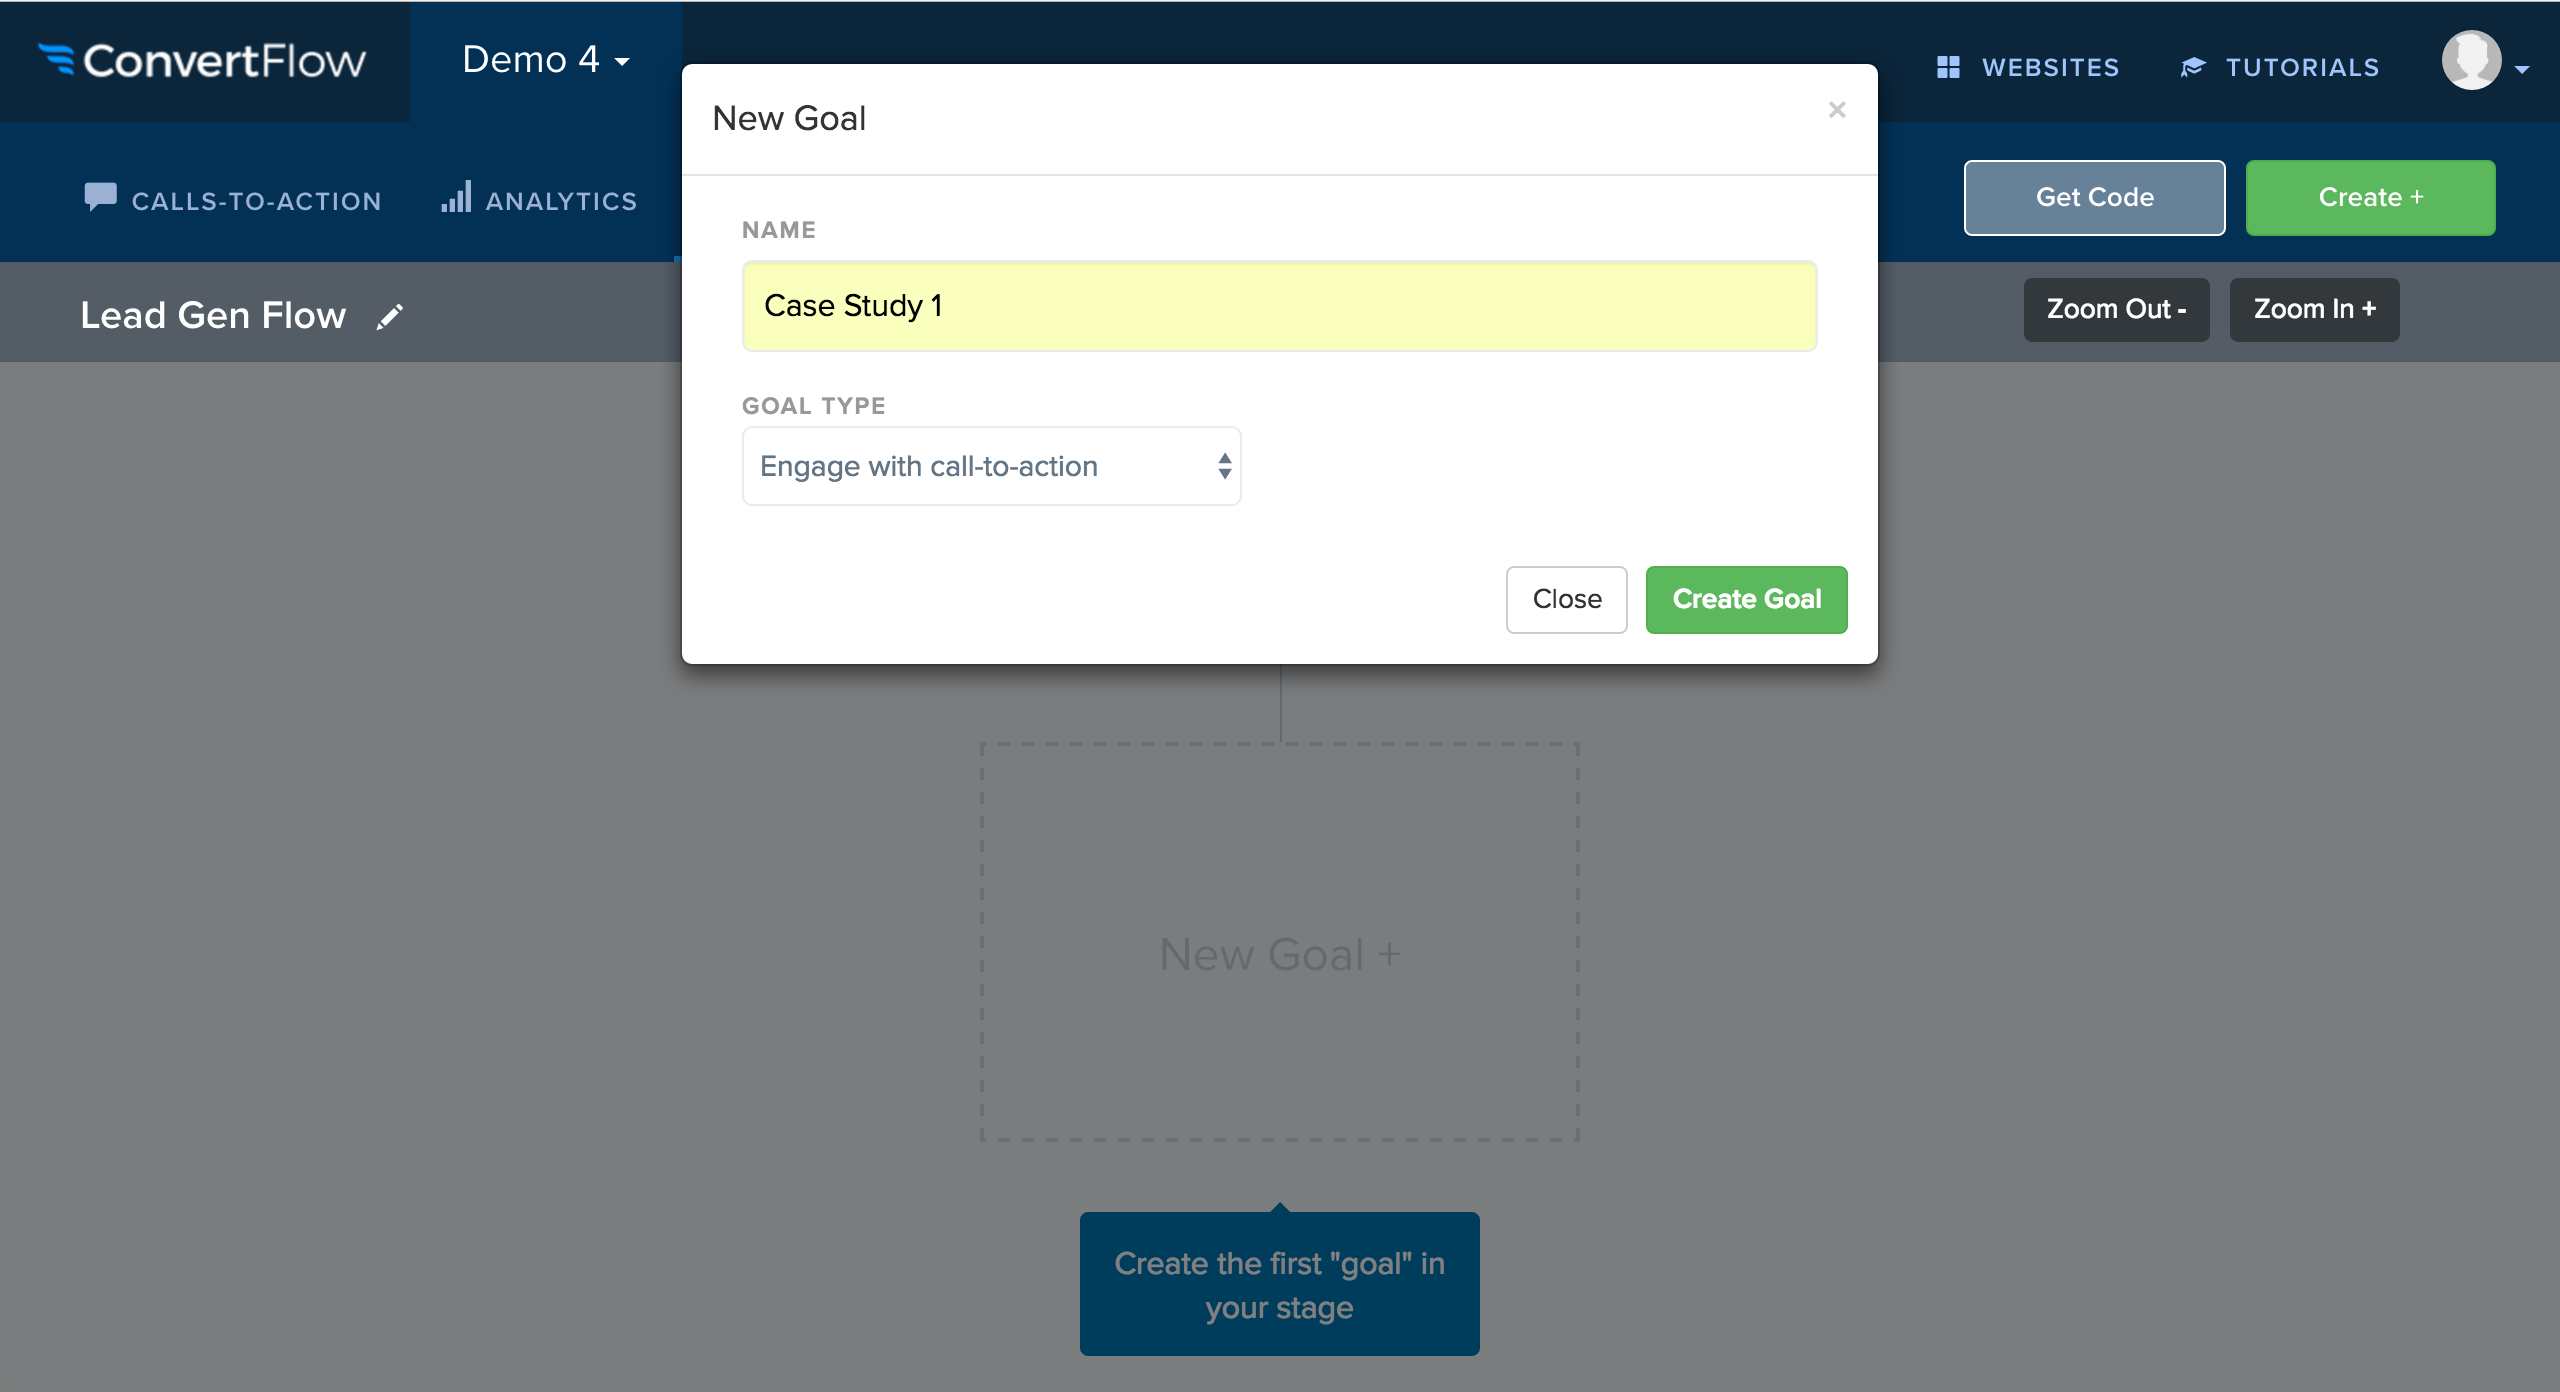
Once you’ve added a stage, you’ll need to create a goal that you’ll promote with calls-to-action on your website.
Creating a conversion goal
For our first goal, we’re going to promote a case study. Choose “engage with call-to-action” from the goal type drown down menu.
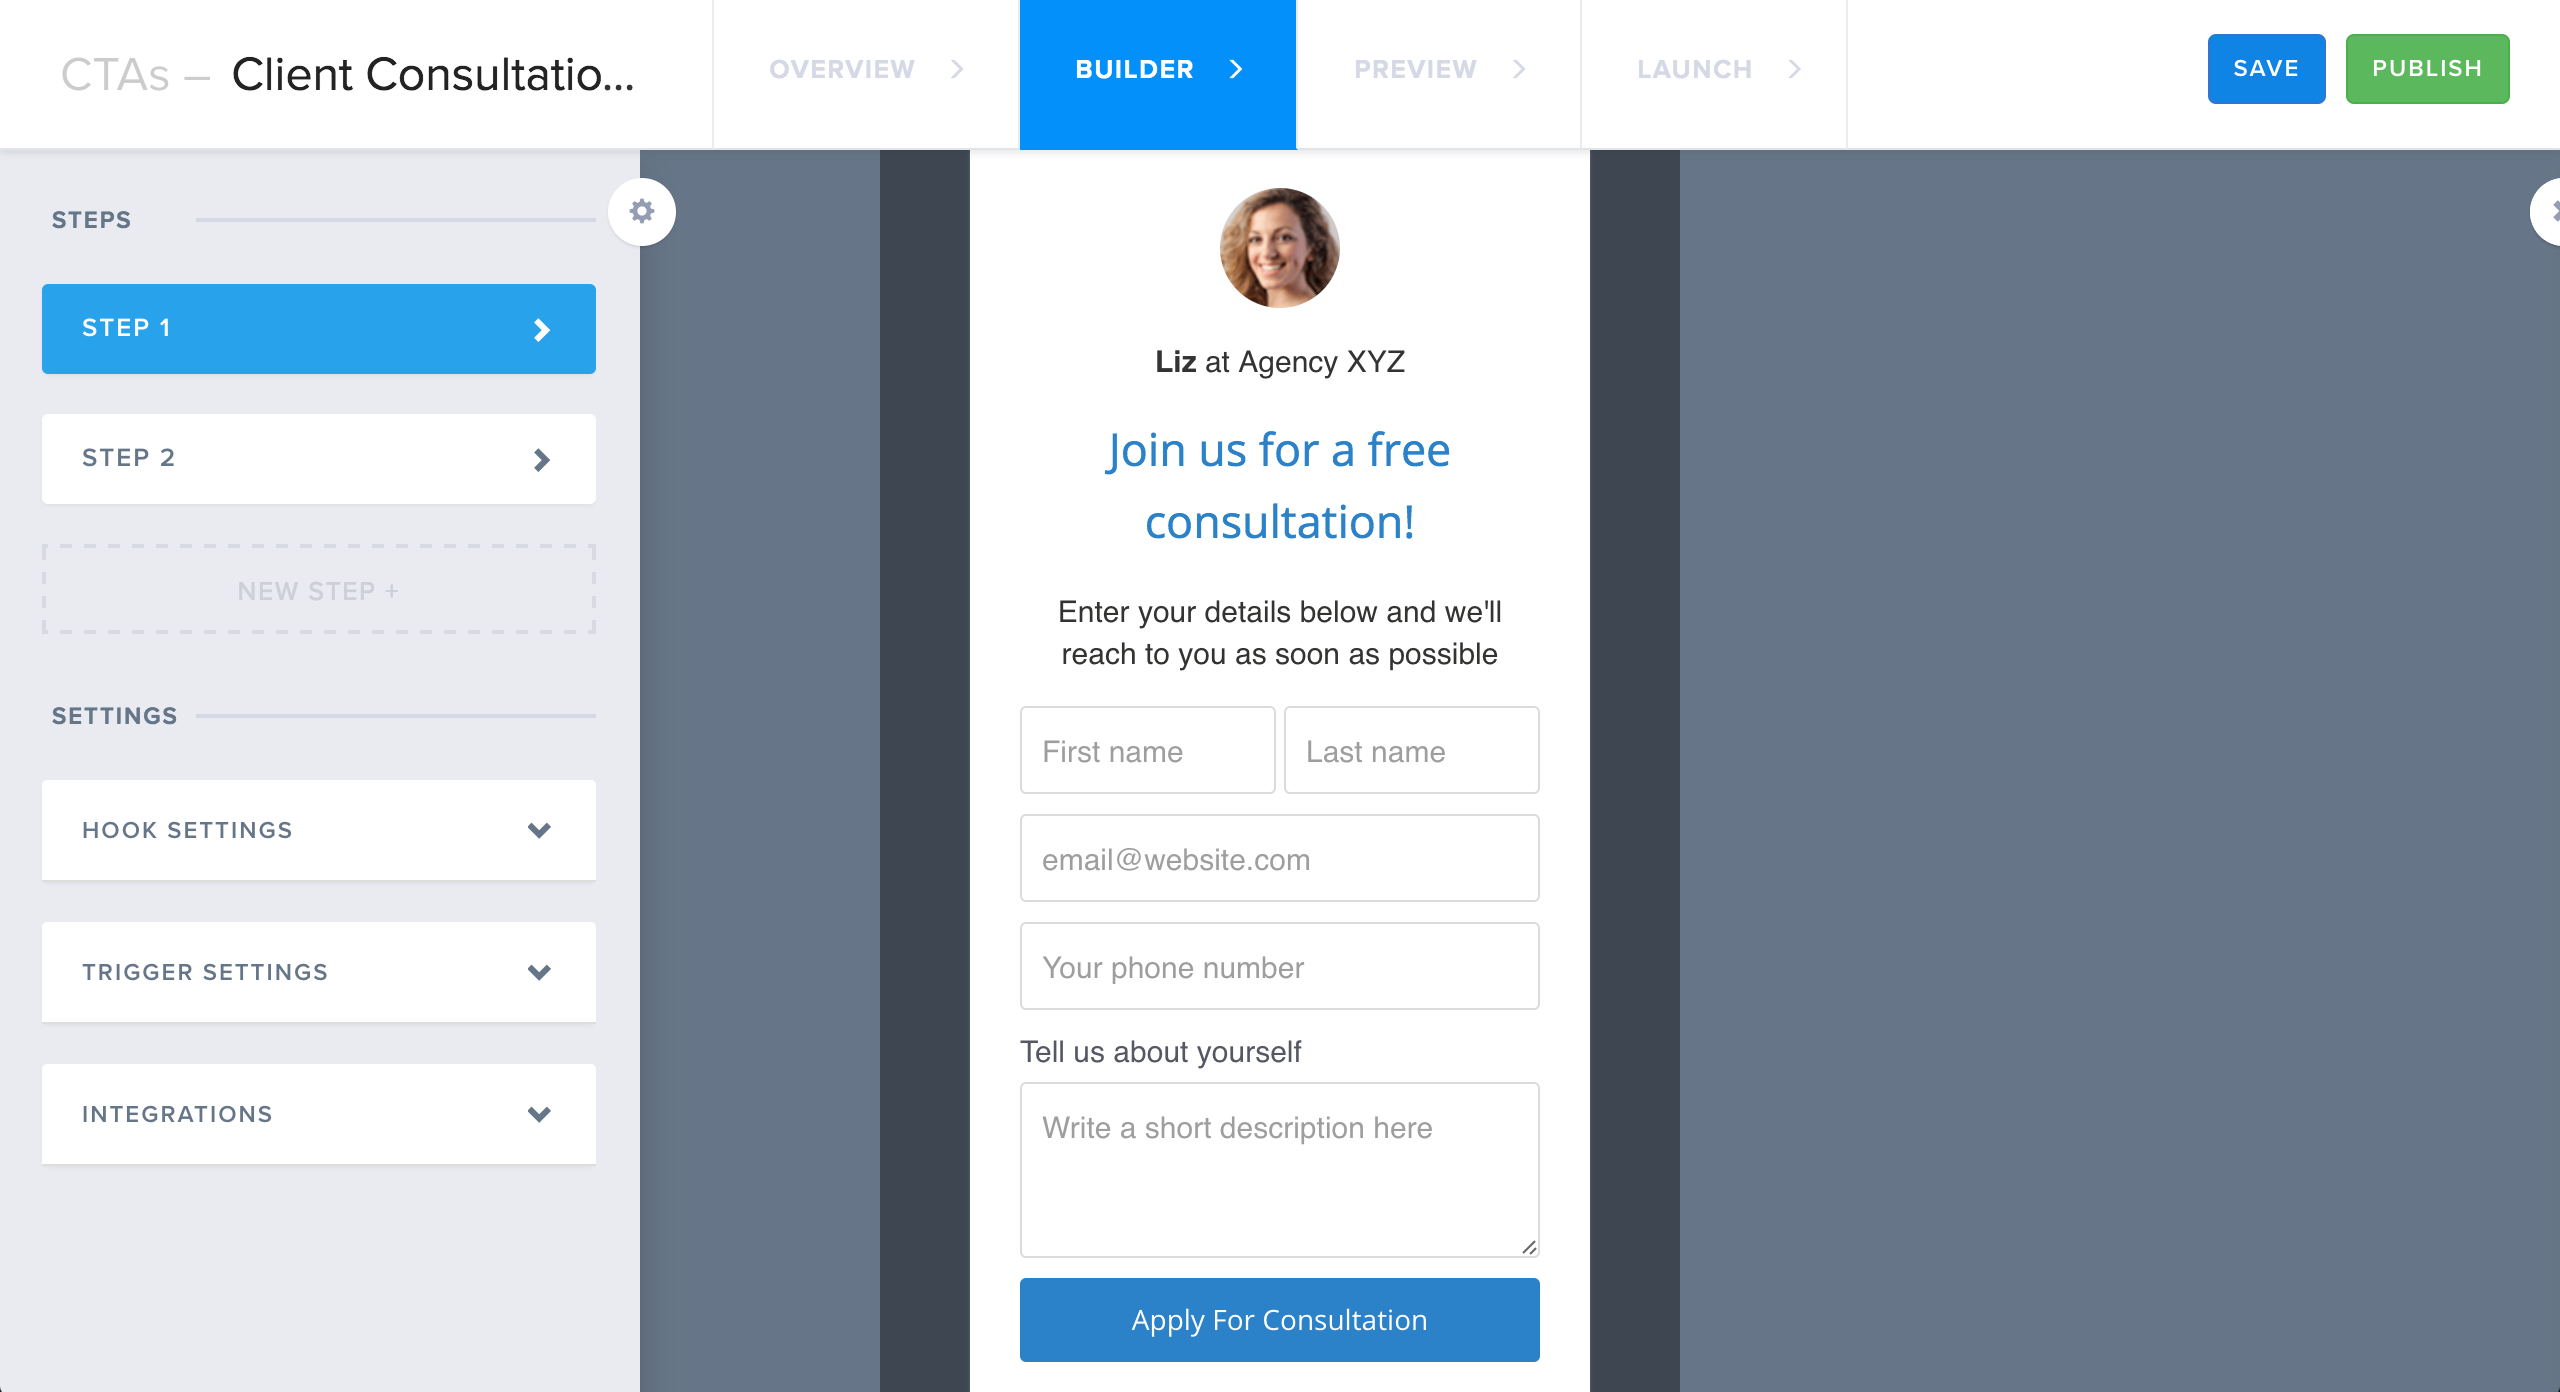
Creating a call-to-action
Then we’re going to create a call-to-action to promote this case study, so we can add it to our goal. Click on the green “Create” button and select “Create Call-To-Action” from the drop down menu.

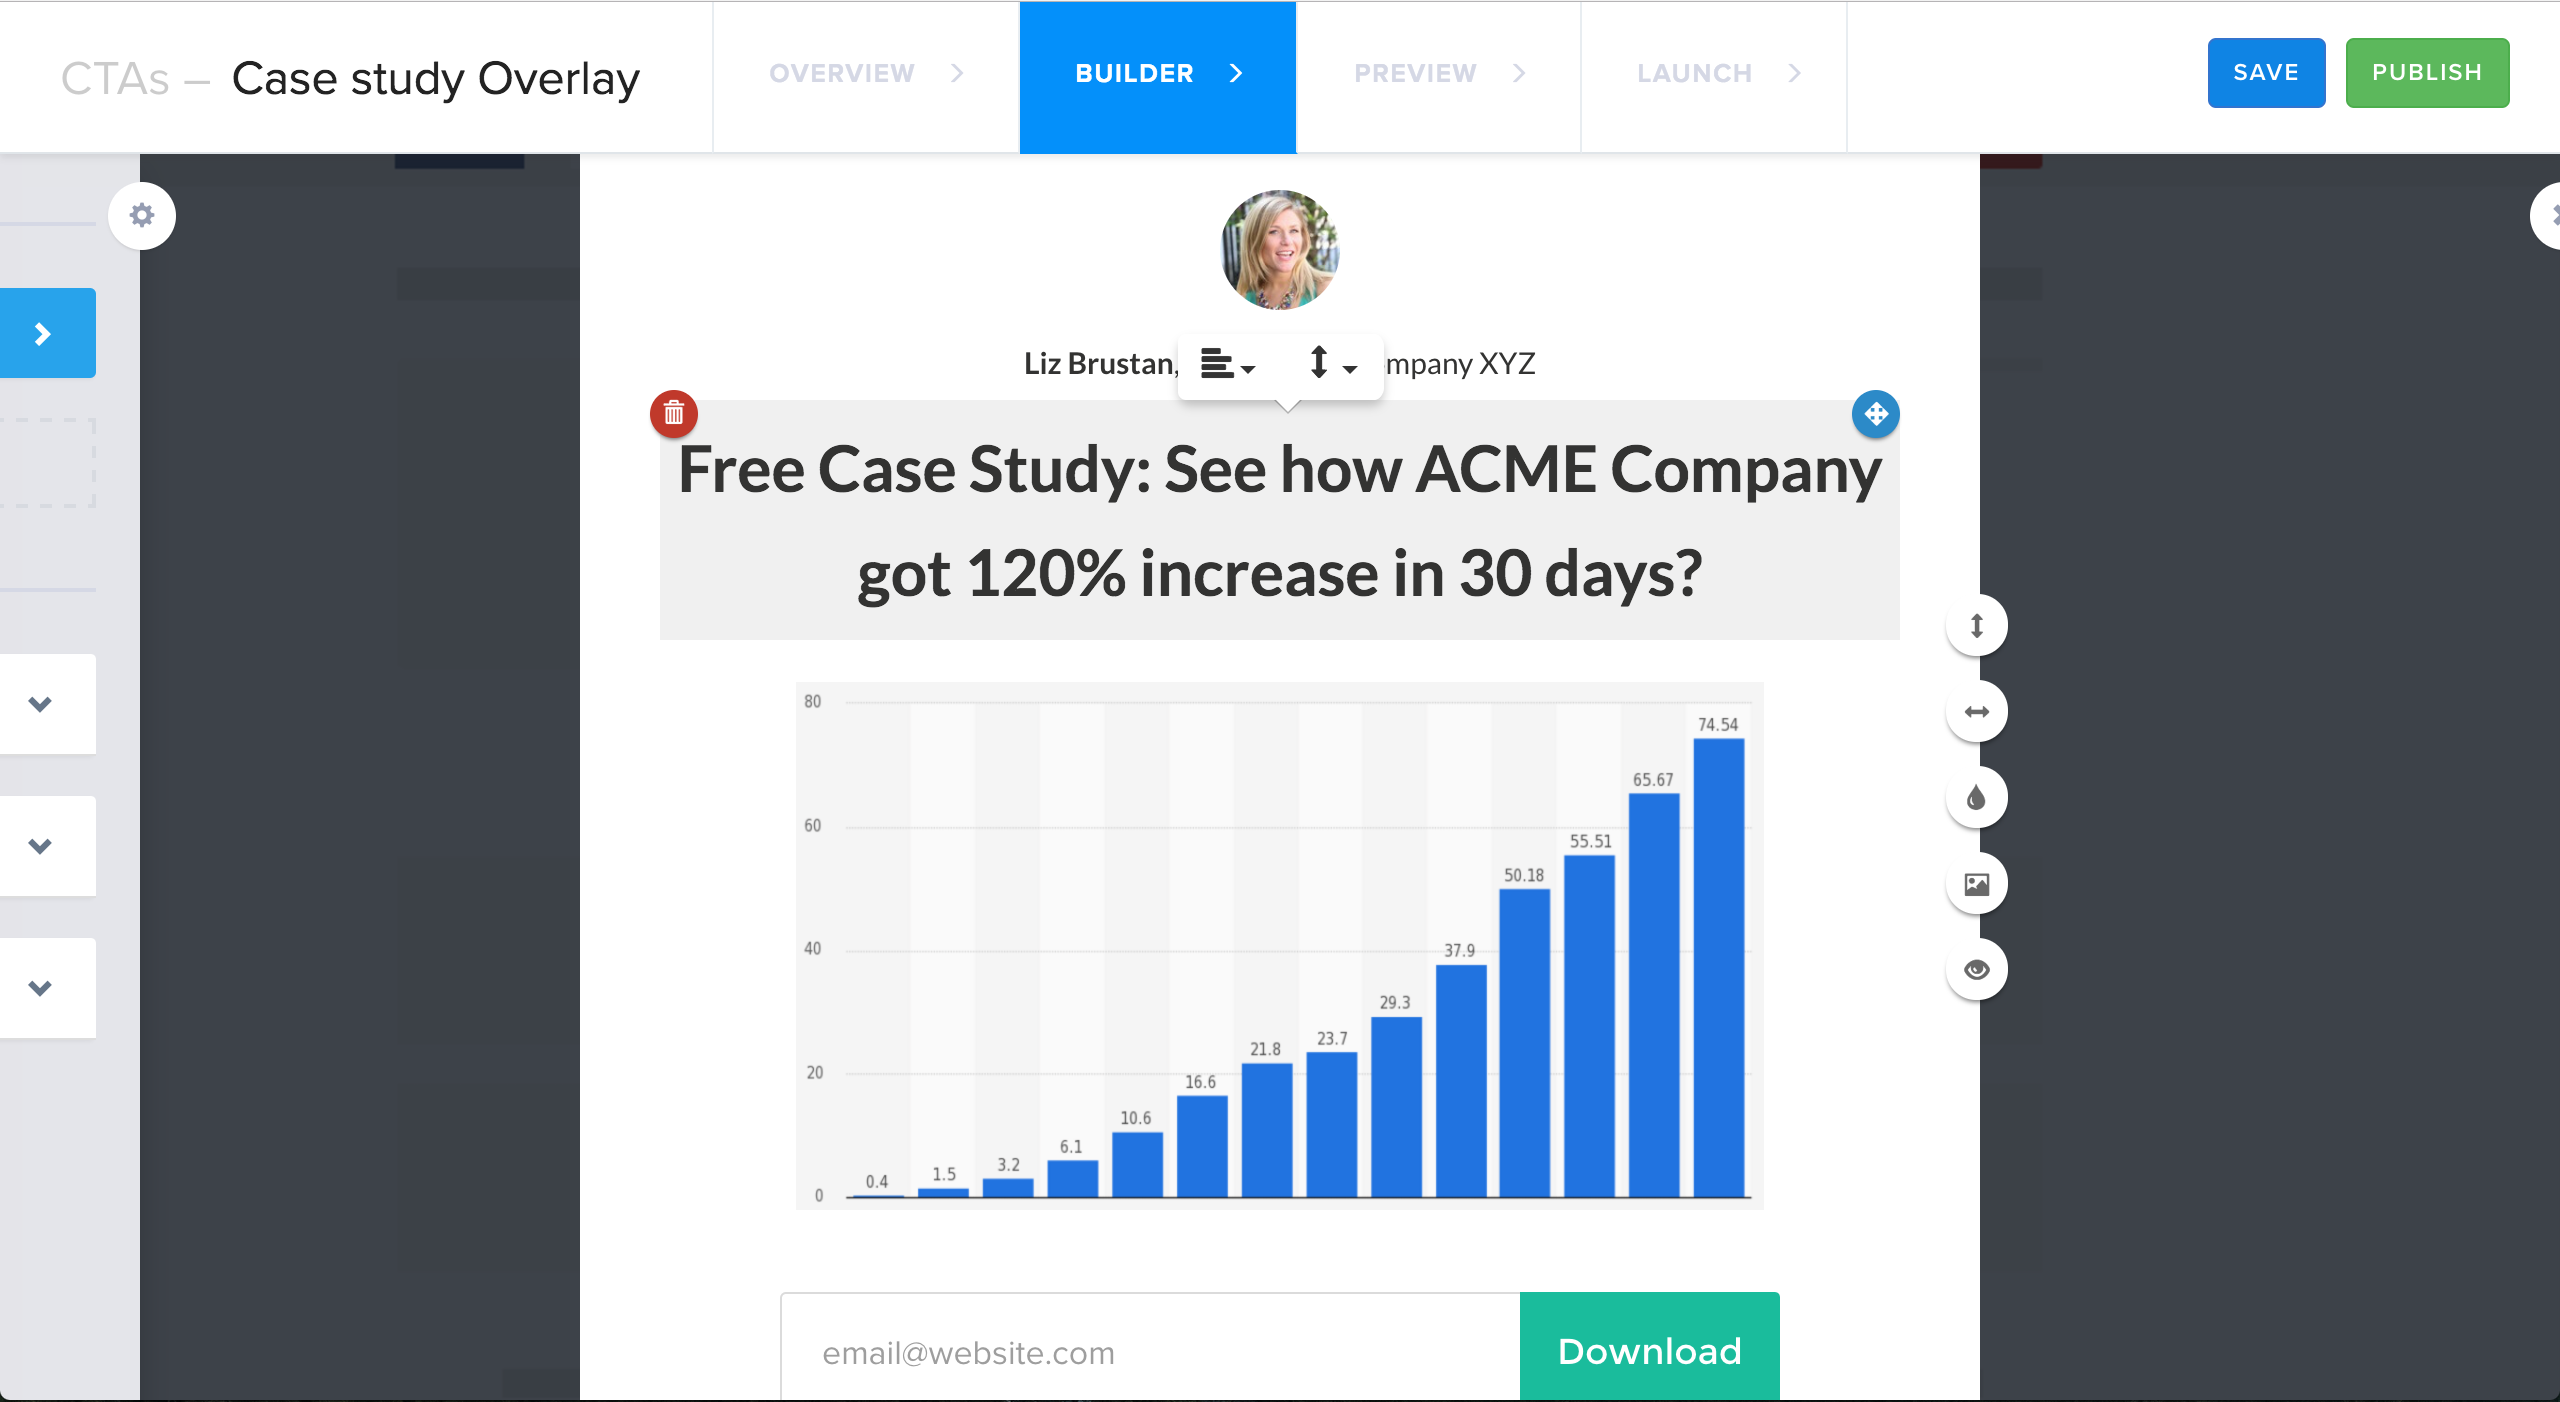
For this type of call-to-action, we’re going to use an Overlay, which will pop up and engage visitors as they interact with our website.

Select Box Overlay.
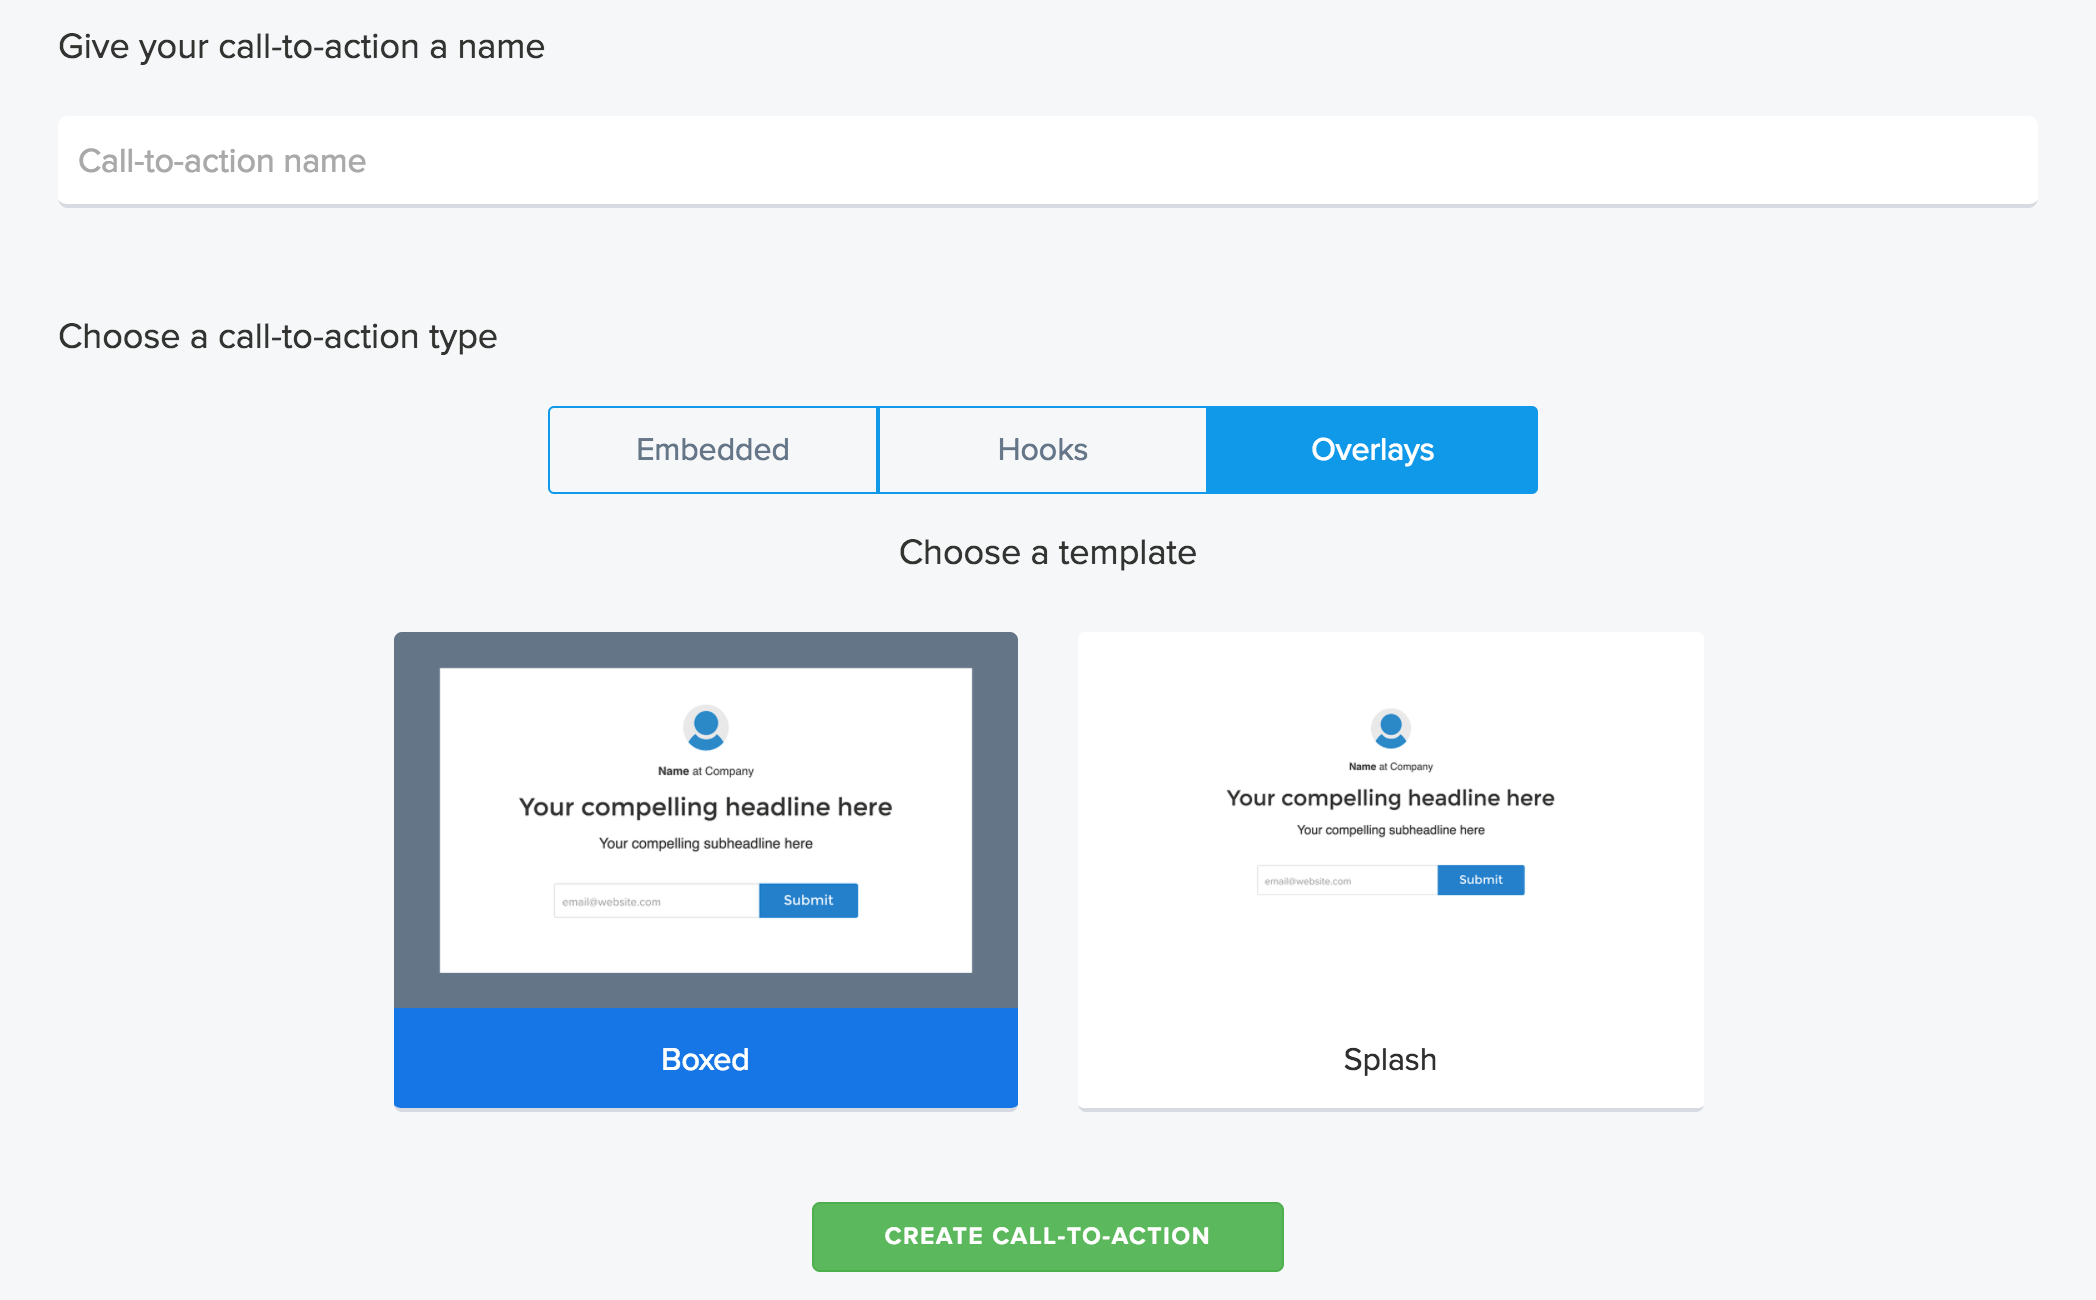
Follow the walkthrough, which will show you how to create the call-to-action.
Creating actions
Once our call-to-action has been created, let’s trigger an action to subscribe contacts to the case study campaign in our marketing automation tool when they submit our form.
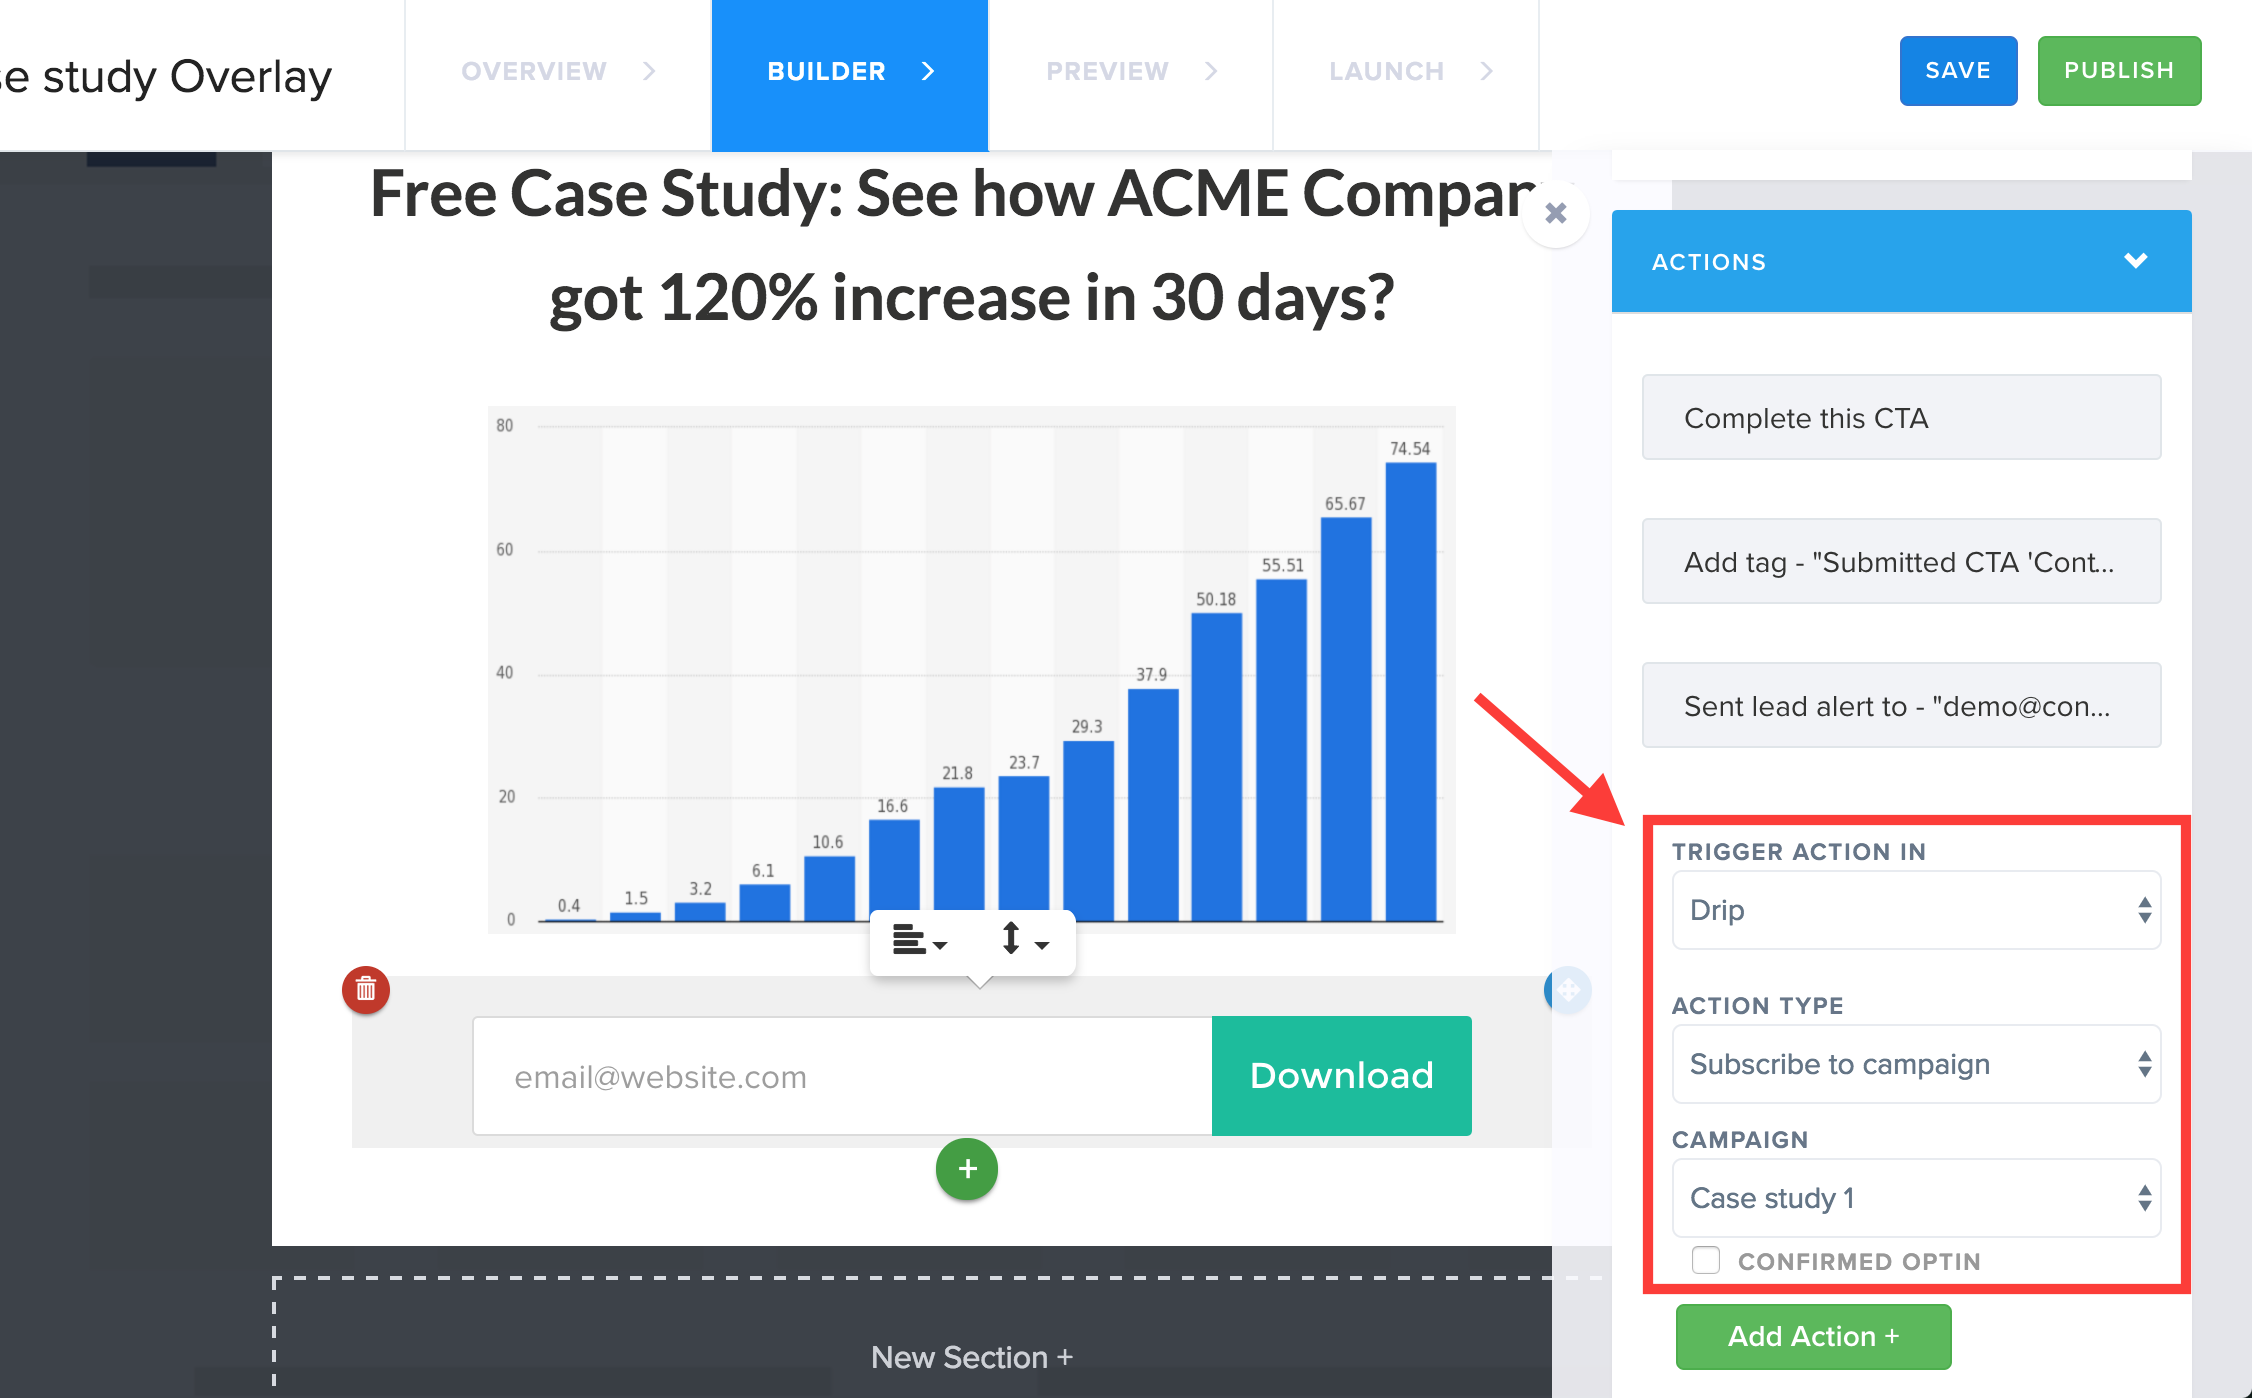
Click on the email field to open up the form settings sidebar. Then, under actions, select your marketing automation tool from the integrations drop down menu.
You’ll see that ConvertFlow lets you to trigger various types of actions in the tools we integrate with.
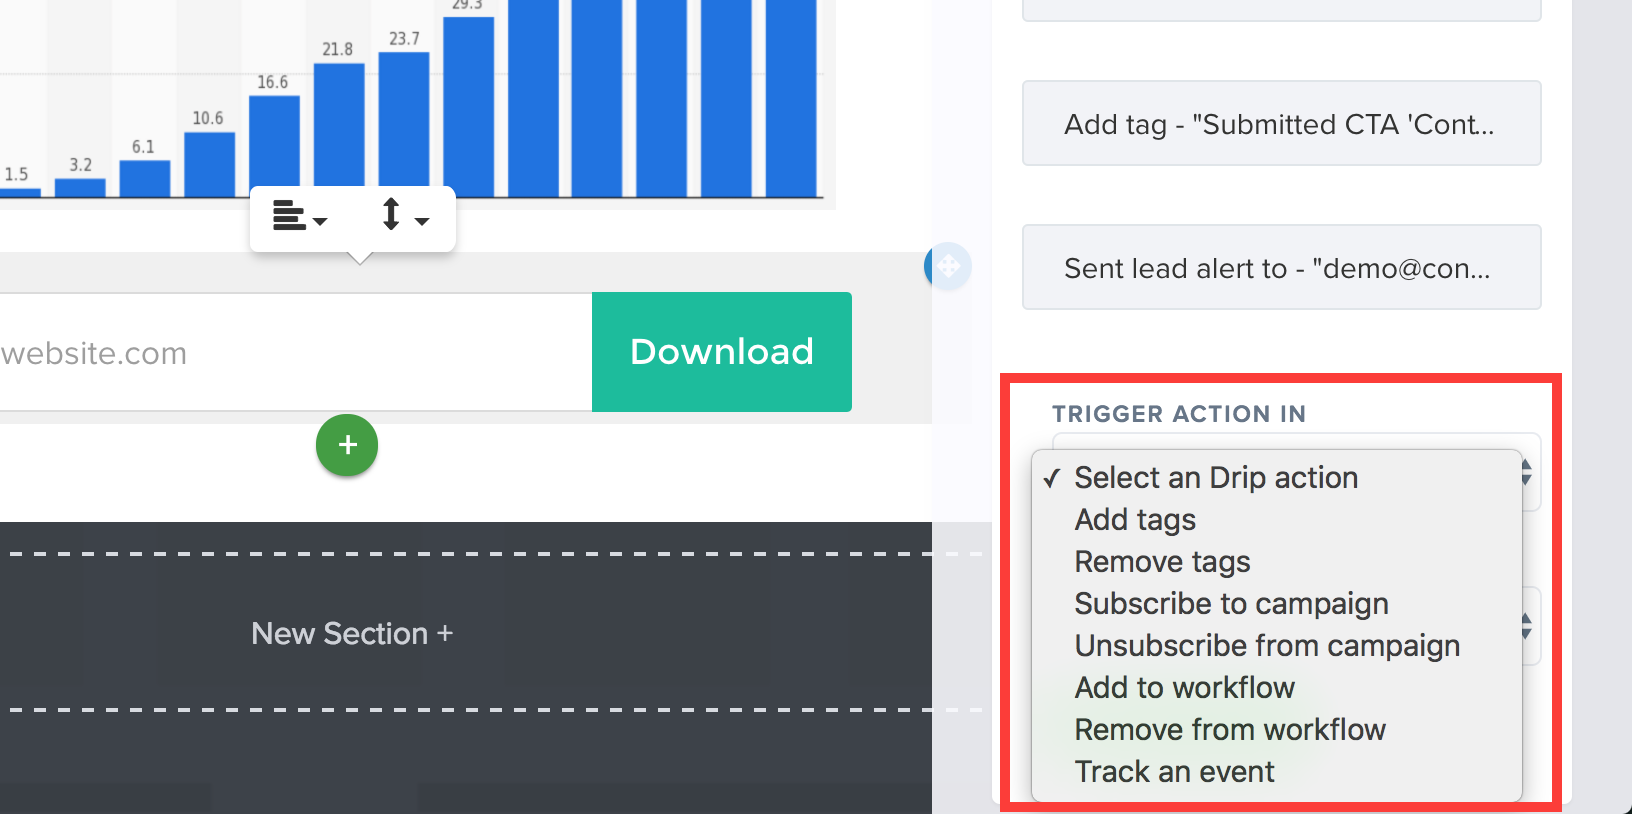
You’ll select “subscribe to campaign” from action type, and select your campaign from the campaigns list.
Click the “Add Action” button to add it to the actions list for this call-to-action.
Then, click “Save” to save your progress. Click “Publish” to publish your changes to your call-to-action.
This will take you to the Preview page, where you can see the published changes to your call-to-action. Let’s now head over the to launch page by clicking the “launch” button.

On the Launch page, we’ll want to clicked on the advanced tab to give us the option to add the CTA to the Case Study goal in our Flow.
Select your goal from the list of goals, and click the “Add to flow goal” button.
Then, click on the goal that was added to open your flow in a new tab.
Setting targeting conditions
Now, click on your goal and set the targeting conditions you want to use for displaying your call-to-action on your website.

This call-to-action is now launched on your site and ready to start subscribing new visitors to our email campaign in our marketing automation tool.
Next, we’re going to create a new stage called “Subscribers”, and a goal in this stage that promotes a complimentary consultation to every returning visitor that is subscribed to our Case Study email campaign in our email marketing tool.
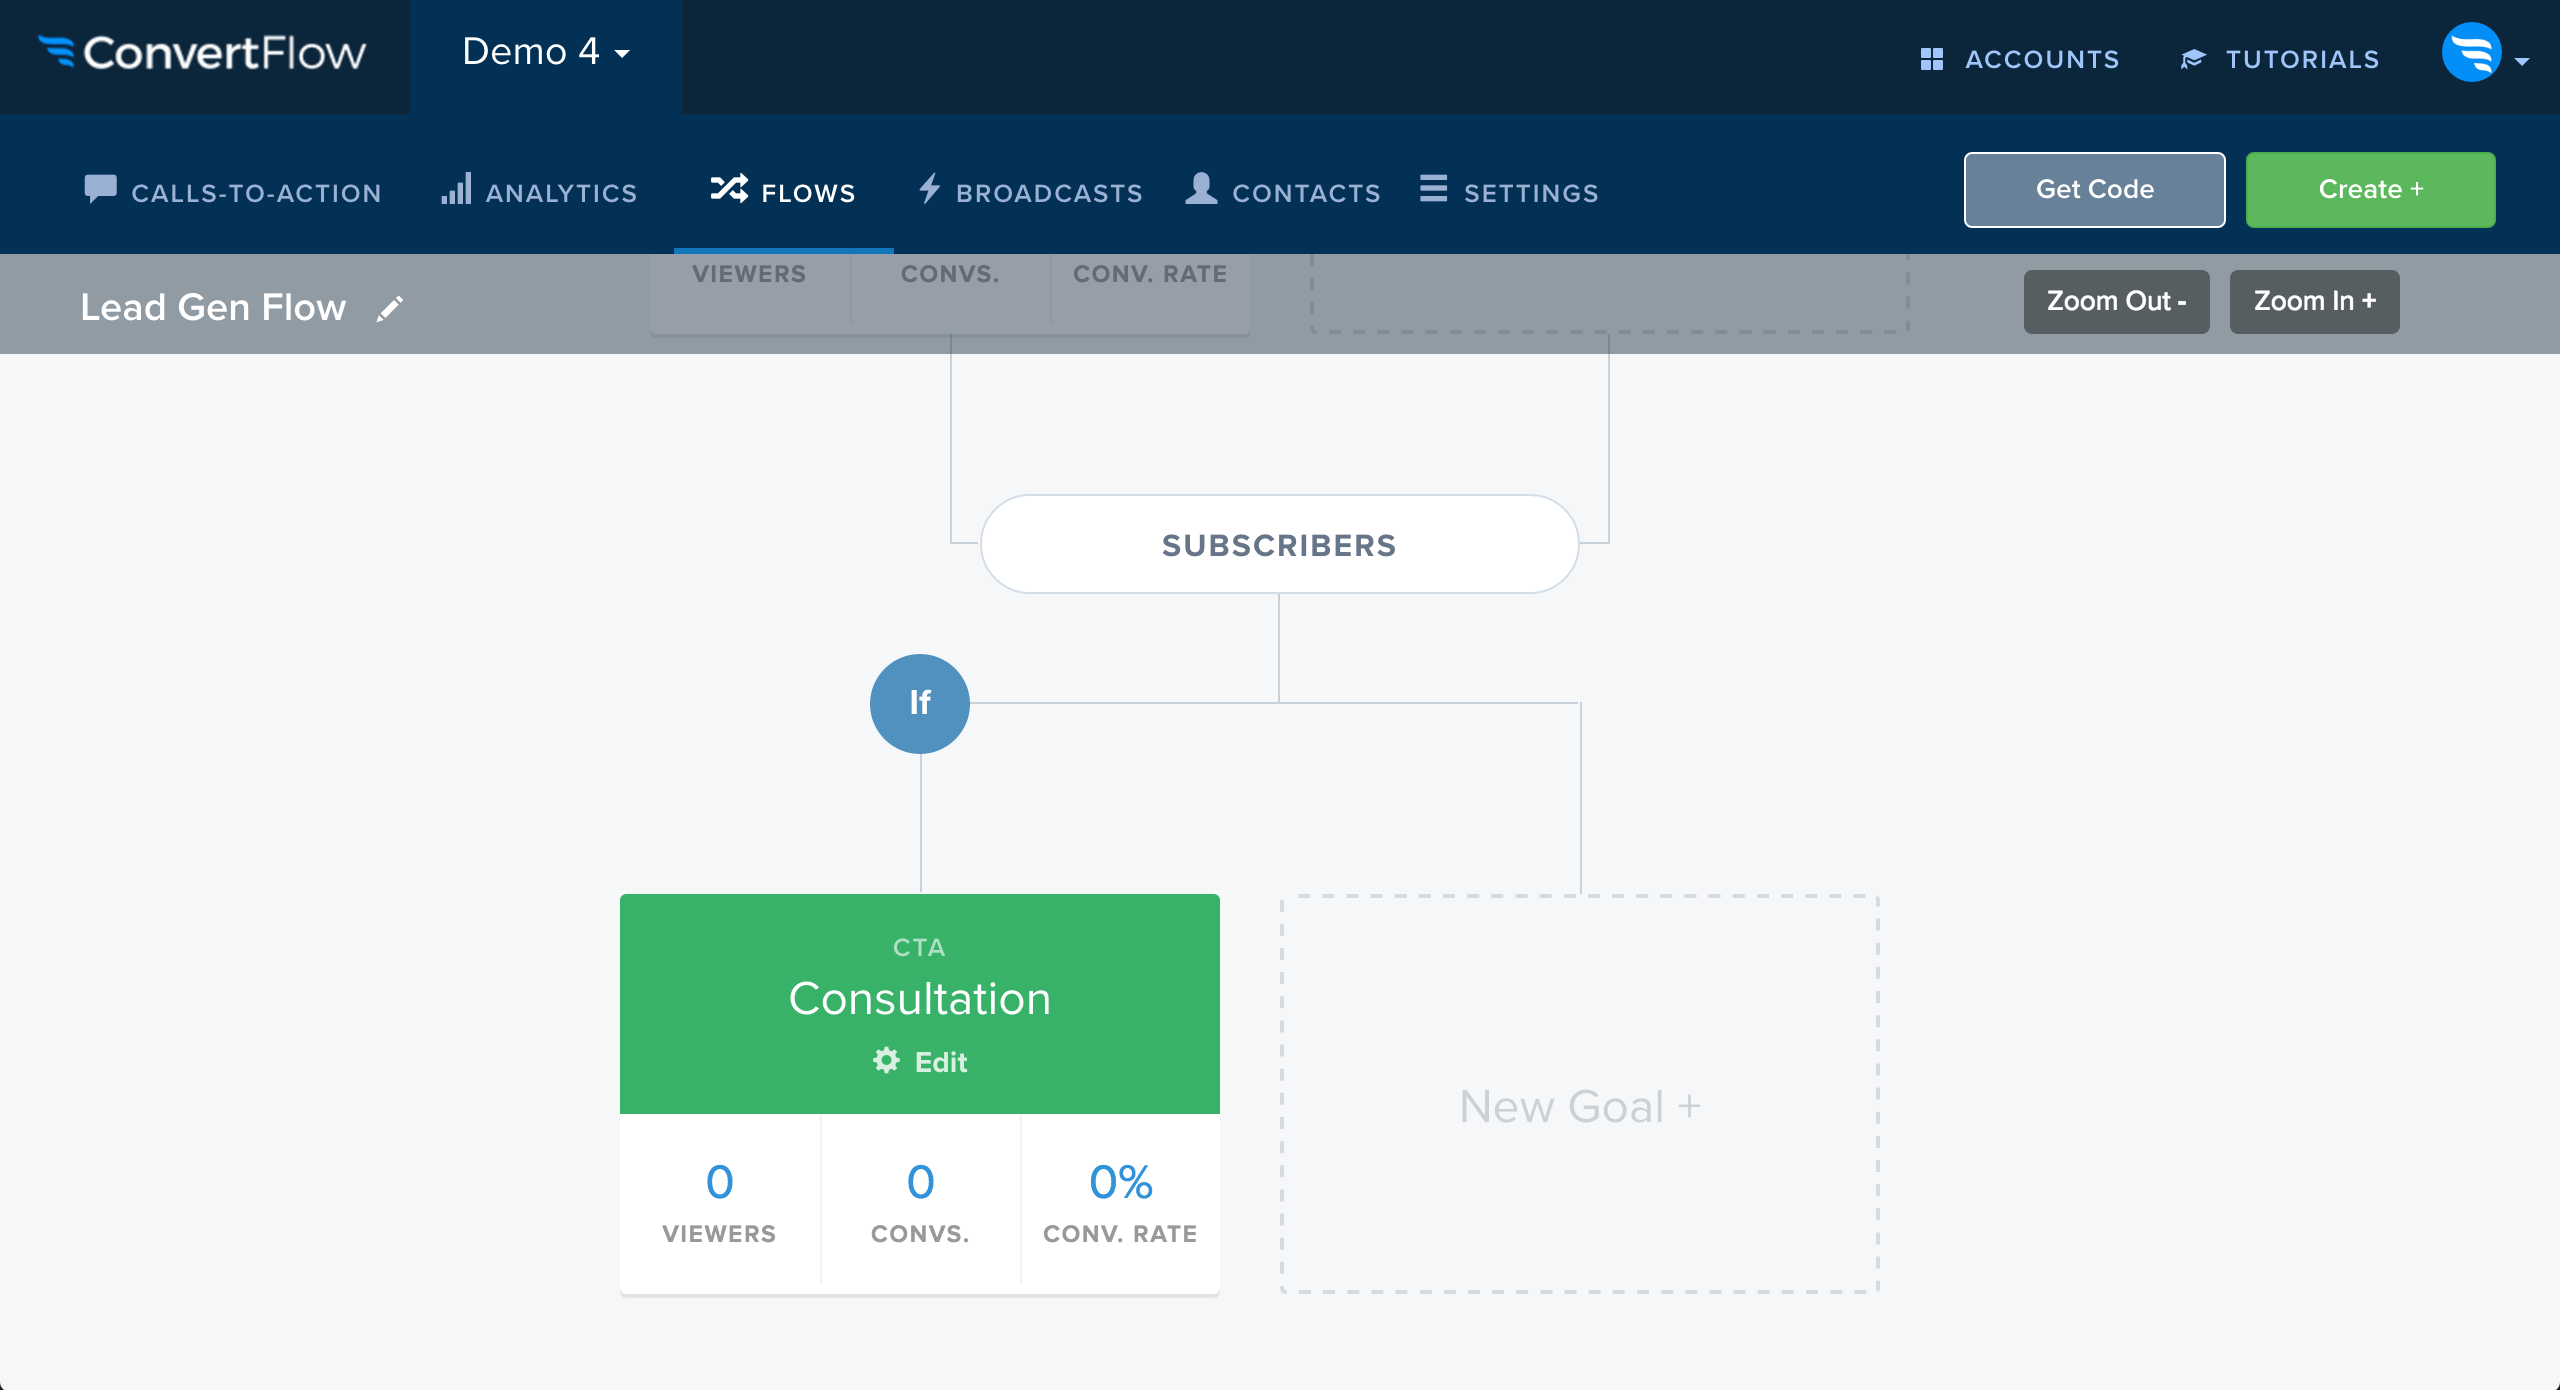
Then, we’ll create a call-to-action for this goal.
In our goal, we’ll set a targeting condition to only show this call-to-action to visitors who are subscribed to our email campaign in our email marketing tool.

After setting our targeting conditions, we’ll scroll down to the actions area. Let’s add an action to track a custom event in our marketing automation tool (this may be "tags" in the tool you use). We’ll name this custom event “Requested Consultation”.
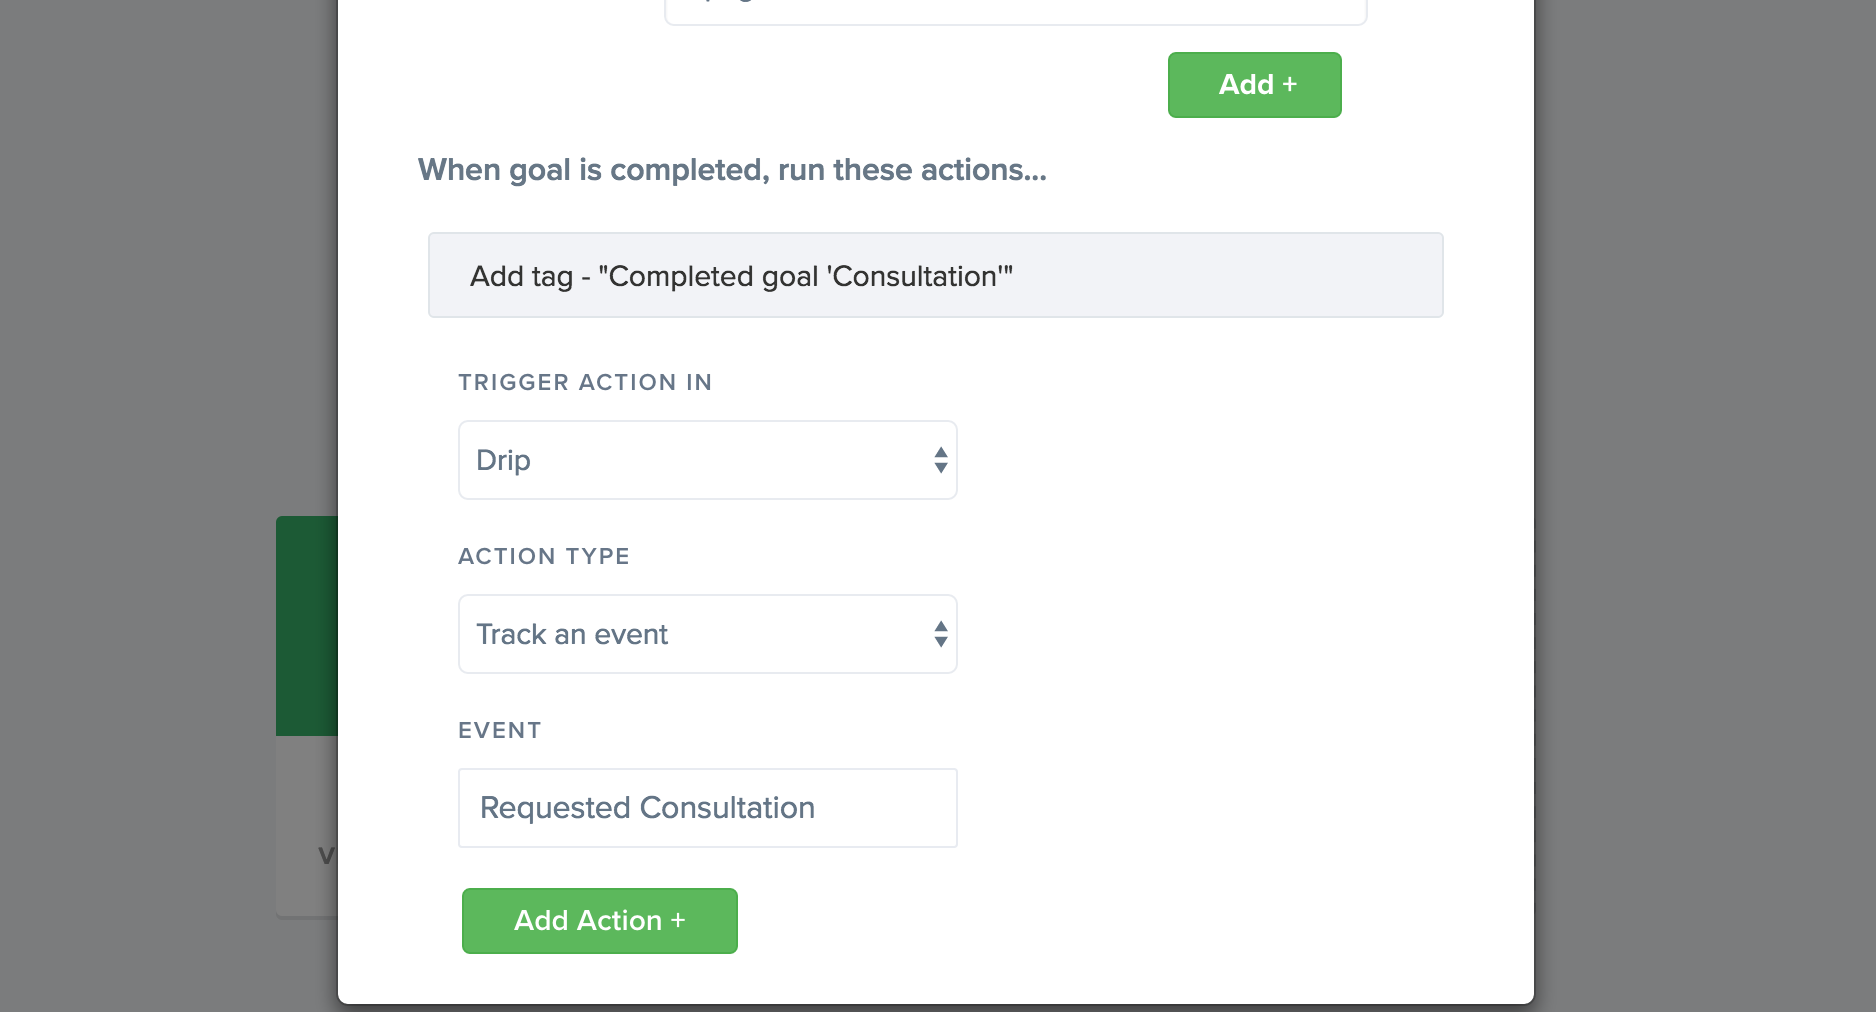
In our email marketing automation workflow, we have it set to trigger an email campaign called “Engagement campaign” when the “Requested Consultation” custom event is tracked.
When our visitor returns to our website, we’ll now start retargeting them with a call-to-action that promotes “request a callback” until they become customers. This way, our team can follow up with them when they’re ready to buy.
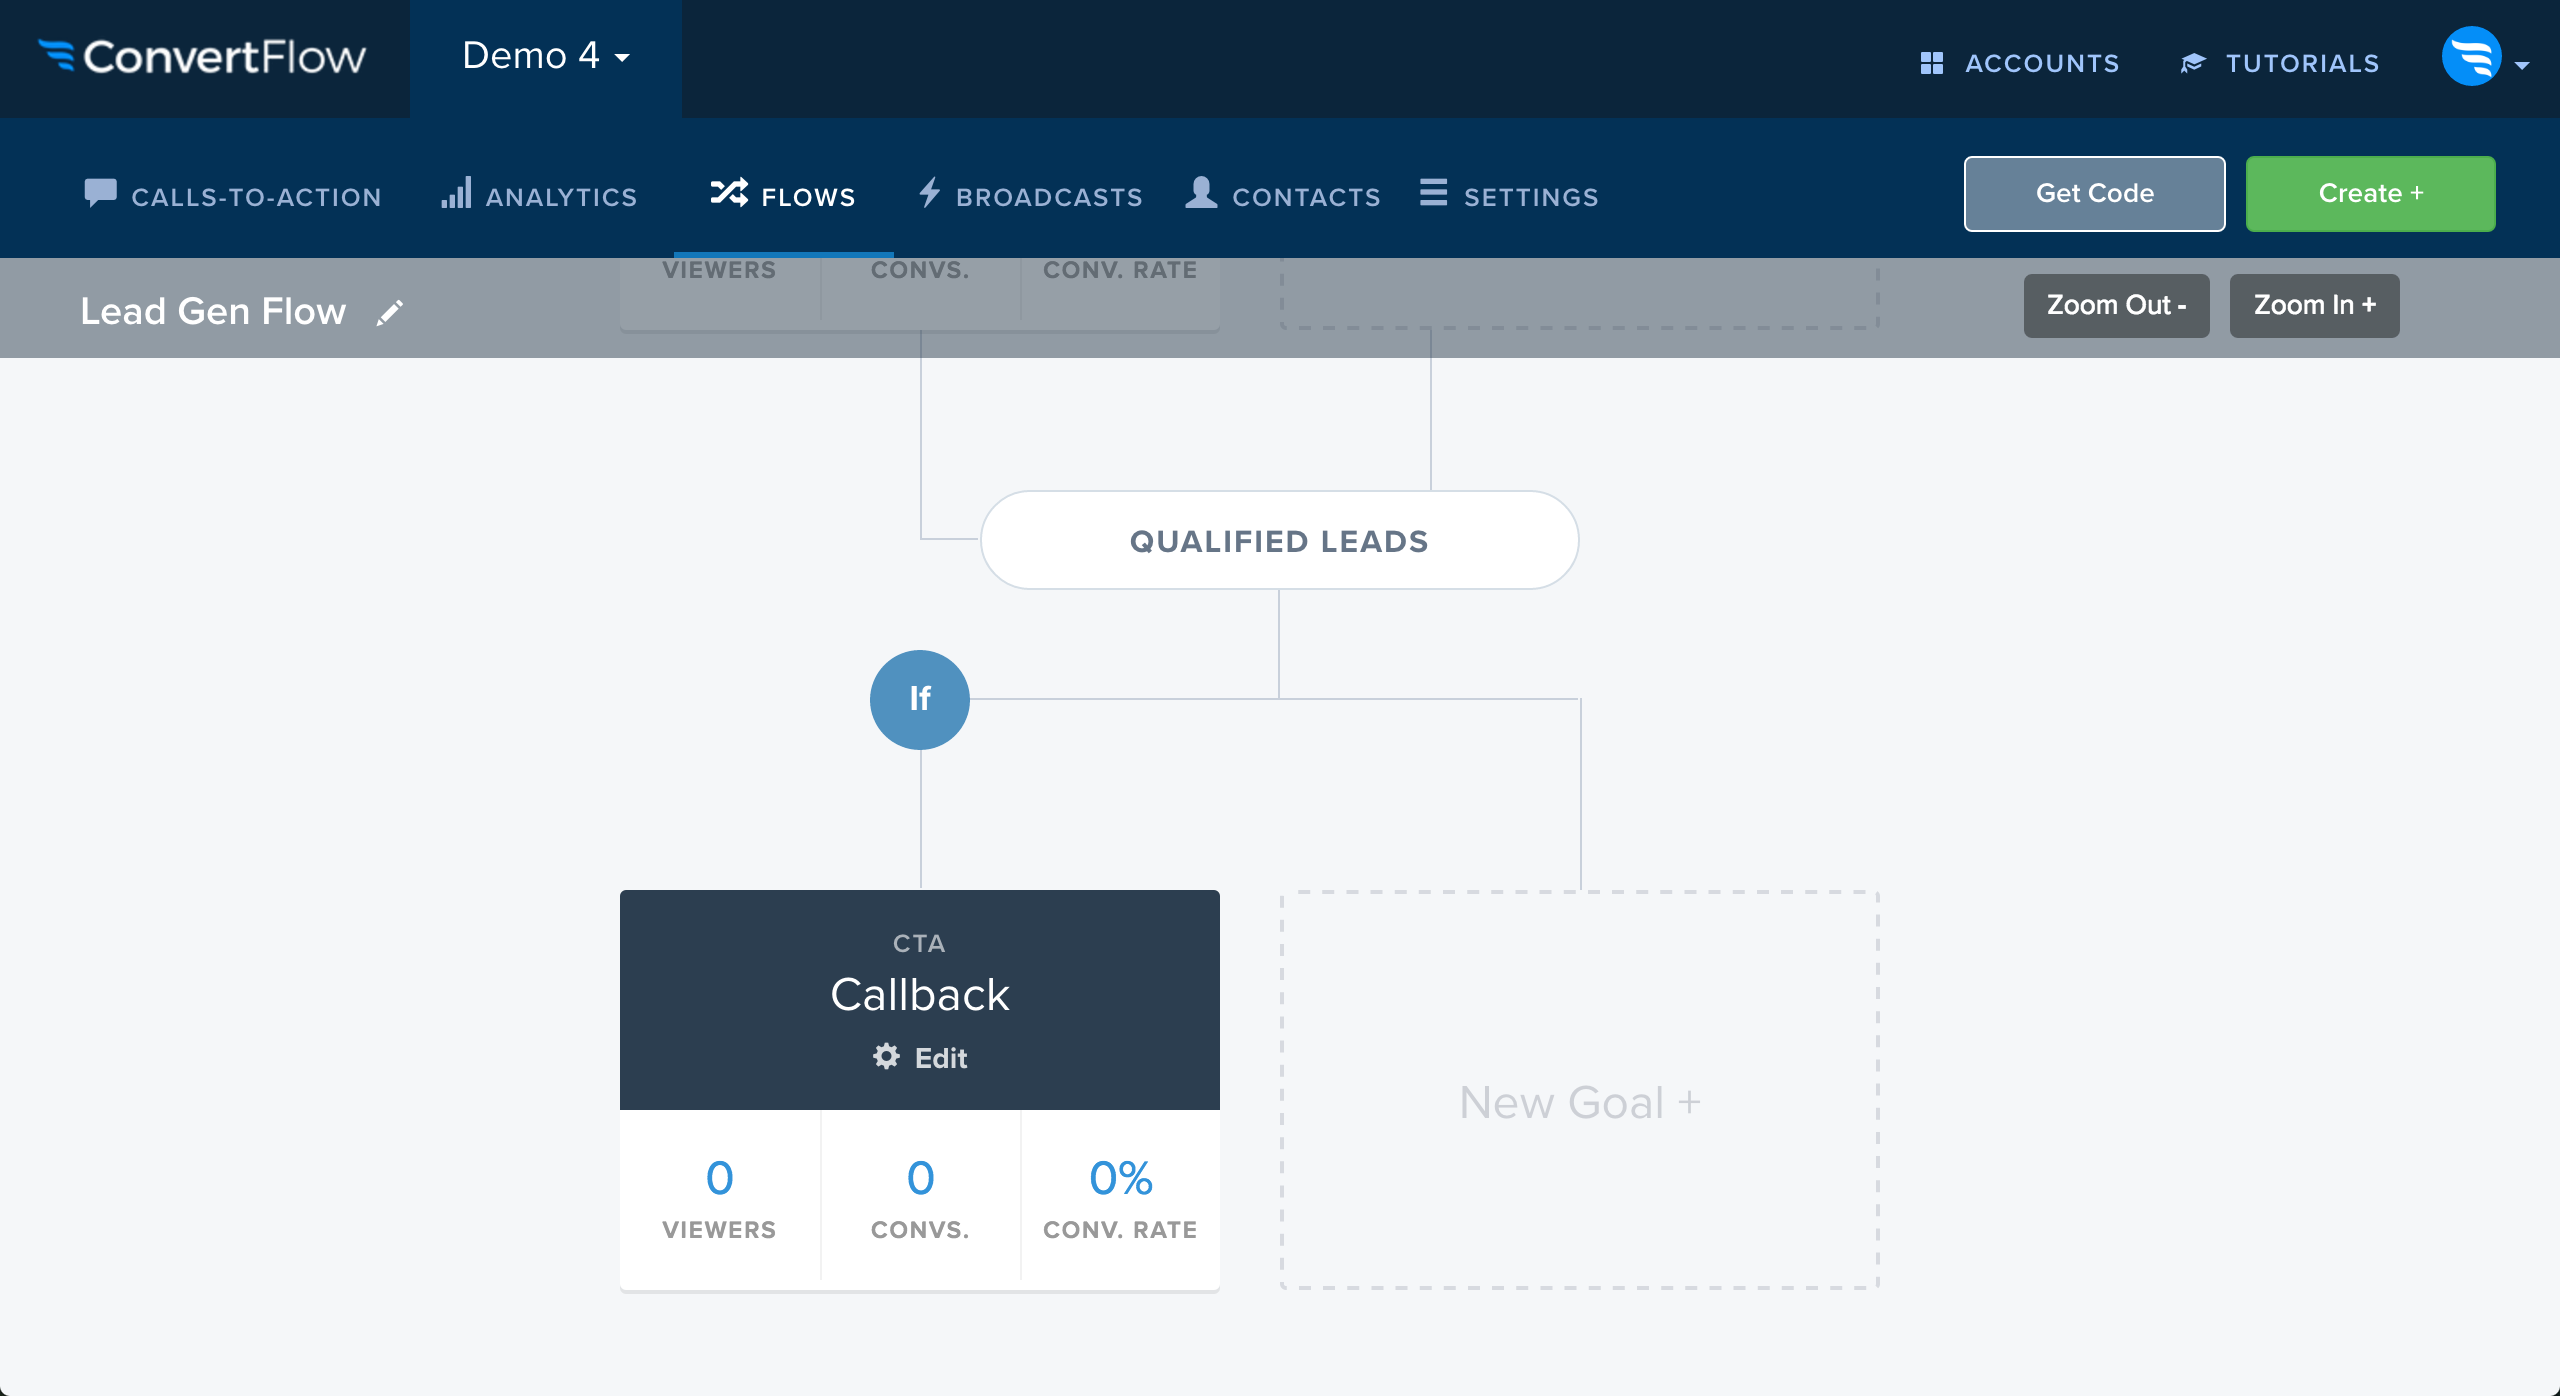
Here, you can see the call-to-action for this goal.
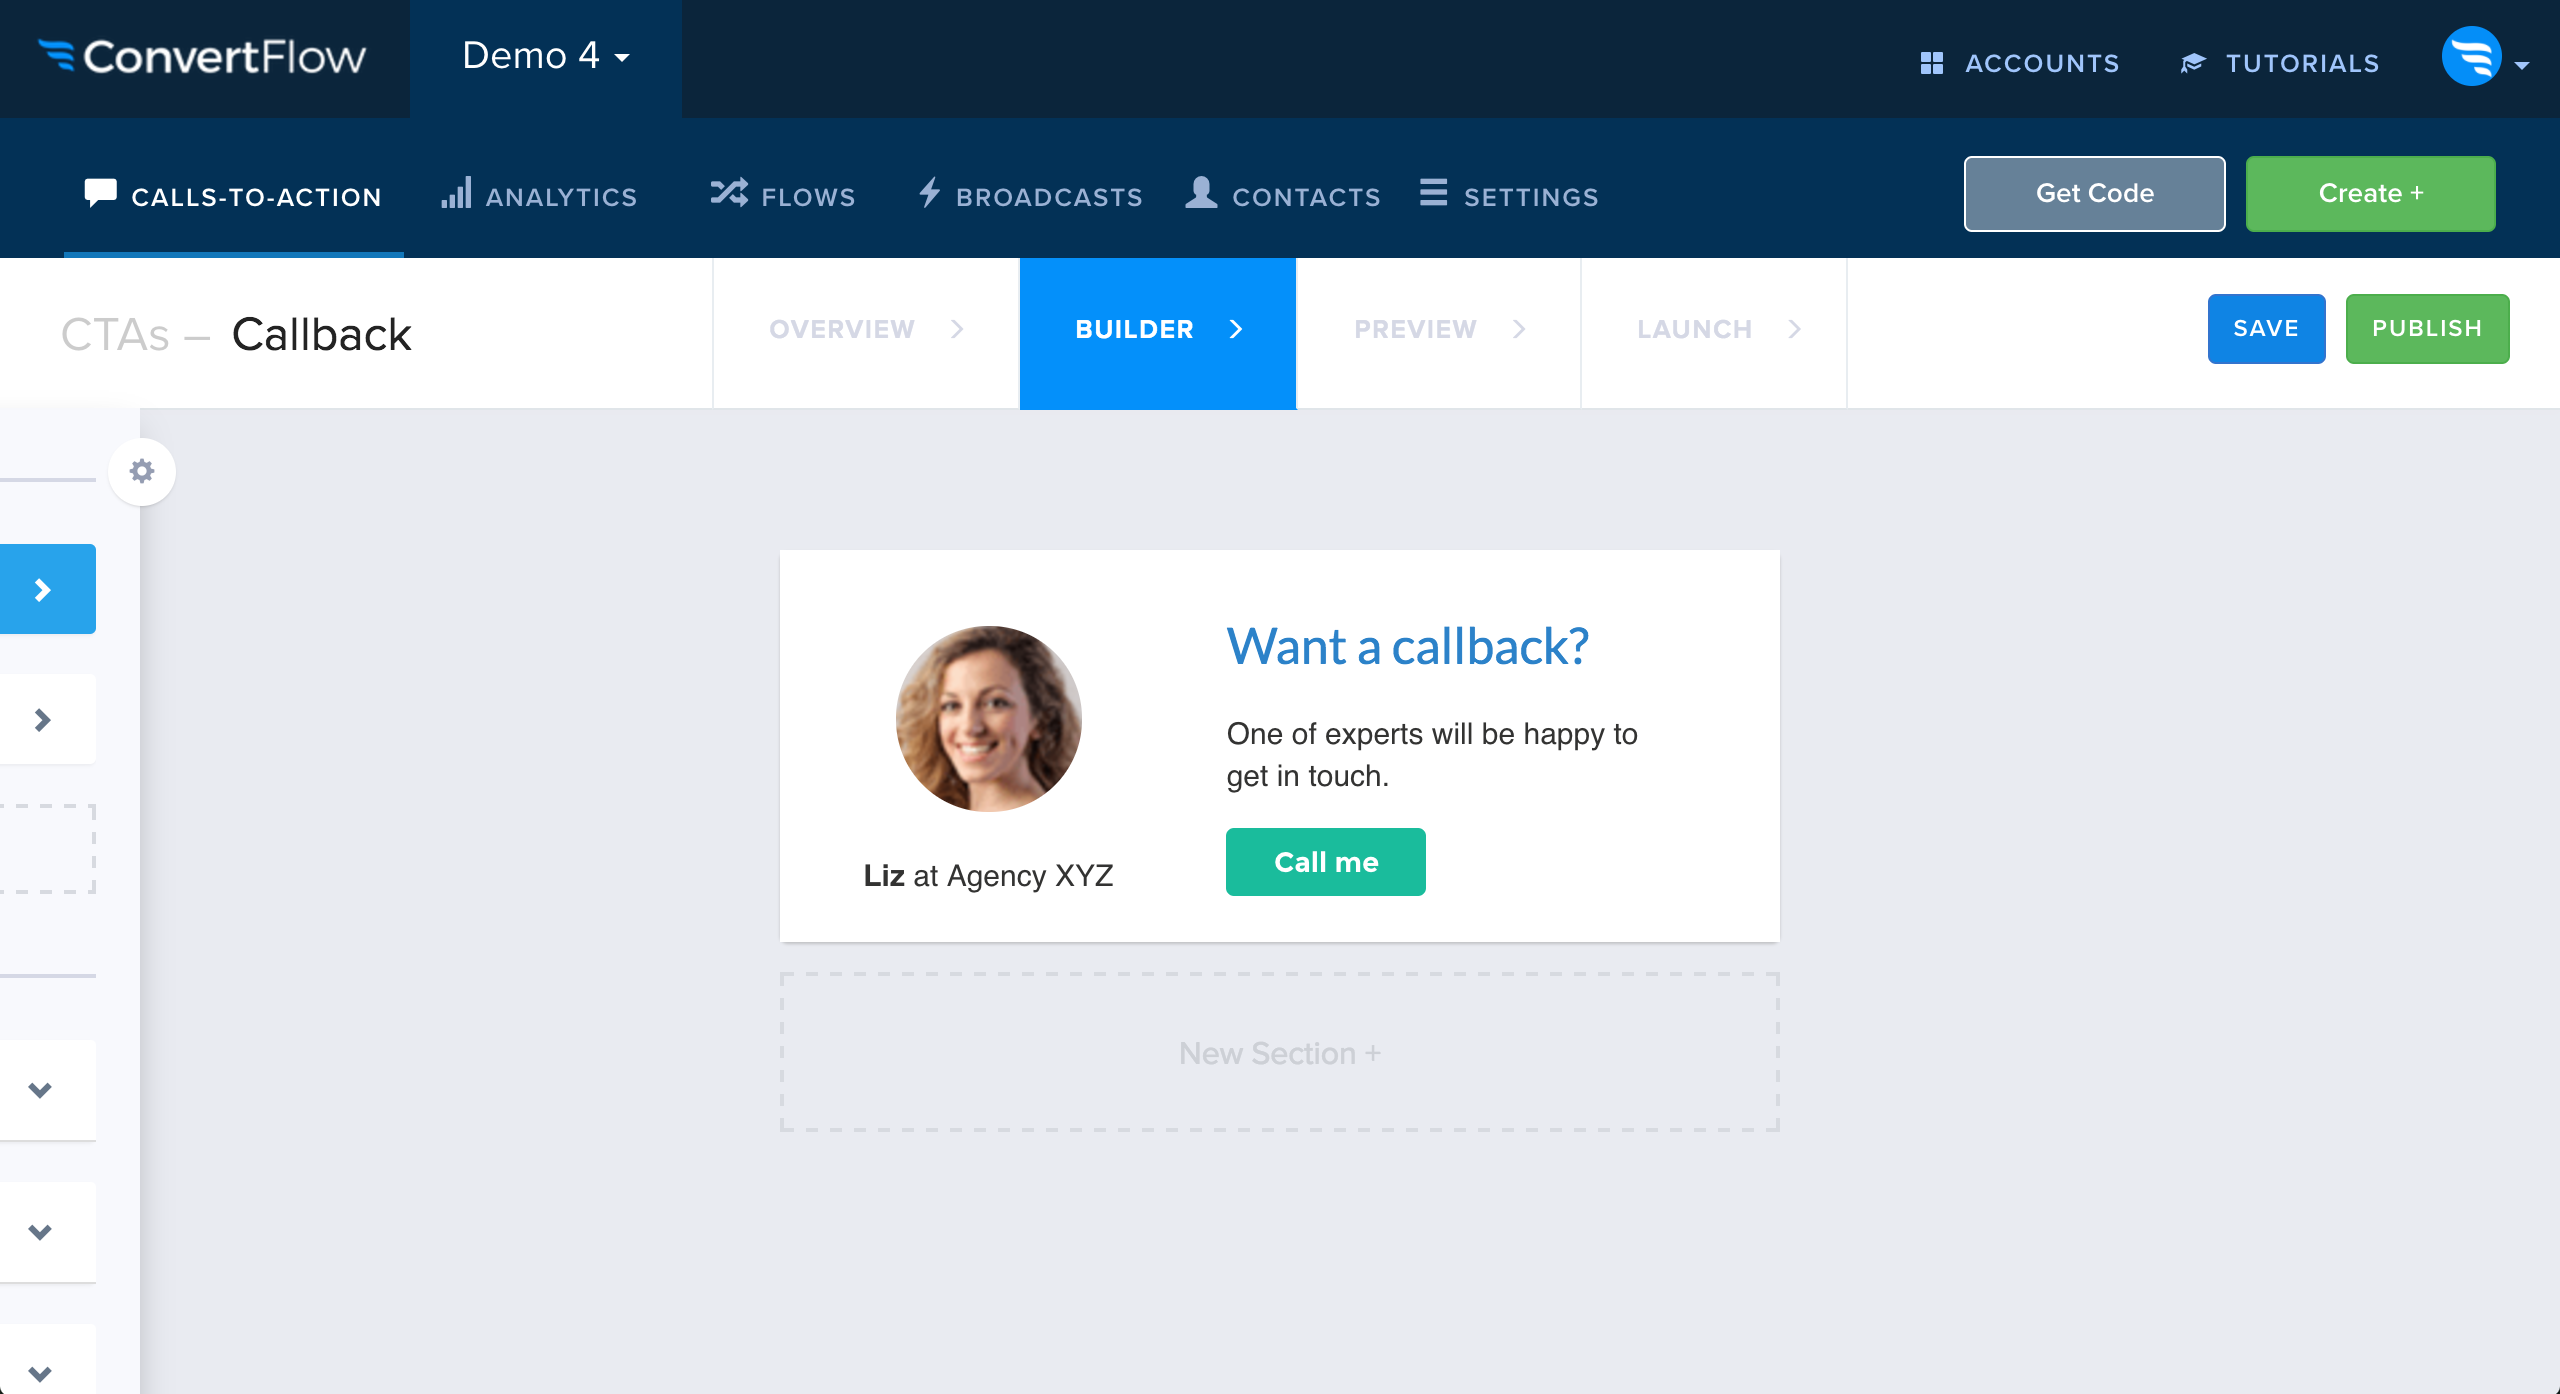
We can then trigger action to track a custom event or tag in our marketing automation tool called “Requested callback”, which will send an email notification to a team member to follow up with our lead.
And there ya go… we’re all done!
Conclusion
As you can see, by using ConvertFlow, we were able to easily build a lead generation campaign that uses on-site retargeting to capture, engage and convert your prospects on your website..


.svg)
